Sunday, 14 February 2021

Unity + Oculus Integration on Mac

The Chinese New Year Weekend is too short! I want to spend maximum fun time with the Bean, and get some catching-up-with-sleep-time, but I also want to learn how to make something for Oculus using my Mac alone?? I found several posts online claiming to be able to teach you to set up your Oculus device in 10 minutes. HA I suppose they definitely didn't use a Mac for these speed runs (my Mac has now decided that its new calling is to mimic the hideous sound of an airplane taking off). Still, I persist in valuing the retina display+portablity over practicality and doing everything on my Mac. Will I be forced to retreat back to using a PC again after much frustration? Let's find out!

FUN FACT: According to Rescuetime I spent 33 minutes in total in Unity in order to complete these steps on my 15" Macbook Pro 2019, including all the downloading and importing. The writing of this documentation is probably taking far longer.

The Oculus is a type of Android device so have to check for Android Build Support in the version of Unity I'm using. Just created a 3D project in Unity in the version of Unity I happen to be using.
Unity Asset Store has this default "Oculus Integration". Whilst waiting for that to download, I saw there were so many different integration packages out there for VR and more. Actually got lost browsing all the rather interesting sounding "Tools/Integrations" category on Asset Store. Which ones do the most interesting things? NO CLUE. I guess I will just try Oculus Integration first before actually trying the others.
There are several updates and Unity will need to restart, after which there will be some new Menu items for Oculus like this:
Under Edit > Project Settings > Player > XR Settings > Virtual Reality should be supported.
Another step I would add in is to preemptively remove Vulkan Graphics API, because if you don't, it will throw up an error about XR being incompatible with Vulkan. (Alternatively, I suppose one could go into the OVR scripts which is stopping the build and find the lines where it checks for Vulkan and comment out the checks?)

So I also went to read up on Vulkan Graphics API and what it does - the internet says: "Until now, the mobile graphical interface has been using the OpenGL platform. While the platform was suitable for intense mobile applications like gaming and photography five years ago, the old platform isn’t enough to handle today’s AR/VR intensive applications. It is also not possible to pack in massive hardware in a restrained form factor for running intensive mobile applications. The Vulkan API was developed by Khronos to ensure improved graphical performance with lesser resource usage. The new API has been built from scratch for rendering console quality graphics on existing mobile hardware. What that means is you will be able to enjoy the PC-like graphics on your high-end smartphone". ALRIGHT BUT WE WON"T USE IT.

OH WAIT AS OF 1 FEB 2021 the internets say that Unity now supports Vulkan for Oculus Quest? ¯\_(ツ)_/¯

Ok whatevers. At this point I just removed Vulkan for the time being so I can continue.
Next is to create a developer account and app ID. Now I definitely have mixed feelings about the Facebook integration, which means I have to take several precautions regarding privacy. If I was buying a VR headset only as a casual user, then the issues with forcing users to login with a Facebook account would make me reconsider getting this device. However, the reason I've gotten a Quest 2 is for portability in VR development. Consider all the factors on your own before getting a VR headset device!

Go to http://dashboard.oculus.com/ in a different browser and set up the Developer account.

Connect the Quest to the Mac with the usb cable. Under Build Settings > Android > the Quest should now be available as a device.

Build & Run > and when its done, you can put on the headset and it will start to load your scene. Probably could have used the prefabs to make a scene but there are some demo scenes that came with so I just loaded that first.

Wahooey a demo scene!


NEXT STEPS?

Tiltbrush? Building Tiltbrush which has gone opensource?

How does I workflow???: Workflows: The process flows you should follow

How to screenshot on Oculus Quest 2? Press the Oculus Button + any trigger button. The app needs to have permission to save to storage beforehand.

Where do the screenshots on Oculus Quest 2 go to? Turns out that the Quest is a kind of Android device so on a Mac you have to download Android File Transfer and find screenshots under Oculus > Screenshots.

Saturday, 13 February 2021

VOID: Documentation and Process


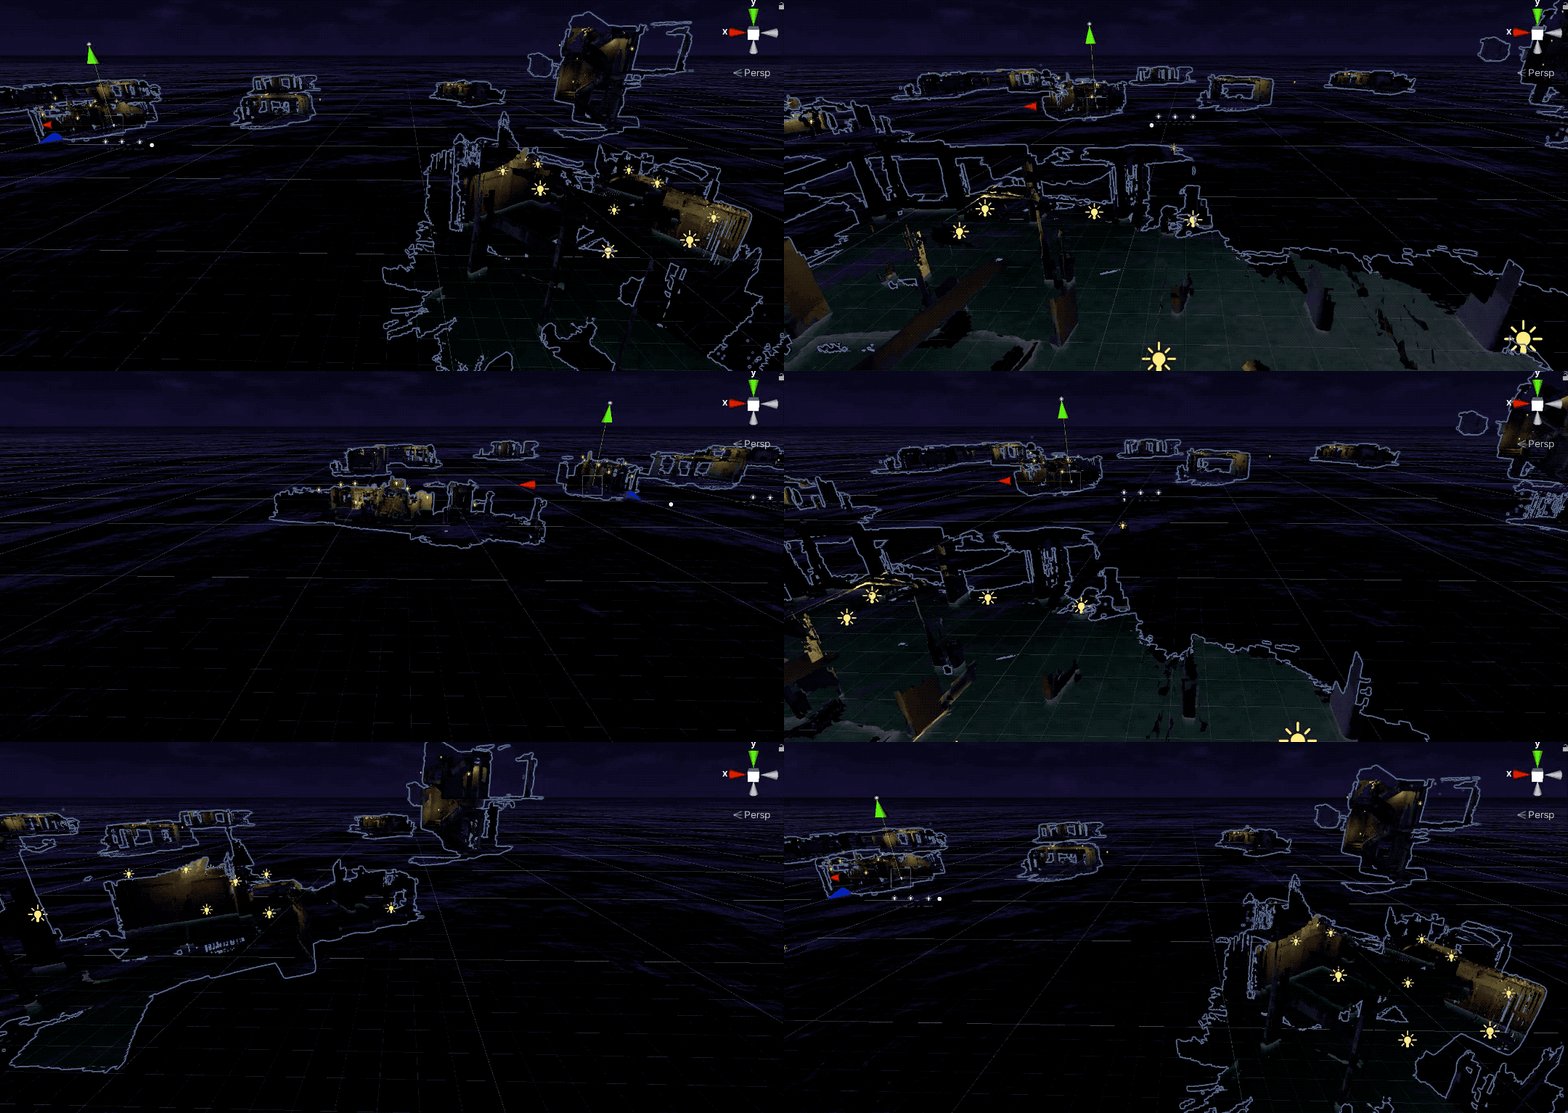
VOID started with a bunch of 3D scans. This was the first scan I made whilst waiting at the corner of the void deck for a taxi. The funny thing about this scan was that you got quite a good view of whatever I was looking at, but there's a empty void behind my two legs, where the scanner couldn't reach, which makes it look like sootmark traces in the aftermath of an explosion. There are numerous 3D scanning apps available for iPad Pro and it is easy to export the data as an textured OBJ or glTF/glb and the file can be quickly imported into Unity.

Gameplay images from VOID

These days I spend quite a lot of time waiting for taxis to take me and Beano between places. The timing is such that I frequently end up commuting at daybreak or at night, catching glimpses of dimly lit buildings and sleepy carparks through the darkness. The two destinations I frequent (my house and my parents') are incidentally both what you might consider somewhat complicated places to get to, so there are many opportunities for a grab or taxi driver to become lost or give up the will to find me in the midst of all the one way road systems. So... there is a lot of waiting, during which I've ended up scanning void decks, mining it for material...

Void deck waiting area

When Shih Yun first invited me to show something at OTHERWORLDS, I had several other experiments and drafts that I thought of showing, which I realised over time to be unnecessarily complicated. A good game is not a collage. A game does not necesssarily get better from having more elements in it. I realised that I liked my growing collection of Void Deck scans... and I wanted to make something out of all of them.

HDB Scans from Veerasamy Road

The only weird thing about doing this is that after staring at it in a dream-like state within my game for so long, it is kinda weird to still walk through the same corridors on an everyday basis.
An obvious reference for the work is "In the Night Garden", a show that Beano has been watching a lot of. Some years ago I remember once attending a lecture in the basement of RCA. The details of this lecture eludes me except that the visiting speaker was a new sleep deprived father who had watched a whole lot of "In the Night Garden" recently with their toddler. He apparently had some near-religious epiphany with regards to the philosophical meaning behind "In the Night Garden" and I only have the merest impression that he had meticulously tied it up with an elaborate history of design or critical design or radical italian design pedagogy from the 1970s or whatever it is that RCA design students get lectured to about (and that I was impressed with the mental leaps of the lecture). It thus seems typical that now in my own sleep deprivation of caring for the Bean, I do not recall that useful gem that this forgotten speaker had wished to impress upon us, that rare and useful tidbit that he had gleaned from the watching of "In the Night Garden".

A Screenshot from "In the Night Garden"

Now as I am watching and rewatching pixelated copies of In the Night Garden via youtube on an old and heavily bumpered ipad, I am only left with questions. WHY IS IGGLE PIGGLE ALONE IN A BOAT AT NIGHT? WHERE IS HE SAILING TO? IS THE NIGHT GARDEN THE FEVER DREAM OF AN IGGLE PIGGLE LOST AT SEA? IS IGGLE PIGGLE ALRIGHT? WHERE EXACTLY IS THE NIGHT GARDEN?

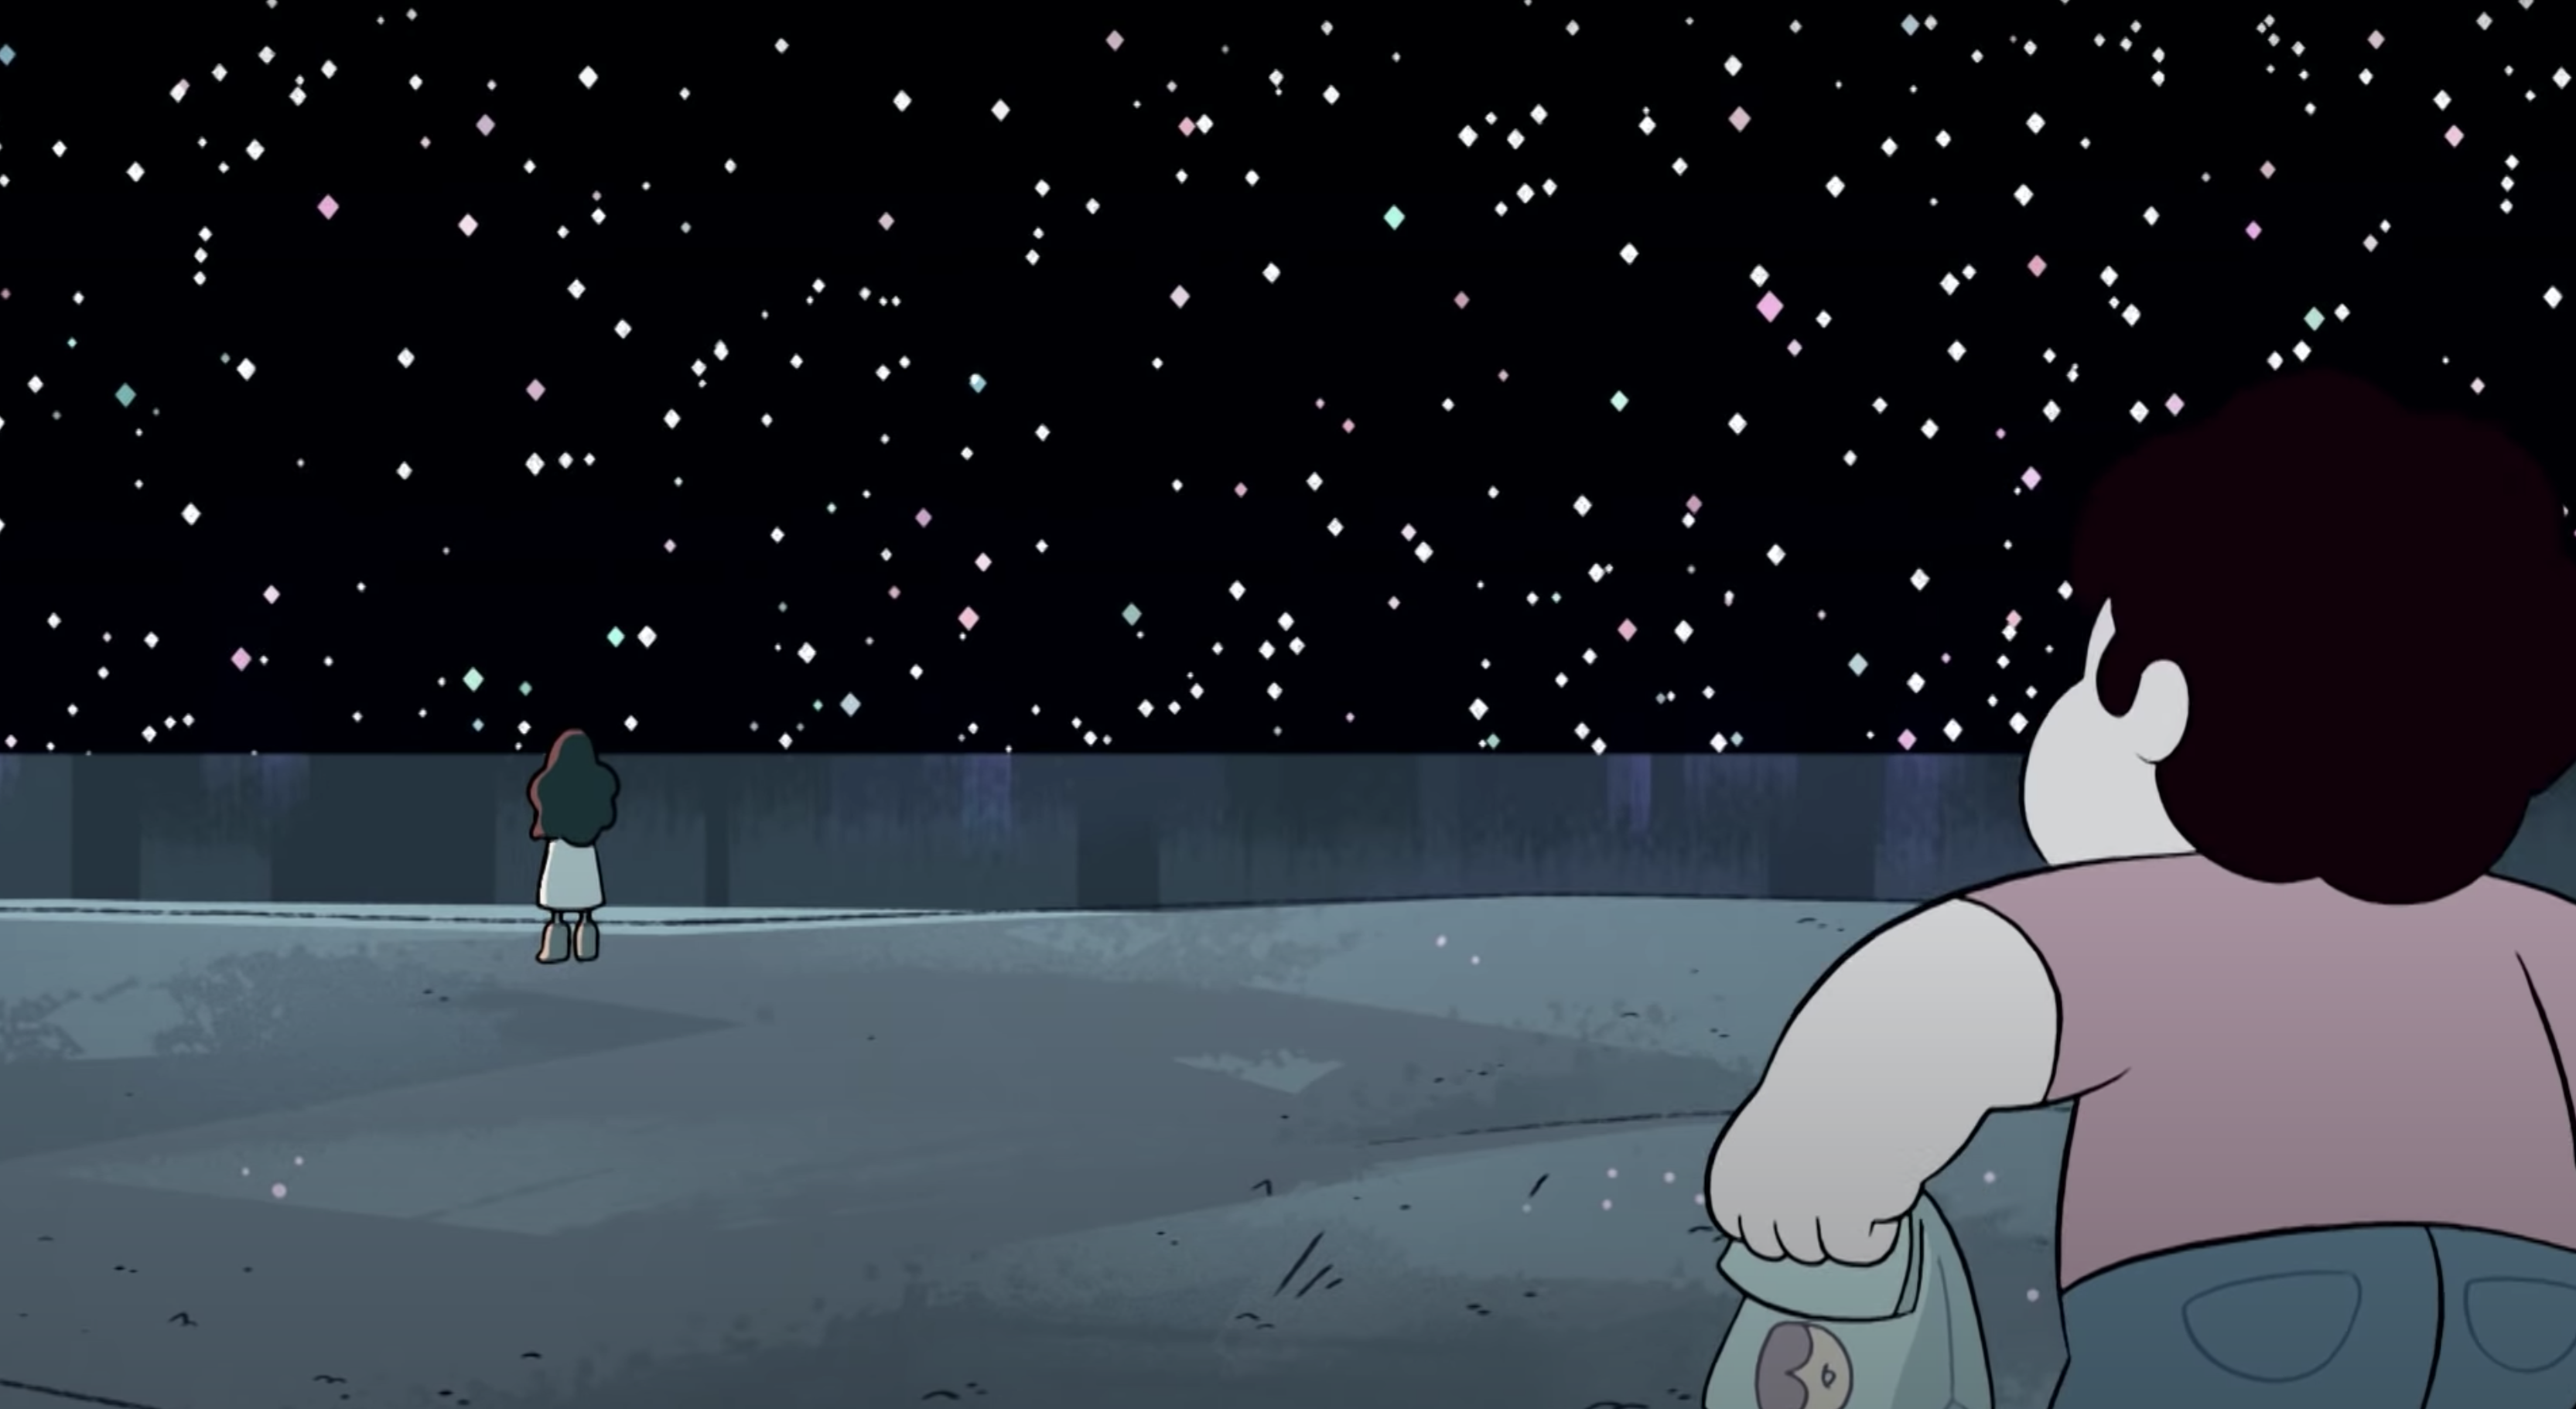
Another reference for this work is a scene from another children's show - Steven Universe. Years back I used to catch bits of it and I remember thinking that it was way too childish for me (I probably even said something like "I dont know what people see in it!!!". But when I was on maternity leave I somehow ended up binge watching seasons of it all at one go in the middle of the night. It was when I watched this episode that I was suddenly SOLD on the show, because seeing a nightmare version of the city made me realise that they had done such a good job of painting Beach City to me in the previous episodes. They needed audiences to have built up a good mental map of Beach City before hitting us with a nightmare version of it - otherwise the episode would not have any impact. It is funny that I almost feel kinda nostalgic rewatching old episodes of Steven Universe, because the show now gives me a feeling of Beano being really tiny. I suppose this is the video version of "song that happens to be playing in the background during a defining period of your life". I really love the thoughtful, gentle way in which the show handles topics such as mental health, parenting, and relationships - and I guess I envisioned it being a beautiful cartoon for Beano to enjoy watching with me, one day in the future...

"Rose's Room" (Season 1 Episode 19)

In this episode, Steven discovers that his mother's magical room can fulfill any wish he asks for. After asking it for a bunch of silly things, he is hungry and decides to go get a donut from the shop in Beach City, and he thinks he has stepped out of the room to get a donut, but actually Rose's room has generated a parallel Beach City. Everyone is speaking funny and he runs to the water's edge where he finds the waves are not working properly. Finally after a terrifying time in the city, he realises it is a dream when he tries to eat his donut and it poofs.

Enough of the back story, here is the work!


VOID IN THE CAVE

Shao from DUDE.SG combined all our works into the CAVE setup for the exhibition at Gillman Barracks - a 3 screen kinect based interactive virtual environment! The boat was self-propelling, but it would turn according to the direction of the user's body.
Due to safe distancing measures, the gallery could only accomodate a fixed number of people at one time, so queues outside built up to insane levels. Whilst the show was incredibly short, I heard that there were about 600-700 people who came through each day, so at least we know that many people got to try it!


PRODUCTION NOTES

A few notes here on issues I encountered along the way:

Water in the Boat - Convex Hull

So I wanted to get a boat floating on a sea. I didn't reinvent the sea, no, if you must ask. I did this version with Crest, an existing ocean renderer system for Unity 2019.4.8 and later. A real boat actually displaces the water, so at first when my boat was in the water the ocean rendered into my boat. The fix is to add a convex hull (take the shape of your box and create a shape which is the smallest solid closed convex shape of itself) and then use a script to disable the rendering of the water where the convex hull is located inside the boat. No more water inside boat.

Resolution

One thing I’ve blithely not comprehended before was that on a MacBook with Retina display, the pixel density is twice that of the norm, therefore instead of 72dpi it is actually 144 dpi, meaning for every 1px there is actually now 4px (2px x 2px), hence when I take screenshots/screencaptures that do not account for the embedded dpi setting of 144dpi, they will come out twice as big. A crucial issue when trying to screencapture my game as a gameplay video…

Colour / Dropped Frames / Understanding Unity Profiler

Monosnap is the trusty screenshot app I've used for several years now. Using it meant that I never had to really think about how I really wanted to compress things, because I just trusted it to quickly crop and compress things for me (whether image or video). However, most of what I've been screenshotting with it so far have been things like annotations of images and lectures, for which colour is not much of a big deal. Well, my lazy days are ending. Using it to capture a gameplay video this time around showed me that maybe I need a better long-term solution for gameplay screencapture (possibly even an internal game recorder?) because (1) there is something going on with the colour (probably to do with conversion from 10 bit colour to 8 bit colour, which flatten my subtle purples to black), and (2) there is also something going on with dropped frames, which I am guessing is possibly my macbook pro's gpu being not up to the task of, so it all points to (3) that I probably need to watch more tutorials on how to properly use the Unity profiler to improve the performance of my game... ¯\_(ツ)_/¯


COMING SOON: VOID IN VR?

Saturday, 30 January 2021

Singapore Art Week 2021: Where to see Debbie's Works

For those in Singapore at the moment, I have a couple shows ongoing/upcoming during and beyond Singapore Art Week. I'm showing them as digital works and video works, so technically your location won't matter once I have properly uploaded all the works later in the year...!


1. VOID

Void is a small game that's available for download on itch.io (Mac currently / Win coming soon) and you could say it is a translation of my current reality into game form. Since I work full-time but also have a toddler who doesn't quite go to daycare, I spend my days shuttling between void decks, waiting for taxis to take me between my own house, my parents' house, and the office. There's usually anywhere between 5 to 12 minutes of waiting where I don't know what to do and for the fun of it I began scanning the various spaces in a very ad-hoc fashion. I rather liked the bad scans more than the good scans, and I ended up using this material to make an interactive experience in which you're a little boat drifting between ruins, with the pillars looking a bit like the pali da casada (the poles that stick out of the water in front of buildings) in Venice.

If you're in Singapore, its also in an awesome CAVE for just 4 days only at Gillman Barracks (9 Lock Road, #03-21, in the former unit of Arndnt), made by the amazing team from DUDE.SG. What this means is that you can navigate through the otherworlds inside it by raising a hand, squatting, flapping your hands wildly in front of you, and swiping. The entire show is a labour of love by INSTINC and altermodernists and all the artists involved, and the CAVE experience is truly seamless. Go and see it!

Otherworlds: non/digital realities
Organised by Instinc @instinc_space
Co-organised by @altermodernist
Curated by @hilda_hiukwan
Opening Hours: 28 Jan 2021 – 7 to 10pm 29, 30 Jan 2021 – 12nn to 10pm 31 Jan 2021 – 12nn to 7pm
Venue Gillman Barracks Block 9 Lock Road, #03-21
FREE ADMISSION
8 artists 2 cities
Digital and physical works
Facebook Event Link: https://www.facebook.com/events/302803607957276
Debbie's "Void" on Itch: https://dbbd.itch.io/void


2. THE LEGEND OF DEBBIE

My vision for this work was to mine myself for material and create a gallery in which all my artworks were magical wormholes into alternate realities where I would tell you ridiculous stories that were both believeable and unbelievable and you would see various crazy visual representations and reinterpretations of my old work. We always talk about digitisation lately especially during covid – but are we really and truly exploring all the possibilities in a new interactive format like a 3d video game? I had some pretty tight time constraints (only working on this on weekends when I'm off work - I mean I do have a full-time job too), and being a one-woman developer team reined in my wild ambitions for this work (initially wanted to make a crazy ragdoll puppet of myself, which I scrapped due to having difficulties with ragdoll physics and rigging and lipsyncing, none of which is my speciality). I definitely feel this work is not even close to its final form and I imagine slowly improving it over time...

State of Motion: https://stateofmotion.sg/
Curated by Syaheedah Iskandar & Thong Kay Wee
Marina One
20 Jan – 21 Feb 2021
Exhibition open 12pm — 8pm daily (Except Public Holidays)
7 Straits View, Singapore 018936


3. MOTHER

In the basement of the National Gallery Singapore, I have a project called MOTHER. Try to visit it on Thurs-Sunday when there are helpful little elves to guide you through using the kinect-based interaction. Visually speaking this work is indeed a departure from what I usually make - i guess because of the involvement of form axioms' dev team and my own limitations in Unreal (specifically: having tried to make my part of it on my own without any experience with Blueprints or having watched a proper tutorial or course on it - woops! Yes as it turns out one cannot transfer skills of one game engine to another haha). The background environment for MOTHER was also contributed by the development team; I described it and they translated it in their own way into what you see there. I suppose I imagined in my head something more brutalist and weird and oddball - but what came out was a bit more scifi alien in the end, a bit like walking into a basement lan cafe and you're deafened by the ambient sound of nonstop clicking and shooting. So... yeah, not entirely what I expected, in case anyone is confused how this strange thing is a "Debbie Ding" work. Nevertheless I do feel like I learnt a lot from the progress of making it, especially experimenting with vocaloids.


4. RULES FOR THE EXPRESSION OF ARCHITECTURAL DESIRES

I guess this was my first video work, which I shot in Berlin over a summer, and made foley sound for in the dark scary basement of the ZKU building. The writing that accompanies the work was written about an anonymous city but there are glimmers of other very real cities in it. I'm just showing the video work for this exhibition at SEED space and it opens this weekend Saturday - and I am humbled to be showing alongside the amazing video work by Martha Atienza, Charles Lim, Lim Sokchanlina, Perception 3, Christina Quisumbing Ramilo, and Tromarama.

Images above from when I showed the work in Maison Salvan in Toulouse. Will update the pic of the show in SEED space when I can get a better picture!


Documentation for the works coming soon!

Saturday, 31 October 2020

I self-studied for 6 and a half hours to pass the Unity Certification (Unity Certified Associate: Game Developer)

I just did the Unity Certified Associate Game Developer exam and passed it. Aight, I know this is probably going to sound like a HUMBLEBRAG but, I am writing this post because I was originally pretty apprehensive about taking the exam. Although I’ve used Unity for several years, I wouldn’t describe my job role as a game developer. So I worried that what I had done before wasn't good or "professional" enough. Before the exam, I also furiously googled for people's accounts of how they studied for it, what exactly they studied, so in case there are others who come after me who are doing the same thing, I thought I'd add a description of my experience and what I did to pass!

I know that the Unity Certified Associate is considered the "entry-level" certification, but even if its the entry-level test, it still needs some studying! Besides my artistic endeavours (which this blog is mainly about) I actually work a full-time job (and not as a game developer), but Unity happens to be something that my work would like me to focus on a bit more. But it is actually a very intense few weeks at work – in addition to which I am also having to care for a very demanding toddler + working on several personal projects on weekends, so this meant I was very busy and only really able to eke out a little bit of time for studying.

Now, the title of this post is a little click-baity, but it is true. Recently it so happened that I re-installed Rescuetime, so I am able to definitively tell you exactly how long I spent preparing and "studying" for the exam from start to finish!! No more handwaving or vague estimations, I can actually tell you that in total, I spent exactly:

38.5 hours preparing for the Unity exam:


32 hrs (8 hrs x 4) : Attending a Unity Game Developer course
6.5 hrs : Self-studying

Breakdown of Course time

32 hrs: Attending a Game Developer course. I decided to sign up for and attend a course with fixed hours and a human instructor so it would formally "block" out time in my calendar to study Unity. I could have done it online on Udemy or Coursera or something like that, but attending it with real people also gave me the pressure that I had to finish the course, and I also could hear the sort of questions that new users ask (useful for someone who intends to teach it). Since it was formalised as a course I had to attend for 4 weekends, I asked my parents to help with childcare (thanks mom and dad!!!) during my course hours, so I could really dedicate the time to studying Unity and asking the instructor all the questions I ever had about Unity. I should add that at the point I took the course, I had several years of experience of casually using Unity already, so the material was generally very simple for me but I really appreciated having someone tell me what was the OFFICIAL way to do things. I've been anyhowly doing things for a long while (because I was self-taught but in a very disorganised way) and the instructor Siang Leng showed me many quick fixes for things I had been doing in very weird ways, so this was very enlightening to me.

For me, my intention when I take a course like this is to eventually reach the level that I could teach the subject, to be able to explain in detail the semantics of the user interface of the program, to understand everything about how the formats are encoded and used, and for me to I fully understand the processes from start to finish and do it in my own way, instead of just copying what the instructor is doing. I like to think that my capture rate (rate in which I absorb what instructor says) is very high, if not 100% at this point. Once I am shown how to do something, I will go and make sure I can do the task myself, and I will screenshot or even make a screen video of myself doing the task on my own after the instructor does a demo, and I immediately publish this to my own wiki (my 'Second Brain'. In forcing myself to document everything this way (to be able to use my own demo to teach others), I am pretty sure that I... have more than accomplished the "lesson objectives".

Breakdown of Self-Study time (6.5 hrs)

3.5 hr : Completing all the quizzes on the official Unity Courseware. When I did the course, I was given access to the official unity courseware on gmetrix. Now this courseware is the one for the "zombietoys" project that I vaguely remember trying out yeaaaaaaars ago when I first started using Unity. Not that I ever completed it. A lot of it seems very outdated, as it was done on Unity 5.something. But I decided to do the quizzes at the end of each section. If I got a section mostly wrong, then I went back to watch the video for it (at 2x speed, of course). I think I breezed through the first 10 chapters without getting quizzes wrong, then the second half was the stuff I clearly wasn't so familiar with, things like Animation and Audio.


3 hrs :  Mock exams. I had access to a special 400+ mock exam question bank prepared by my course provider, like a kind of "ten year series". To be honest, I didn't have that much time, but at the barest minimum I decided that I would go through every single mock question once. I checked each question as I did it with the answer key. I did some of this whilst breastfeeding Beano with a split screen on my phone, however, I quickly realised that studying on my phone wasn't the most ideal for certain sections because I really ought to have just done it with Unity open in front of me.

As I went along, I googled each section on the Unity Manual, googled any words I didn't understand, opened up Unity and used the feature to build a test file. In Unity, I created every single possible asset once, created every 2d and 3d component once. I made handwritten notes as I went along, and later I also 'revised' from these notes by highlighting key words.

I asked my colleague (Unity guru!!!) for areas he thought I should revise and he mentioned a few areas that I realised I was less familiar with - Animation, Audio, etc. So I tried going through the motions of creating the animator, setting up some audio mixer groups, trying out every single type of light with all the different shadow settings, making different particles, etc.

I am glad to say that the outcome was, better than random! 644/700 means that I should have scored about 92/100, so yeah, I'm happy with that score. It was on the whole easier than I had expected, but I might have been lucky with the draw of the questions. I recognised several of the questions and topics from the official courseware / mock tests. The time (90min) was more than enough, I sped through it once and finished it within 40 minutes, marking all the questions I was not sure about for review and then I used the remainder of the time to check the 'mark for review' question set twice through, unflagging them as I made up my mind about the answers. Then after having checked it as best I could, I decided I would submit it (20 min early). (I was very glad to have done it on computer instead of at a test centre which would probably have given me a lot of nerves).

So what does this mean? It means that it is true that the exam is more about your experience and familiarity with the software and scripting. If you are a casual Unity user of several years, it is possible to pass the Associate exam (not professional exam) with basically what is just around 2-3 evenings worth of extra studying (6.5hrs) on top of completing a basic game dev refresher course (32 hrs).

I hope this helps someone else out there trying to decide if they should take the Unity exam and how to study for the Unity exam!

Many thanks to the Dingparents whose help made it possible for me to study for and ace the exam!!

Sunday, 23 August 2020

My First Vinyl Cutting Project

I've always liked vinyl as a material since the process of labelling and thinking about the text has always felt like a meaningful part of my work. Sometime back I also enjoyed working with cutting acetate-type sheet material, but cutting it by hand was quite a schlep. Whilst mindlessly browsing a certain (ahem) short-form mobile video sharing social media platform, I kept seeing lots of "behind the scenes" shots of people using cutting machines to creating stickers and vinyls as part of their "quarantine etsy home business". Some of them showed sophisticated uses of the machines to do precision things like layering vinyls, foil embossing, heat transfer film, debossing, etc. ie the things that mainly is done at a commercial print shop, even if we've had the technology for ages and ages and it is pretty simple. (The less impressive ones were just repetitions of the same type of etsy product copied from one another, and some pretty basic things which made me say "HOW IS THAT EVEN A BUSINESS? People pay money for this???")

One of the electronic cutting machines I kept seeing was the Cricut and Silhouette, the latter of which I had used once in NYP's Makerspace, somewhat fruitlessly (because the grip maps were not maintained well in the shared working space). Somehow, I had not really thought about a home vinyl cutter before.

This class of electronic cutting machine can cut vinyl, paper, cardboard, plastic, stickers, cloth, thin sheets of wood, basically practically any sheet material with perfect accuracy. You can also insert a pen into the slot and it will draw for you, but it is so perfect you may as well have used a printer. There are no errors. I couldn't possibly draw as perfectly as this machine, unlike my experience using more shonky plotters. In fact, when considering what a precision device this is, this makes the line-us look like a toy.
To be honest, the downside is that the machines are not open-source, and now I've also read that Provo Craft has been aggressive in pursuing legal action against software makers who have tried to reverse engineer their software in order to make the machines cut their files directly (bypassing the default cricut design space). So the machines have their own 'ecosystem' catering to communities of users who are largely home-crafters and small businesses. The cutting files have to be uploaded via their proprietry software (it accepts png/gif/jpg/svg) and sent to the printer via their software. Up to about the 2010s it appears that it ran on a cartridge system and everyone had to buy these pre-set cartridges which wouldn't have been interesting to me at all.

Probably the weirdest part is that it seems to have created a niche of users who are not skilled or tech savvy enough to design the files, all searching for cutting files and ultimately willing to pay shocking amounts for files that they can cut with. (Cue more of the "HOW IS THAT EVEN A BUSINESS? People pay money for this???")

Knowing all this backstory to the way it is run, why would I still get a machine like this? Well... although there are alternatives like the KNK Force/Maxx/Zing, Skycut, GCC, Saga, Vicsign, Teneth, Liyu, Boyi, etc (so many), many of these are pricier, all have their own software to deal with, not all are as well documented, and I may not have the time to calibrate the blade settings one by one for each material... so... eh. The most important thing is that I can just send an svg file over and get it sliced, like how I might do with the laser cutter. That's all I really need. So for me, going with the big name machine means that it works out of the box.

Since Illustrator is kinda my thing, I just did up a quick idea for a metal style name text for Beano's toy piano in it. Some people prefer to use things like inkscape, Sure cuts a lot (SCAL) or Making the cut (MTC - which appears to be abandonware now) to produce the svg files (I also know that SCAL and MTC were the two software makers who were forced to make their software non-compatible with cricut). I think this points to it being a casual crafter user base, not an art/designer user base, where I would have thought that Adobe Illustrator would be considered the industry norm for software used to generate SVG files. Anyway, could also imagine coding up the svg markup too to get the files, maybe through Processing again.
The shapes in the SVG have to be "welded" together in Cricut Design Space or else it will try to optimise the space and rearrange your cut items all around.
I bought the cutting machine online, but I did make a trip to Plaza Singapura's Spotlight where Cricut has a big area in the front of the entrance, along with its vinyls. I took one look at the price of the vinyl there and basically made an about turn - they were in the 17-45 range (*spits out my tea*).

For supplies, I got rolls of Oracal 631 Matte for cheaps online. After doing a bit of research, it appears that a standard vinyl used by vinyl shops is the Oracal 631 (removable) or Oracal 651 (permanent). The adhesive on 631 vinyl is a clear, water-based removable adhesive while 651 is a clear, solvent-based permanent adhesive. Maybe I will get 651 for future projects but at the moment I just got rolls of the removable 631 vinyl which I could then use for household projects as well as screenprinting...

At Spotlight the Cricut brand removable vinyl was SGD17 for 4 feet of Black Removable Vinyl (SGD 4.25 per foot). But online I got SGD44.70 for 30 feet of Oracal 631 Vinyl (SGD1.49 per foot for the Oracal 631 Black Vinyl). I also got Transfer Tape in a roll online at 24 for 50 feet (SGD 0.48 per foot). For the "default" vinyl, I was a bit wary about getting random chinese brand vinyl just because I wouldn't know what kind of adhesive it would be using, although I guess if I want to experiment more with materials I will need to order more samples from different producers esp when it comes to the weird and wonderful world of HOLOGRAPHIC VINYL.
I got some tools from the Nicapa brand which was a lot cheaper than the cricut brand tools. I think you really do need the tools to do the "weeding" or removal of excess vinyl. Although, I could have packed in more items in the vinyl sheet, but this was my first try I didn't want to be THAT adventurous. It seems inevitable that there will be a bit of 'wastage' along the way.

I sometimes try to imagine what a printmaking class would comprise of (Having never studied printmaking or art or design when I was younger (in a formal way). If printmaking mainly was about the psychomotor skill (and not about having to study the history of printmaking or the cultural aspects of the medium), then in the future, would anyone really need to study printmaking or could they also quite possibly totally DIY it with a precision cutting machine like this? A print would be made by simplifying an image into the main regions and colours, and then vinyl cutting those specific areas in the right coloured vinyl that one could obtain. With a physical vinyl, more vibrant or unusual colours beyond the digital printing colours could be obtained - like spot colours, pearlescence, reflective mirror finishes, or holographic effects...
Actual time spent making the digital file and writing this post was several times more than the time spent on actually executing this project physically. Took me probably a maximum of 15 min from cutting the vinyl, loading it up on the lightgrip mat, cutting the vinyl, weeding, laying over the transfer tape, cleaning the target surface, and transferring the vinyl to the surface. So yeah... precision and speed was achieved.
The final product!