Table of Contents:
- Flat Viewings
- Online Research
- HDB Resale Flat Purchase Process
- HIP Options
- HIP Works & Bathroom Fixtures
- Renovation Budgeting
- Appointing Renovation Contractor
- House Design Layout
- Painting Scheme
- Laminate and Tiling Selection
- Hacking Works
- Aircon Installation
- Flooring (Terrazzo)
- Electrical Distribution
- Lighting Design and fixtures (fans, heaters, oven switch, etc)
- Carpentry / Blum Hinges
- Door and Door Frame Installation
- Windows Installation
- Blinds Installation
- Non-built-in Furniture (Ikea, Hipvan, FortyTwo, Qoo10, etc)
- Household appliances (Fridge, Washing Machine, Dishwasher, etc)
- Plumbing (Sinks, Washing Machine, Dishwasher, etc)
- Moving Day
- MORE TO COME...
11. Hacking Works

All of the kitchen walls and floor were to be hacked because the existing tile work was in a poor condition and also exceedingly filthy... This would be the only hacking works to be done for our flat. To save on costs, we only hacked the kitchen tiles, and instead did an overlay of the tile work in the living area.

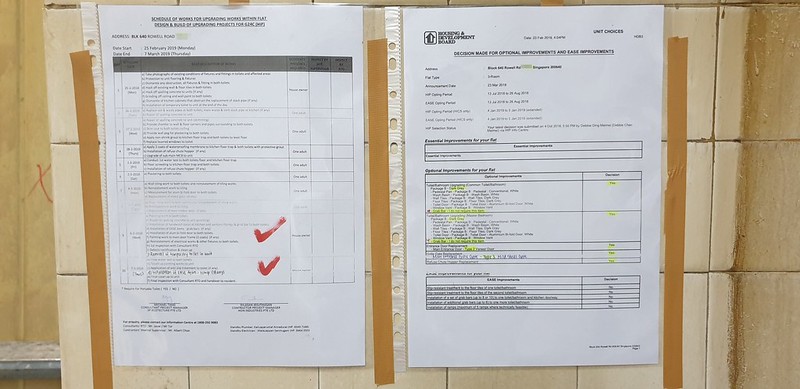
Our contractor helped us apply for the renovation permit (which takes 2 weeks) and this was straightforward as we were not hacking down any existing walls. If you are hacking any of the walls though, you'll need to submit the plans for approval in advance and this can take longer for the approval of the permit. There are quite a few rules concerning what is hackable and what is not, but if you have looked around the block you will see that a lot of people do quite creative hacking in their HDB flats despite the many constraints.
Finally when the notice comes you have to stick it at the lift landing or at the door of the flat to inform neighbours of the works - and the contractor/sub-contractors should also keep to the working hours and days on the permit. Since our block is undergoing HIP at the moment, there are always a few dozen of these notices stuck around the lift because everyone is taking advantage of the chaos of the HIP work period to time their noisy or destructive renovations.

Note the old rubbish chute in the corner...
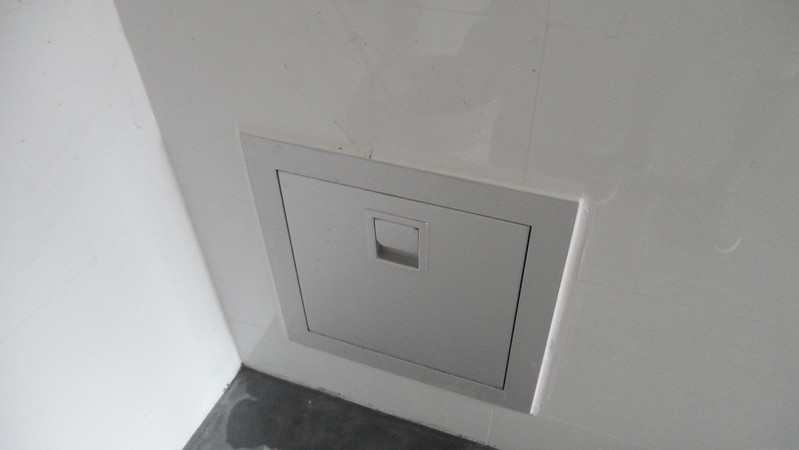
Replacement of rubbish chute (HIP) only after hacking and retiling
Another thing is that we asked the HIP office to delay the installation of our new refuse chute till after the hacking and tiling works, otherwise the new chute would be damaged during the hacking process.
As for the actual hacking itself, I am always surprised to see that the hacking is often done within a day. Similarly, the HIP works hacking also just takes a mere morning. You would imagine this to take a long time but actually hacking doesn't cost a lot and is pretty quick.
12. Aircon Installation
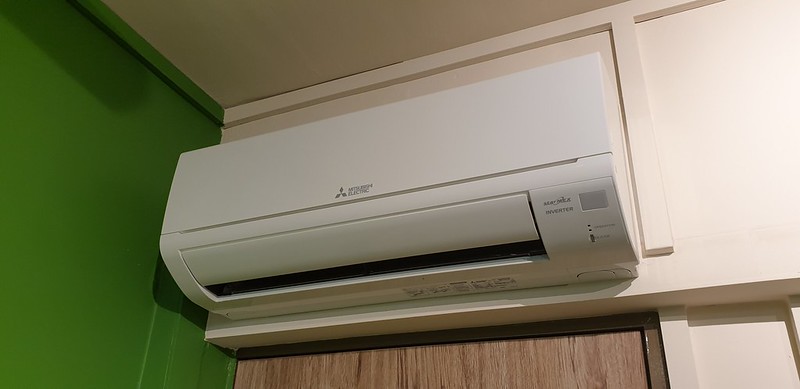
The finished product - the aircon in its room!
The all important aircon! Although it is the main splurge in our monthly electrical bill, without the aircon we might shrivel up and die in a sweaty puddle on the floor. Or in my case, productivity might drop by several points as a result of overheating. For our 3-room flat, we decided to get 3 blowers or a System 3 aircon - one for living area, and two for the bedrooms. We did not use our contractor's aircon contact, instead preferring to do it on our own, so we engaged the aircon installers separately on our own and arranged for the dates to slot into the rest of the works.
The unit for the blower is BTU or British Thermal Unit (it actually stands for the the amount of heat required to raise the temperature of one pound of water by one degree Fahrenheit), and according to Gaincity's website, how you calculate what you need in BTU is as follows:
Gaincity Aircon Buying Guide: "Find the square footage of the room you are trying to cool and multiply by 35. This will give you the ballpark BTUs you should look for. Shady room? Decrease that number by 10%. Sunny room? Increase that number by 10%. Add 4,000 BTUs if you are putting the A/C in the kitchen. If more than two people will be in the room regularly, add 600 BTUs per person."
Living Area + Stores: Approx 4 x 6.3 = 25.2 sq m (approx 271 sq ft) - needs at least 9485 BTU
Blue Room: 4.35 x 2.9 = 12.615 (approx 136 sq ft) - needs at least 4760++ (sunny side)
Green Room: 4.35 x 3.2 = 13.92 (approx 150 sq ft) - needs at least 5250++ (sunny side)
The System 3 units we decided on correspondingly were (Mitsubishi Starmex Electric):
1 x Outdoor Unit MXY-3G28VA2 (for all 3 blowers)
1 X Indoor Blower Unit MSXY-FN13VE (12000 BTU) - for the living area
2 X Indoor Blower Unit MSXY-FN10VE (9000 BTU) - for the blue and green room
Aircons are usually installed over 2 visits to your house:
1st Visit: To dismantle wiring and existing piping and dispose of old system 2 aircon
(In-between which the house painter comes in and does the first coat of painting)
2nd Visit: To install new drainage piping, trunking, compressor, and new system 3 aircon
(After which the house painter comes in again and paints over all the new trunking)

We also had to make some modifications to the new door frame design so as to accommodate the way in which the aircon drainage pipe would be run through the rooms. Here we were measuring the frame to see how much extra needed to be left so the big trunking could run across the top of the door frame - we eventually had to ask for the doorframe to be lowered by about 2.5" here.
Our main contractor initially suggested we tell our aircon installers to do 3 visits - but this doesn't seem to be the normal practice. The only reason you might break it up into 3 visits is because there are very dusty works going on in the house after the 2nd visit (eg: hacking). However, this can be fixed by having them put a big plastic wrap over the blowers after the 2nd/final installation to prevent dust from entering the blower and to restrict its use before the house has been properly cleaned up.
Our experience buying and installing our first home aircon: The dingparents were adamant that we should stick to a tried and tested aircon installer such as Gaincity which they had used multiple times. With the benefit of hindsight, perhaps this would have been a safer bet. BUT HOW WERE WE TO KNOW UNTIL WE TRIED IT FOR OURSELVES? The main thing we understood at that point was that when picking an installer, we had to ensure that the installer was using the correct types of premium materials for the installation - pvc drainage pipes, the proper wire cables, the right kind of class 1 insulation, and copper pipes. We just assumed the rest would follow....
George found another installer online who promised the same quality materials and could do it within our rather tight timeline (to fit in with the rest of the works). We saw a number of reviews online that were quite favourable for the company JEX AIRCON so we engaged them to install our aircon. I also got the dingfather to come down help us check that it was done properly. But... I don't know if I can recommend JEX AIRCON again (and I'm not including the link) because there were so many red flags:
Fear for workmen safety and worksite safety: On the 1st visit they did not use a safety harness when climbing out to check the existing blower and I don't think the homeowners should be have to be actively worried that the blower might fall off the ledge during retrieval. When we hired someone to do the job we assumed they would follow all health and safety regulations and not let their workmen take unnecessary risks! Only one of the workers really spoke English (the rest of the team was composed of Indian workmen who did not understand English so direct communication with the workmen physically doing the work was difficult for us)
Not sure if installers were actually trained or BCA licensed: So on the 2nd Visit, we asked the workmen who came to our house if they were BCA licensed but we were given a blank look and the very worrying response: "What is BCA?" - This made us think that none of the men who were working on it were actually BCA licensed or trained, so I texted the company again who confirmed they were BCA-certified. What can one do that at that point?
Took an unusually long time for standard installation: They took from 9am-10pm to install 3 blowers, which seemed bizarrely/ridiculously long. I mean, I really didn't expect people to work at my house from 9am till 10pm. The poor Dingfather had to stay there with them from morning to night because I was at work (and even after I got off work!!) - and actually the poor workmen were just working nonstop. It was hard to be angry at the men on site because they seemed to be really struggling and doing their best but they were just confused and unskilled and ill-equipped to do the job. From what I understood and from the dingparents' past experiences (of which they had many), normal professional installers could install 3 blowers in a morning, but Jex Aircon's men really did not seem to know what they were doing at all, as if they were doing it for the first time and figuring it out on the spot, which was bizarre for a professional company and also made us quite nervous.
Again, as Lemongrab might say: "UNACCEPTABLE!!!!!!"
Finally, after a long arduous installation process on their end, they had finished up everything but were unable to connect it to our power to prove to us it worked, which seemed ridiculous. It was only with the intervention of Dingfather (who originally trained as an electrical engineer) that he instructed them on how to wire it to the mains DB box to test that it was functional. Lucky for them, it was working.

Things you'll want from your aircon installation:
- Professional
- Securely installed
- BCA-certified
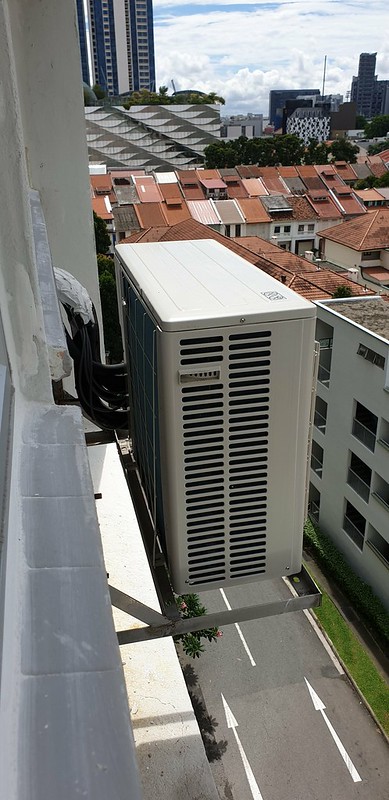
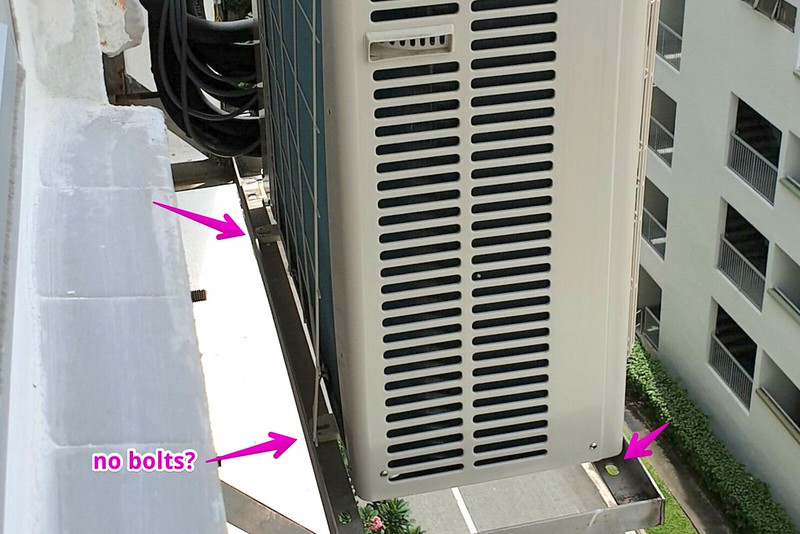
Unfortunately... I didn't feel that we got any of those three from our installer, Jex Aircon. Also, er.... I wonder, is it normal for there to be no visible BOLTS connecting the aircon to the brackets??? I mean I don't think a big wind will blow off our blowers, but seriously....... I guess only time will tell if we have any issues with our aircon units as a result of this haphazard installation. In the meantime all I can say if that if you wanna go with Jex Aircon, then... MAYBE.... DON'T?????
13. Flooring (Terrazzo)

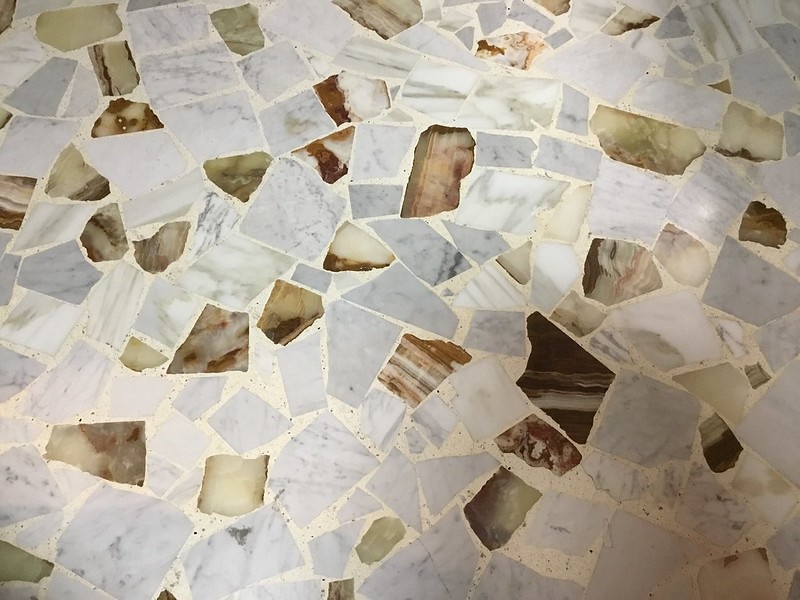
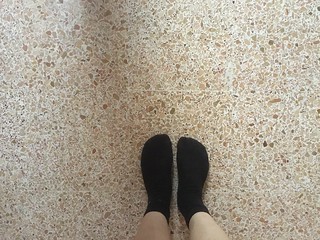
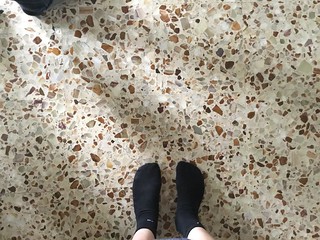
BEFORE: Image by Property Agent on original listing
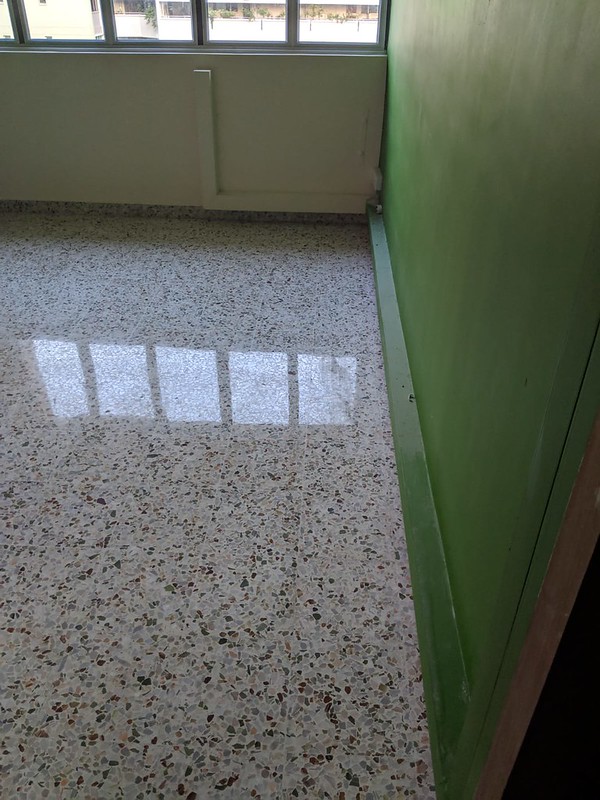
AFTER: Right after the terrazzo polishing
George did a lot of research on terrazzo polishing and sealants. Our friends living in Little India had told us a cautionary tale about the importance of SEALING YOUR TERRAZZO especially the new types of terrazzo, which was causing them no end of grief after they discovered how porous and greedily absorbent their terrazzo was, sucking up all the wine and coffee spilt on it, that they were always at attention with their baking soda and cleaning agents and cloths to absorb any stains that they noticed.
But then.... we got talked out of using sealant because of the cost. The sealant was going to cost more and we have the old sort of terrazzo that is super hardy. Dingparents also told us that if we really needed in the future it would be cheaper to simply repolish the whole lot!

One thing we didn't really personally monitor and which was subsequently not done was the polishing of the skirting board which is also terrazzo. As a result, none of the skirting was polished whereas all of the actual floor was polished brightly. The difference is stark in many spots.
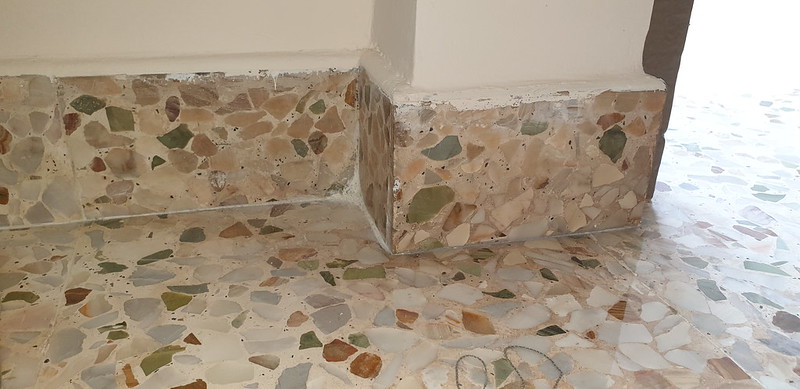
You would imagine that it would be obvious that polishing terrazzo should obviously include the skirting board area. But no, this is one area that the workmen might cut corners on if you aren't present to insist on it. And we didn't have time to rectify it because the work schedule simply had to move on!!!
Lesson learnt: Either get a better project manager to monitor the terrazzo polishing and check that they do the skirting board too -OR- Come down and monitor the terrazzo polishing yourself and insist that they do the skirting board for you as well
14. Electrical Distribution
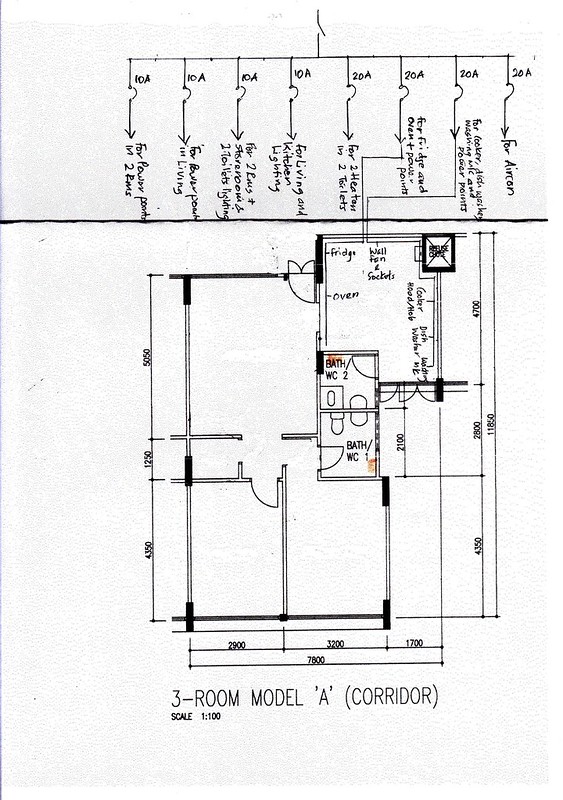
We left this part to the Dingfather who drew this out. This distribution ensures that the load is distributed evenly and we won't have an unsafe dodgy electrical situation such as in our previous rental where most of the house light switches, tv, oven, stove, kettle, and a billion other powerpoints and appliances were all on the same circuit, resulting in the tv and lights going out temporarily in one room when someone else turned on a light in another room.
15. Lighting Design and Fixtures (fans, heaters, oven switch, etc)
I didn't know how to do the lighting BUT SOMEONE HAD TO DO IT so I drew up a plan mainly using a rail and spotlight system because, well, I am more familiar with how spotlights work in galleries, and I figured we could point them around as we wanted later, or even wrap them with gels later on to change the colour... and then... welp, I ACCIDENTALLY OVER-LIT THE HOUSE.
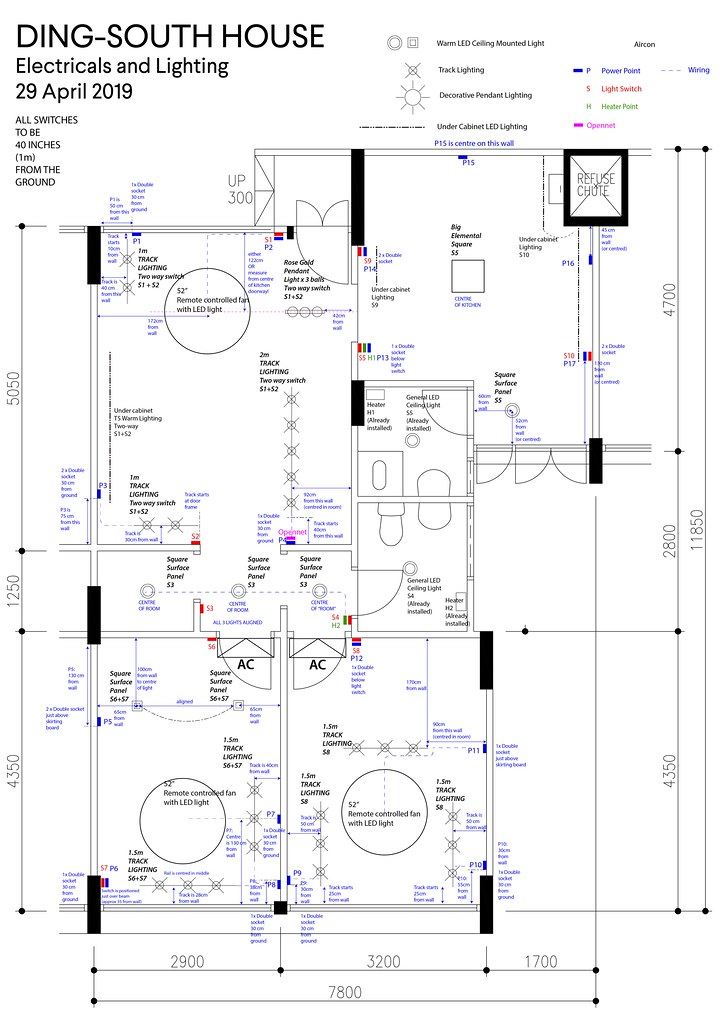
This is the diagram I produced with my planned lighting which I used to brief in the electrician. We planned for a lot of two way switches and a hella lot of 13A double plugs because we like them. I must have done something wrong because at the end of this endeavour we had a electrical bill of OVER 4000SGD WHAT AND HOW DID THAT HAPPEN???
To be honest my expectation for the electrical bill was about 2000SGD and when we asked the HIP electrician to give us a ball park figure he said about $2500 for the entire house. THE ENTIRE HOUSE. So how did our electrical bill go so out of control?
My post-mortem review would say:
- Designer (myself) was blithely unaware that modern LEDS are EXTREMELY BRIGHT so calculating wattage may not be useful
- Designer (myself) was unclear about proper way of calculating lighting required for house
- Bought too many tracks for lights and then proceeded to INSTALL THEM ALL
- Bought too many LED lights for track lighting system
- Too many 13A power points
- Too many two way light switches
On the BRIGHT SIDE - WE HAVE AN EXTREMELY BRIGHT HOUSE NOW!!! The neighbours probably think of us as the people WHO HAVE THAT INSANELY BRIGHT YELLOW HOUSE (our bright lighting complements our bright yellow living room with BRIGHT YELLOW CEILING TO BOOT! HA TAKE THAT!)

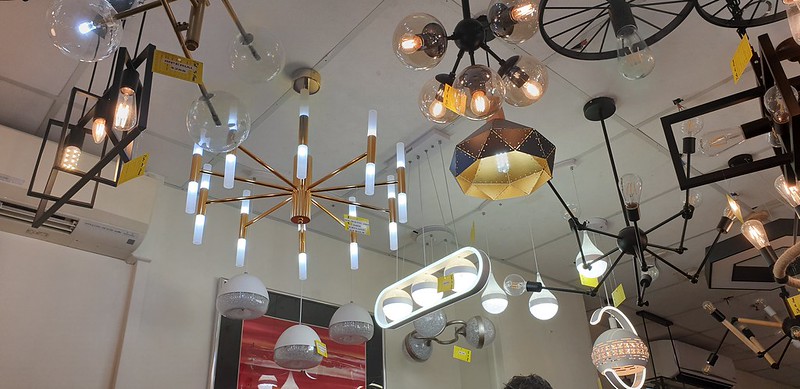


We got our lights from Aspire Lighting in Geylang. They had the simple lights we liked and they were super friendly.
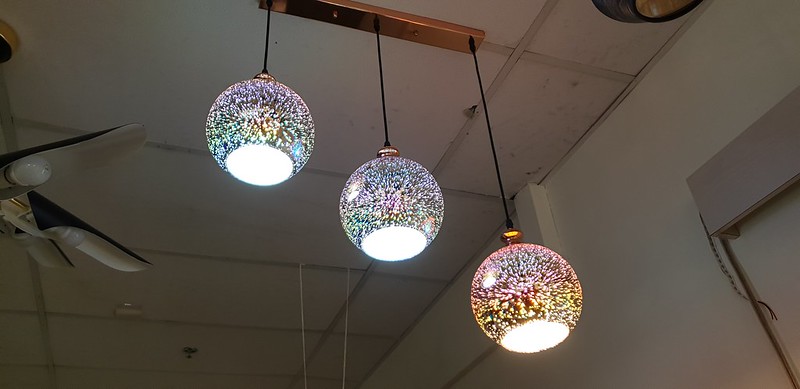
We also saw this fun little light and I think its my favourite light in the entire house. We put it by the doorway, it is the FIRST TIME I HAVE EVER HAD A FANCY LIGHT.
TOP TIP: Are you using spotlights? Don't go crazy and buy more than the recommended amount "just in case". You will not use that many. In fact you might remove some for sanity's sake. Also, don't ask for multiple two-way switches for everything. You think you're making life easier for yourself but actually EACH BUTTON IS ONE MORE BUTTON YOU HAVE TO MEMORISE THE USE OF. Light switch affordances are harder to design well than you would think... even as an interaction designer I am still facepalming a few of my lighting and button decisions in this house...
16. Carpentry / Blum Hinges
Carpentry Design
I expected our contractor to design our carpentry with a bit more detail. This... we did not get. We got a less than impressive drawing with no dimensions on it. I was disappointed with this and even thought of using the diagram as an example of PERSPECTIVE FAIL to show to my Drawing students who are being taught the basics of technical drawing and perspective drawing at the moment.

THE 3D DRAWING OF OUR KITCHEN THAT WE GAVE TO OUR CONTRACTOR
This is the drawing that we gave to our contractor to show him what we wanted. But as we are not carpenters, we cannot come up with all the interior thicknesses and dimensions on our own, nor could we design how to incorporate things such as the gas and water pipes behind - so we thought this Sketchup model would be a useful starting point for the contractor/carpenter to work with.

THE DRAWINGS OF THE KITCHEN THAT OUR CONTRACTOR CAME BACK WITH
These were the slightly underwhelming drawings I got back from the contractor. Later, despite asking for more drawings the best I got was this drawing plus some dimensions added to it after we had a long discussion on the dimensions and placements. By which time I was very worried we would miss the timeline for completion before our critical moving date.

THE NORMAL STANDARD OF KITCHEN DRAWINGS THAT I EXPECTED FROM A CONTRACTOR
This is the minimum standard that I had been expecting for a kitchen carpentry design - this is an example that the Dingparents showed me after our reno was nearly completed - the diagram made by their contractor for their own flat. I had seen this before and frankly although I don't need a full render, I expected at least a digitally drawn, accurate diagram with dimensions.
Clearance for appliances
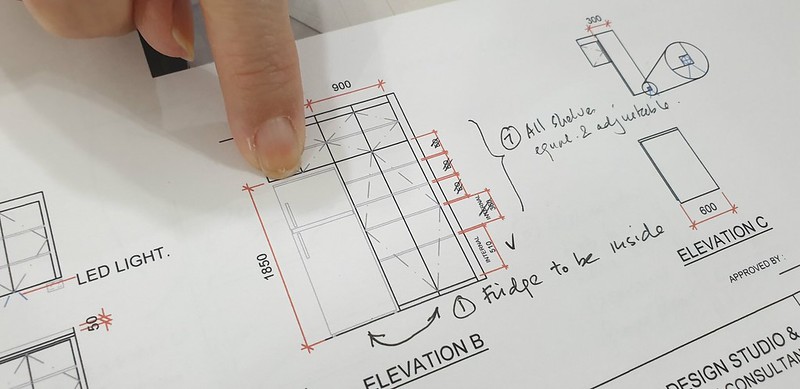
Attention to detail was lacking in many spots of the kitchen but one critical error was that it appeared that there wasn't a clearance designed for the top of our fridge. We had bought our fridge way in advance and it was quite a tall unit. I didn't think that I had to explicitly say that a clearance had to be added in for our fridge but there just wasn't any clearance and it was only with the help of a muscular cleaner in the house that the fridge was successfully wedged into its hole with probably just about 1mm to spare on the top (gulp). AAHHHHHHHHH!!!!
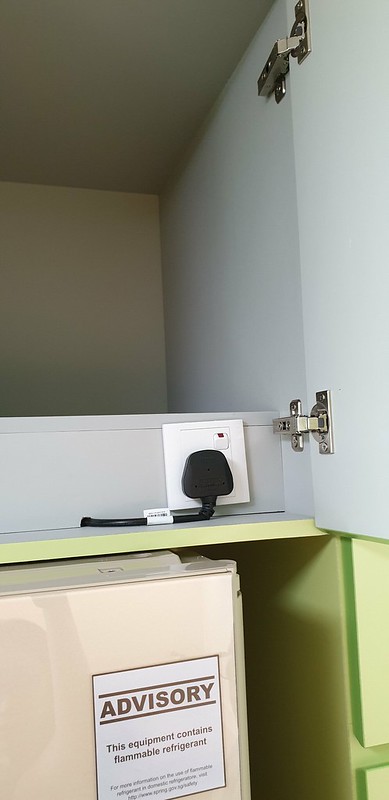
Also, on an aside, who goes and designs such an elaborate torture for cables like this???.... Here is our tortured fridge cable and behold in this picture you can also see the lack of clearance between fridge and top. We have a lot of excess clearance on sides and back to compensate (where I think the actual cooling elements are) so I like to think our fridge is not any worse off from this unfortunate fitting.
Edge Band
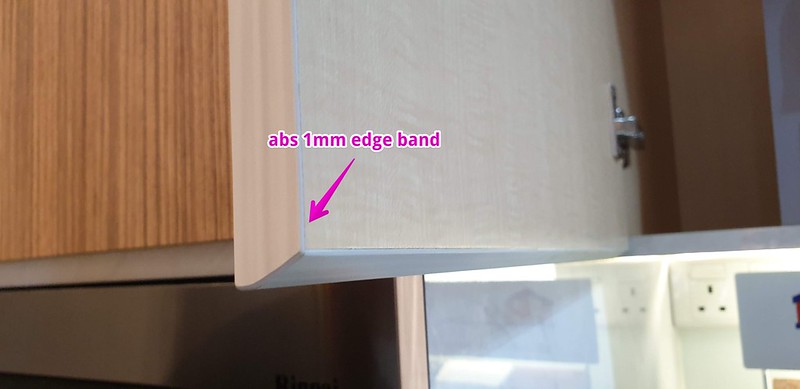
For those who don't know what is the edge band and its in your quote, this is the edge band made of ABS. It is a 1mm strip of plastic ABS used to create a trimming for the carpentry finish. Look I'm trying to find some learning points so I can console myself that this was still a great learning process for us all despite all the disaster.
Cabinet Laminate
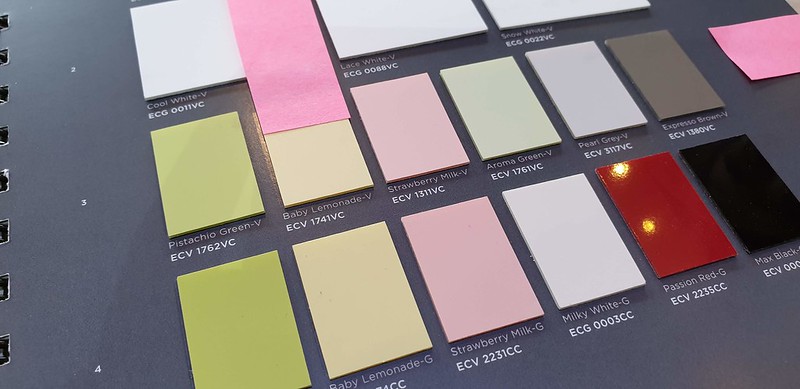
I already mentioned the sad story of the WRONG LAMINATE in my previous entry, but the TLDR; summary of it here is that our contractor somehow mixed up the colour of the laminate we wanted despite it being named and typed out in all the docs and messages correctly - I thought it had a blue film over it thus making it green so I didn't raise a warning flag until it was basically too late and so at the end we discussed it and he waived the extra charge that would have been charged for the premium laminate material. ITS OKAY WE CAN LIVE WITH A PISTACHIO GREEN KITCHEN. It is starting to grow on us.
Cabinet Inner PVC Foil
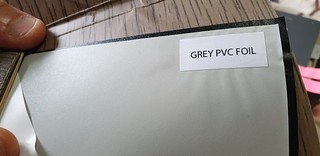
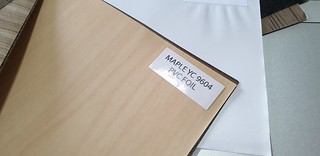
The inside of your cabinets are lined with a pvc coating, you get to choose from a few inoffensive inner colours like these. We chose grey.
Worktop

We chose an inoffensive sort of white quartz material for the worktop (see picture below). I like how the light scatters on top of it. You also get to choose different profiles (if you are feeling "extra"), but we stuck with just the normal flat one. Remember that the worktop has to be cut and fabricated off site, so if you need any holes cut THEY MUST BE DONE IN ADVANCE, otherwise, get ready for that sinking feeling of impending worksite disaster....

By sinking feeling I am also making reference to THE SINK INCIDENT - wherein our silgranite sink (which was EXPLICITLY DESIGNED TO BE AN OVERMOUNT sink was installed wrongly as an UNDERMOUNT sink to the worktop. Nope we weren't happy about this but figured that it would damage our sink to have them uninstall it and remount as OVERMOUNT after they bungled it. Infuriatingly, the installation booklet as well as its widgets were still STUCK TO THE SINK UNOPENED when we found it had been wrongly installed.
In the end the contractor said he could give a warranty for the sink installation as UNDERMOUNT so we left it as that, although to be honest we always intended this sink to be overmount. If we had known it would be undermount then we might have chosen another sink without such a distinct material (now the material is hidden inside the sink), but I really do like this silgranite sink material. Its like our floor - kinda grainy and rough to the touch yet oddly smooth. It is not slippy when wet and it also dries quick.
Top Tip: MAKE SURE EVERYONE AND THEIR GRANDMA KNOWS THAT YOUR SINK IS MEANT TO BE OVERMOUNT OR UNDERMOUNT. OR GO DOWN YOURSELF TO REMIND EVERYONE ON SITE. DON'T ASSUME THAT BECAUSE YOU SHOWED THEM A DRAWING/PIC AND SAID IT ONCE AND GAVE THEM THE INSTALLATION MANUAL THAT THE INSTALLER WILL DO IT TO SPECIFICATIONS! BECAUSE THE CONTRACTOR/SUBCONTRACTOR/WORKMEN WON'T READ ANY OF THE PAPERS OR MANUALS YOU STUCK TO THE ITEMS!!!
Hinges
If I did this all over again, I would explicitly ask the contractor "PLEASE TELL ME WHAT IS INCLUDED BY DEFAULT IN OUR AGREEMENT, WE'LL PROBABLY HAVE THAT" instead of having them say "oh go choose anything you want from the blum website online". Firstly, it was very stressful and confusing having to acquaint ourselves with the different types of blum hinges. Why can't I just ask for "the blum hinges that close slowly on their own" and leave the rest up to my contractor to do it? Why do I have to spend time going down to the blum showroom and study all the blum hinges myself? In addition to that, to be given an additional bill for choosing weird add-ons... How am i supposed to be the hinge specialist now? Man I don't want to have to get into hinges again....
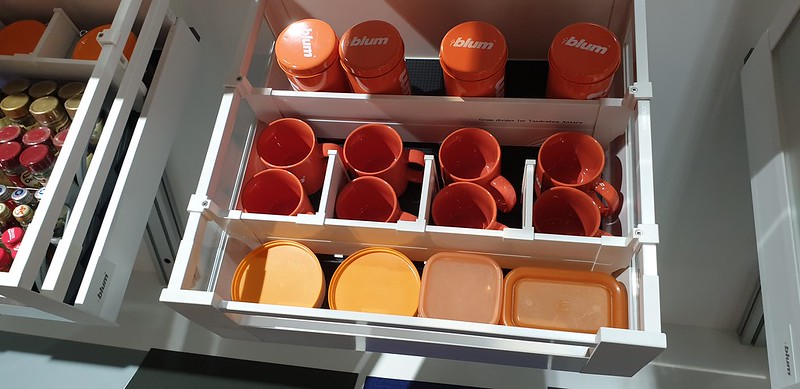
So we went down to understand ALL OF THE PARTS OF A BLUM HINGE WHICH IS PROBABLY MORE THAN I SHOULD EVER NEED TO KNOW ABOUT MY HINGE OPTIONS.
Things I learnt were that for most of the normal casement doors you just need:
107 degree Hinge - CLIP top BLUMOTION - 75B1550 Silver - $4.25/pc
Mounting Plate with 0mm spacing - 175H3100 - Straight with height adjustment - $0.82/pc
This is not one of those $2 hinges you get at the corner store, this is the slow-closing action hinge with a separate mounting plate that allows you to make height adjustments to your door to align everything up. Most hinges don't let you do that as they are fixed plates (if you misalign them they are misaligned and its hard to fine-tune things). Yes that's why your hinge is so expensive. ARGHHHHHH.
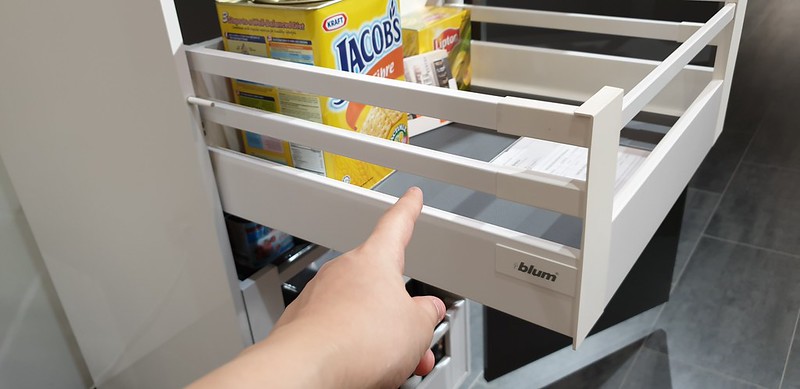
As for the food larder we chose TBX i5 drawers (above). These are of fixed sizes and go inside your large cupboard to give it structure. Some people say you don't need a drawer, but we kinda liked it. We also asked them why people choose between 30 and 65kg load capacities and decided we did not need the 65 kg load capacity. That would be like having a DEBBIE sitting inside the drawer which is not happening anyway.

We also tried out a lot of dish drainer mechanisms... but this was included.
TOP TIP: Ask your contractor "PLEASE TELL ME WHAT IS INCLUDED BY DEFAULT IN OUR AGREEMENT, WE'LL HAVE JUST THAT, AND YOU CAN PICK ALL THE HINGES AS LONG AS THEY ARE SOFT-CLOSING KTHXBYE"
17. Door and Door Frame Installation
Doors was another thing that we decided to do on our own. The dingmother recommended we try the shops along Eunos Avenue 4 and 5, which included Siong Doors, Yontat Doors, and PD Doors. The first two do a lot of those veneer doors which are extremely reasonably priced (Within the $200 range each). The only issue I see with these notably hollow doors (not solid) is that they sometimes slip open with the wind because they are very light. PD Doors does a unique sort of Japanese folding door that we might consider but haven't found it so critical to install just yet.

Yontat Doors

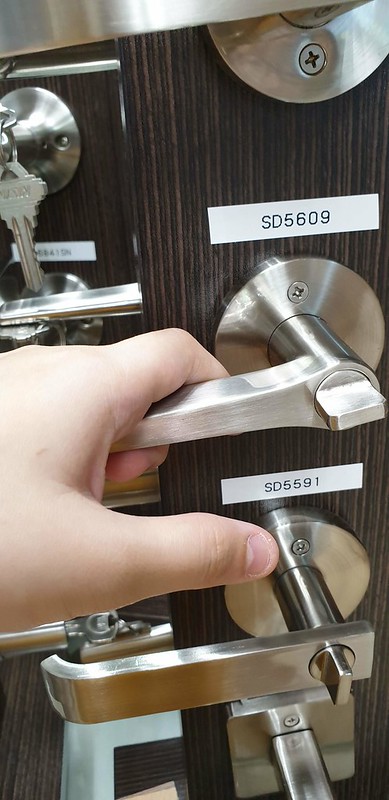
Example of Yontat's door selections and door knobs. I chose one that was more ergonomic (although less aesthetically pleasing). A kind of handle you could just slam down with a finger to open.

PD Doors

These framed doors can slide open and also fold up.
18. Window Installation
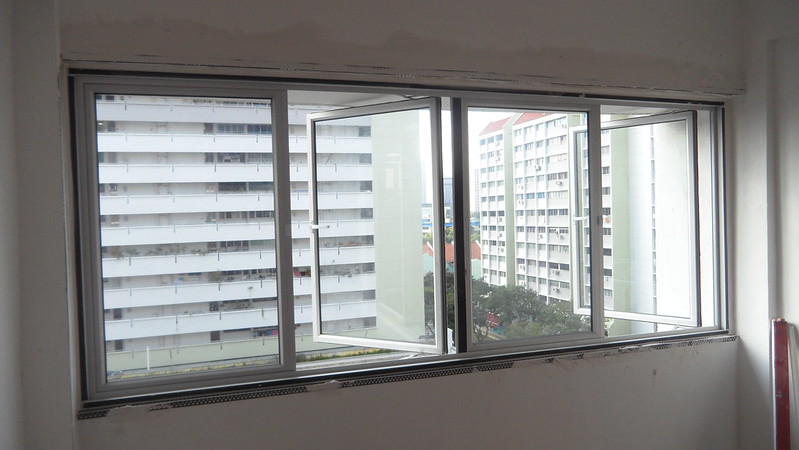
We chose a casement instead of sliding windows because we wanted it to be really soundproof. George also initially wanted double glazing but we were talked out of it because of cost. It is not truly soundproof in there either, but a lot of the sound is indeed insulated.

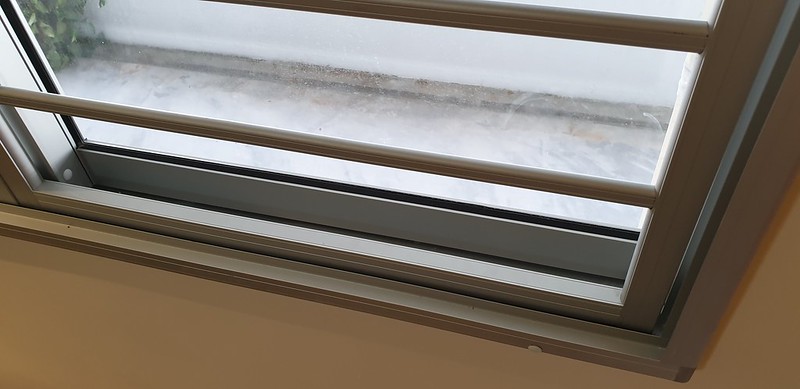
For the only sliding windows in the house, we had them in the living area. For sliding windows and grills they can be 2 track or 3 track. Note that the 3 track is obviously more costly so if you were quoted a 3 track price check that you haven't received a 2 track instead (which happened to us)
19. Blinds Installation

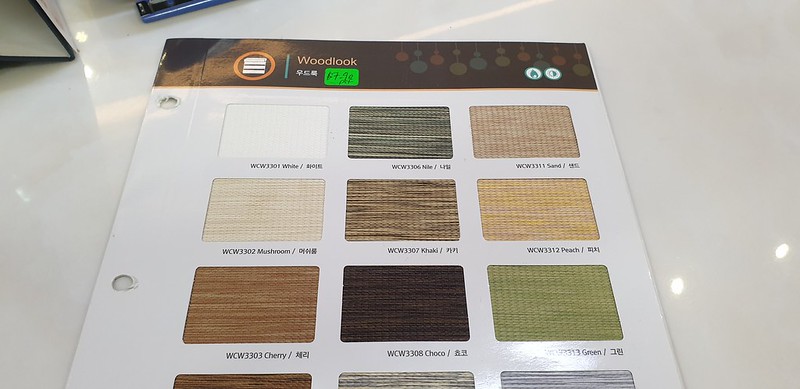

We got Korean combi blinds and it was 940 for all 3 windows including installation thanks to Blinds Guru who were super fast in doing the measurement on the day we went to their showroom and installation was really dust-free thanks to their awesome drilling-hoover-attachment.
Alright I've got De Quervain's tenosynovitis in both hands and have to wear hand guards now so I AM ENDING THIS POST ABRUPTLY TO GO AND REST NOW. More of the juice in Part 4.....