adventures in tech, electronics, programming, cartography, geology, data, and augmented realities
Sunday, 9 November 2014
Meshmixer Experiment
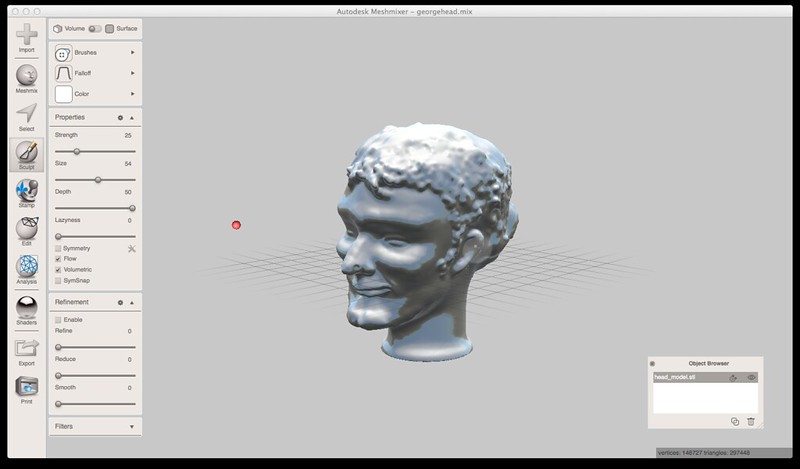
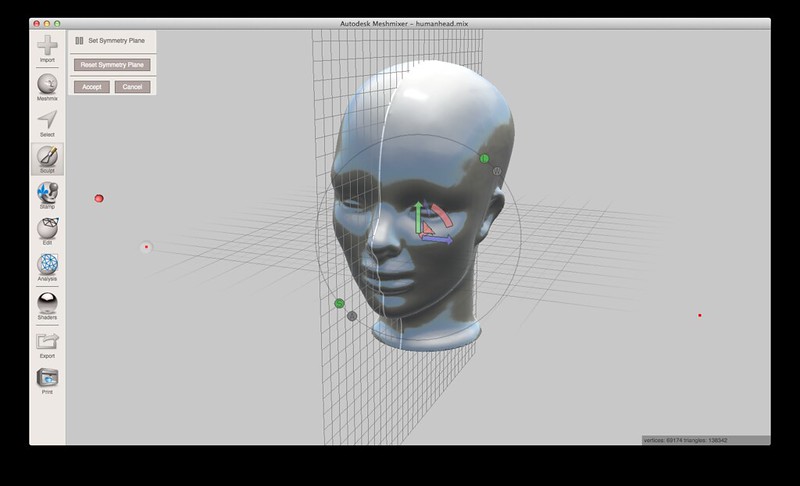
Began with a simple head model on thingiverse and then experimented with Meshmixer’s primitive sculpy tools for one pomodoro. This is basically like the iPad application - fun for a while but wildly inaccurate. The white line in the first image is the line of symmetry when “drawing”; your “drawing” will be mirrored on both sides. I found that it was better to add bits and small lumps one at a time (a bit like how one would model in wax with small fingertip-sized lumps to be slowly worked in) and finally just using BubbleSmooth to go over the lumpy bits.
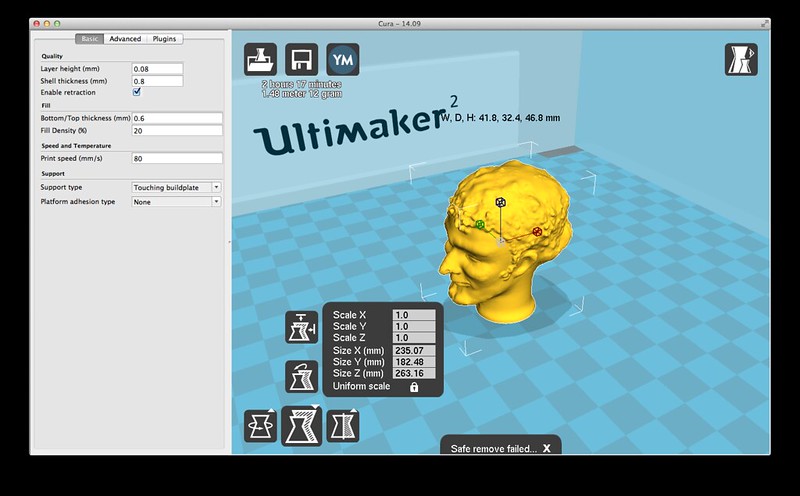
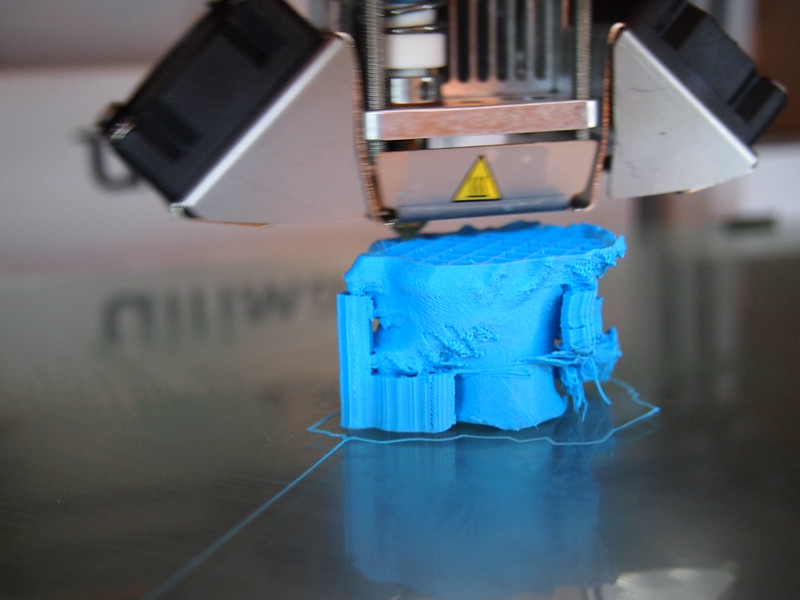
Sent it to print at a speed of 80mm/s. On hindsight this was too fast. Would set the print speed lower to around 40mm/s or 50mm/s for a small print like this in future...
Support structure didn’t stick well to build plate. Nevertheless I didn’t cancel print since I realised it would probably still complete the print. Do note a bit of “elephant’s foot” on the first layer as well.
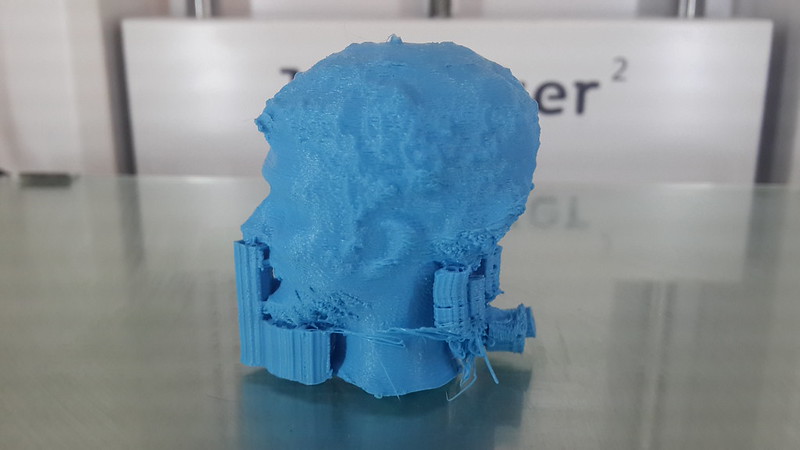
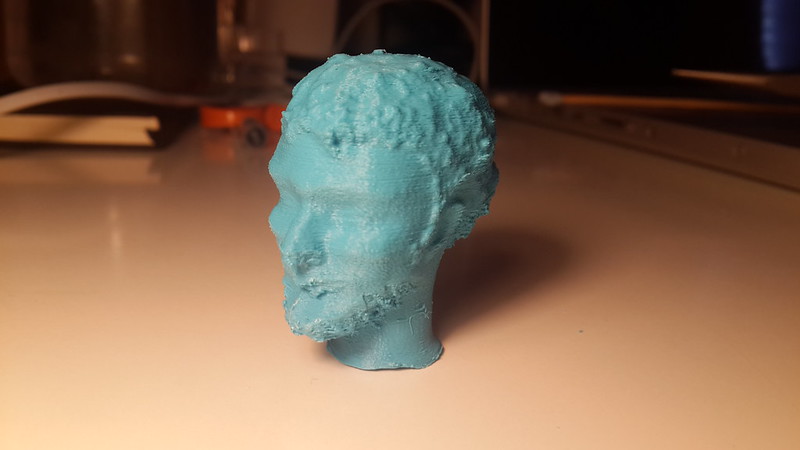
Completed Georgehead. Overhang was quite messy due to part of support structure detaching from build plate quite early on in the print. Nevertheless I think it benefitted from the support structure. Might use a different slicer next time around to see if the support structure is done better for the same model.
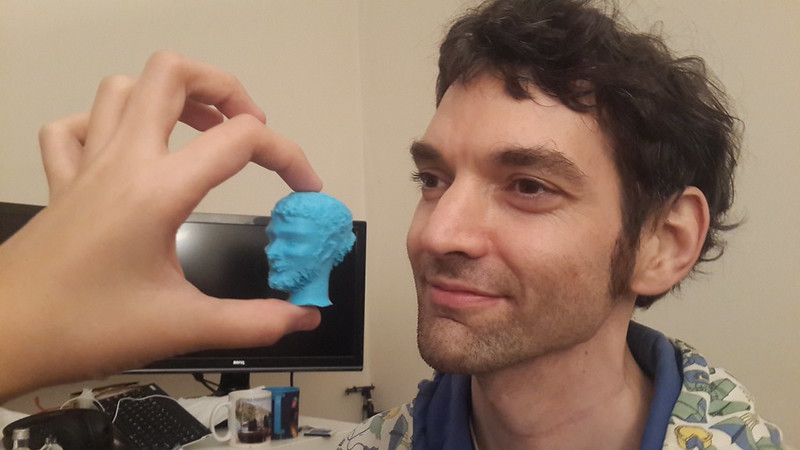
For comparison with the real Georgehead...
See also:
Georgehead on Thingiverse
My previous attempt at making a Georgehead in modelling wax at a Facial Reconstruction Class
Labels:
3d printing,
facial reconstruction,
meshmixer,
PLA,
thingiverse,
ultimaker 2,
um2
Ultimaker 2: Printing a New Material Feeder
The point of a 3D printer or 3D replicating device is that it should be able to print new parts for itself; and this week in our house we were getting one step closer to the Singularity!
So I got the UM2 about two weeks ago, but I had some incredibly frustrating problems with the material feeder grinding filaments down terribly, exacerbated by my inability to open the screws on the material feeder itself. Fortunately, George's bike allen key worked better than the UM provided allen key so he finally opened it and could clean out the ground up PLA and adjust the tension slightly. George thought my loosening of the screws of the material feeder (the 4 on the exterior of the black plastic case) could also have made the tension higher because of the design of the material feeder. Since the design of the material feeder was clearly the weak point in all this (nozzle was fine; already tried the Atomic method), we decided the next step should be to print a new material feeder for the UM2!
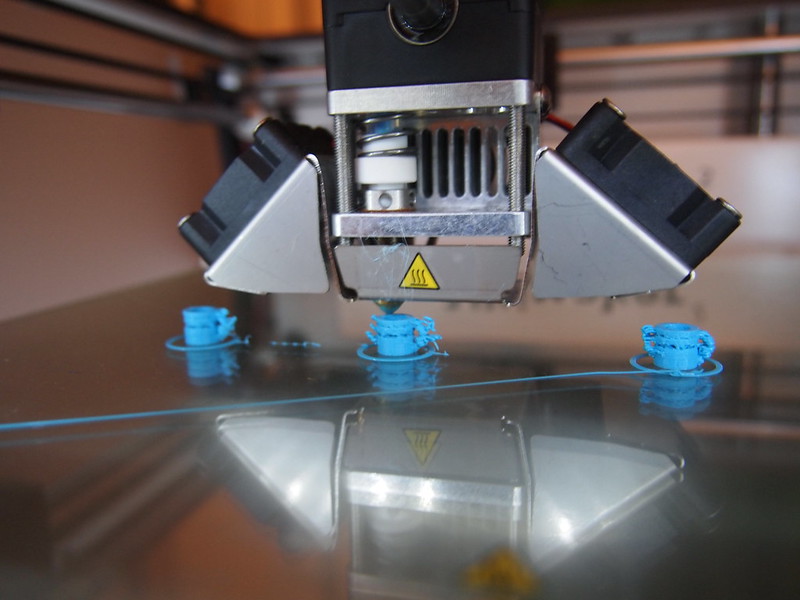
There was a weird blob of filament on the UM2’s nozzle which seemed to overhang dangerously so I thought I would slowly raise the temperature to 260 deg to get rid of it. After the nozzle had heated sufficiently to make the blob disappear, I turned the heat down to go to 220, but the fans were too effective and actually lowered the temperature to 205, and the sudden change in temperature caused some underextrusion, like scars on tree rings on these tiny teacup tests. Therefore if you need to change the temperature, it seems you should change it very slowly and no more than 5 deg at a time.
Removing the blue bowden clip takes some effort... and then some. Earlier yesterday, while the machine was turned off, I was trying to remove the bowden clip and it jettisoned itself out violently... RIGHT INSIDE THE HOT END. After having a small nervous breakdown, I was eventually forced to face reality and to improvise some new tools to retrieve the blue bowden clip from inside the hot end. These finally worked for us - a bamboo stick with blu-tack on one end, and a small paperclip fashioned into a hook. Use the stick with a sticky end to lift the blue clip and then fish it out with the hook.
This unfortunate error happened twice in the day.
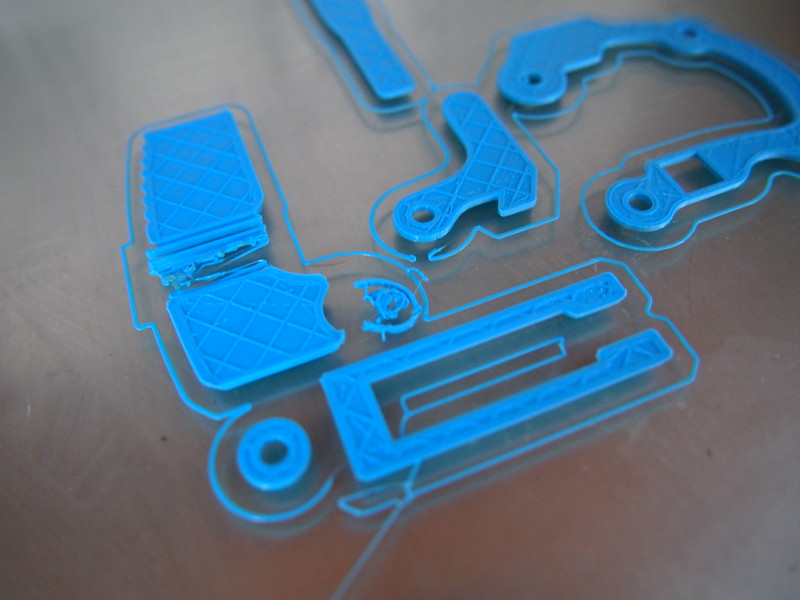
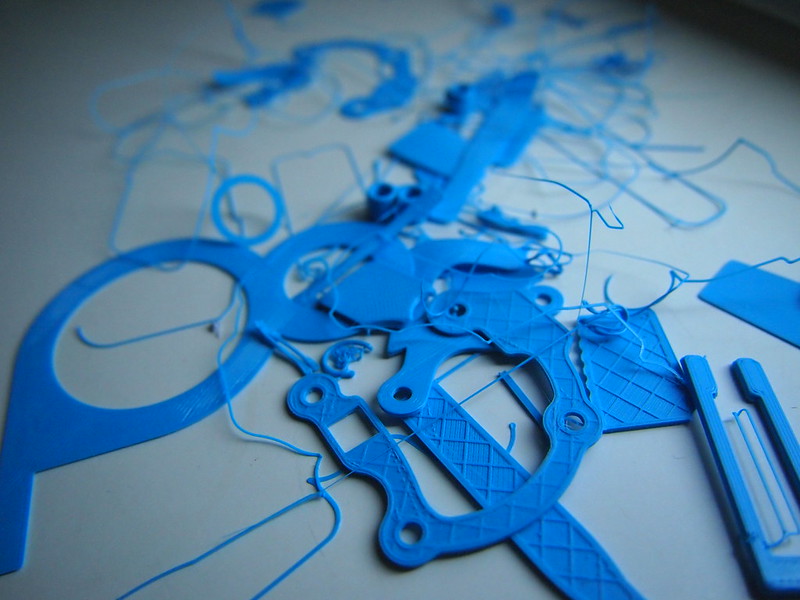
We tried to print all 5 parts of a replacement material feeder in one print with an initial layer of 0.3mm. The result was that every first layer was borked, although we didn't understand what was the reason for it not sticking properly to the build plate. Obviously, if the first layer does not turn out right then the outlook for the piece seems pretty dismal. We tried this about 6 times and each print’s first layer either did not come out straight or detached from the print bed, so we aborted each attempt in succession.
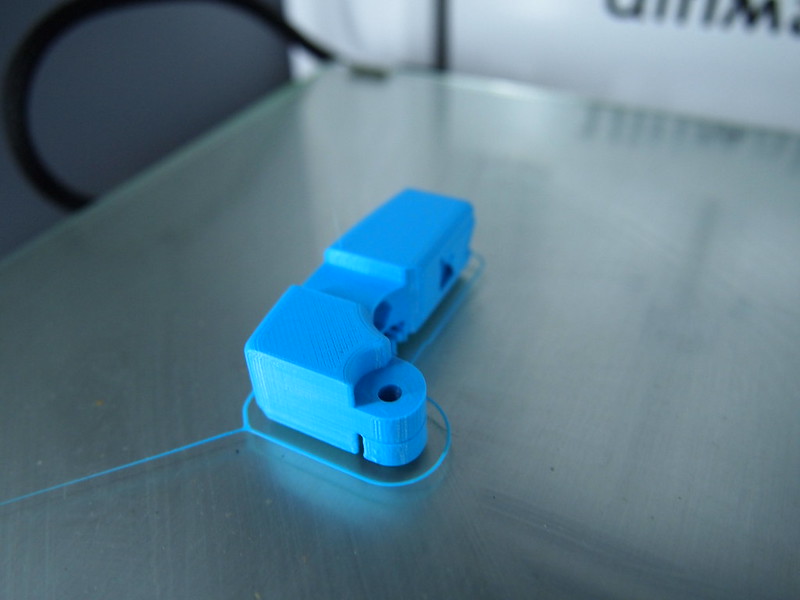
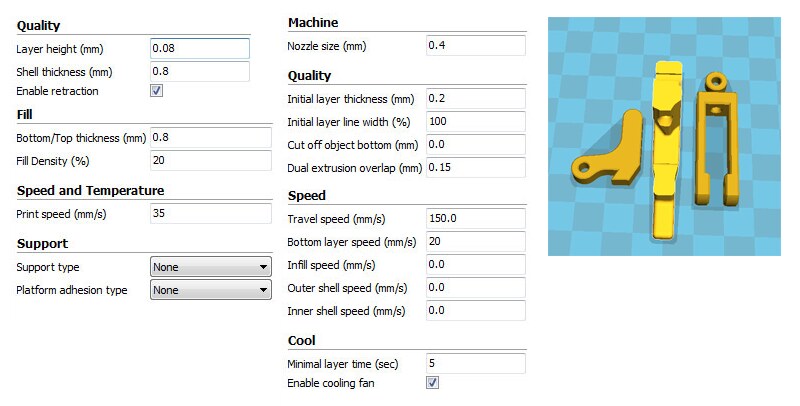
I tried putting some glue on the test bed (with a damp paper towel to spread it out), but I believe the glue doesn’t do very much and can be dispensed with, especially with a clean heated bed. After which we decided to print one part at a time with an initial layer of 0.2mm (and a lower print speed of 35mm/s) and it printed perfectly.
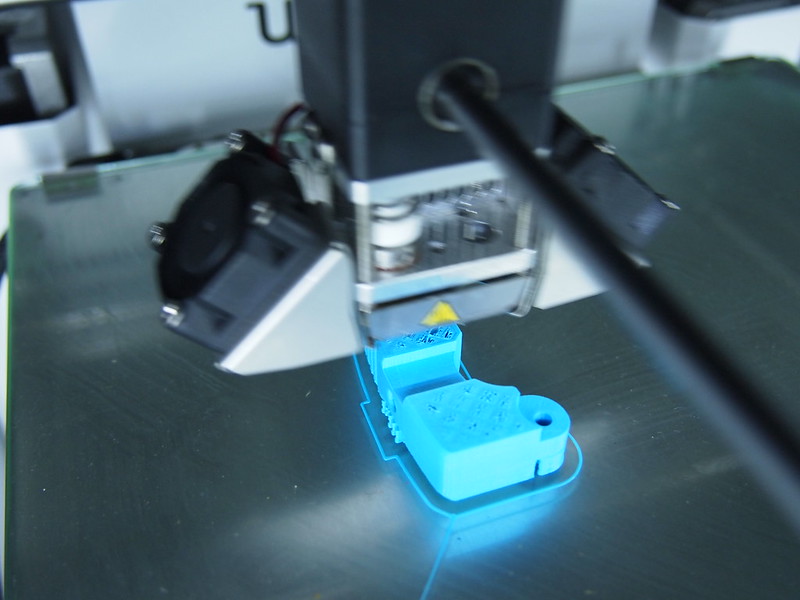
Some appearance of “pillowing” occurs during printing process. Just saying, in case if you are paralysed by inertia and standing there watching the print like a paranoid babysitter - yes, the outcome will be alright as long the top layer is thick enough.
After successfully printing two parts individually on its own, we decided to print 3 of the parts together with an initial layer of 0.2mm. This printed beautifully. Therefore one possible conclusion is that our initial problem with the smaller details of the print not properly sticking to the build plate might have been caused by setting the initial layer at 0.3mm?
Update: EVERYTHING WORKS BEAUTIFULLY NOW. I recommend that if you have grinding problems with the UM2 that you print this feeder with similar print settings. Your sanity will thank you.
See also:
Atomic Method for fixing underextrusion problems
Ultimaker Visual Troubleshooting Guide by 3dverkstan
I've been bogged down by too much work lately (a constant and paralysing problem), and regrettably am behind in a lot of documentation and writing. But during the course of my projects involving any 3D printing, each weekend I'll do a sum-up of all my prints and experiences with the UM2.
So I got the UM2 about two weeks ago, but I had some incredibly frustrating problems with the material feeder grinding filaments down terribly, exacerbated by my inability to open the screws on the material feeder itself. Fortunately, George's bike allen key worked better than the UM provided allen key so he finally opened it and could clean out the ground up PLA and adjust the tension slightly. George thought my loosening of the screws of the material feeder (the 4 on the exterior of the black plastic case) could also have made the tension higher because of the design of the material feeder. Since the design of the material feeder was clearly the weak point in all this (nozzle was fine; already tried the Atomic method), we decided the next step should be to print a new material feeder for the UM2!
Turning temperature down midway too quickly ruins prints
There was a weird blob of filament on the UM2’s nozzle which seemed to overhang dangerously so I thought I would slowly raise the temperature to 260 deg to get rid of it. After the nozzle had heated sufficiently to make the blob disappear, I turned the heat down to go to 220, but the fans were too effective and actually lowered the temperature to 205, and the sudden change in temperature caused some underextrusion, like scars on tree rings on these tiny teacup tests. Therefore if you need to change the temperature, it seems you should change it very slowly and no more than 5 deg at a time.
Improvised tools for retrieval of bowden clip which has fallen into hot end
Removing the blue bowden clip takes some effort... and then some. Earlier yesterday, while the machine was turned off, I was trying to remove the bowden clip and it jettisoned itself out violently... RIGHT INSIDE THE HOT END. After having a small nervous breakdown, I was eventually forced to face reality and to improvise some new tools to retrieve the blue bowden clip from inside the hot end. These finally worked for us - a bamboo stick with blu-tack on one end, and a small paperclip fashioned into a hook. Use the stick with a sticky end to lift the blue clip and then fish it out with the hook.
This unfortunate error happened twice in the day.
Printing a new material feeder
We tried to print all 5 parts of a replacement material feeder in one print with an initial layer of 0.3mm. The result was that every first layer was borked, although we didn't understand what was the reason for it not sticking properly to the build plate. Obviously, if the first layer does not turn out right then the outlook for the piece seems pretty dismal. We tried this about 6 times and each print’s first layer either did not come out straight or detached from the print bed, so we aborted each attempt in succession.
I tried putting some glue on the test bed (with a damp paper towel to spread it out), but I believe the glue doesn’t do very much and can be dispensed with, especially with a clean heated bed. After which we decided to print one part at a time with an initial layer of 0.2mm (and a lower print speed of 35mm/s) and it printed perfectly.
Some appearance of “pillowing” occurs during printing process. Just saying, in case if you are paralysed by inertia and standing there watching the print like a paranoid babysitter - yes, the outcome will be alright as long the top layer is thick enough.
After successfully printing two parts individually on its own, we decided to print 3 of the parts together with an initial layer of 0.2mm. This printed beautifully. Therefore one possible conclusion is that our initial problem with the smaller details of the print not properly sticking to the build plate might have been caused by setting the initial layer at 0.3mm?
Update: EVERYTHING WORKS BEAUTIFULLY NOW. I recommend that if you have grinding problems with the UM2 that you print this feeder with similar print settings. Your sanity will thank you.
See also:
Atomic Method for fixing underextrusion problems
Ultimaker Visual Troubleshooting Guide by 3dverkstan
I've been bogged down by too much work lately (a constant and paralysing problem), and regrettably am behind in a lot of documentation and writing. But during the course of my projects involving any 3D printing, each weekend I'll do a sum-up of all my prints and experiences with the UM2.
Monday, 3 November 2014
Neue Kreuzberger Zentrum
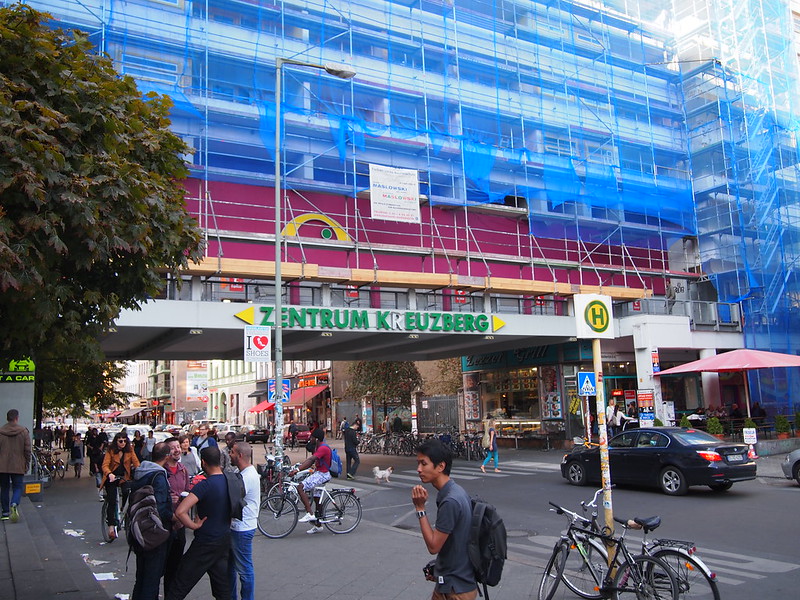
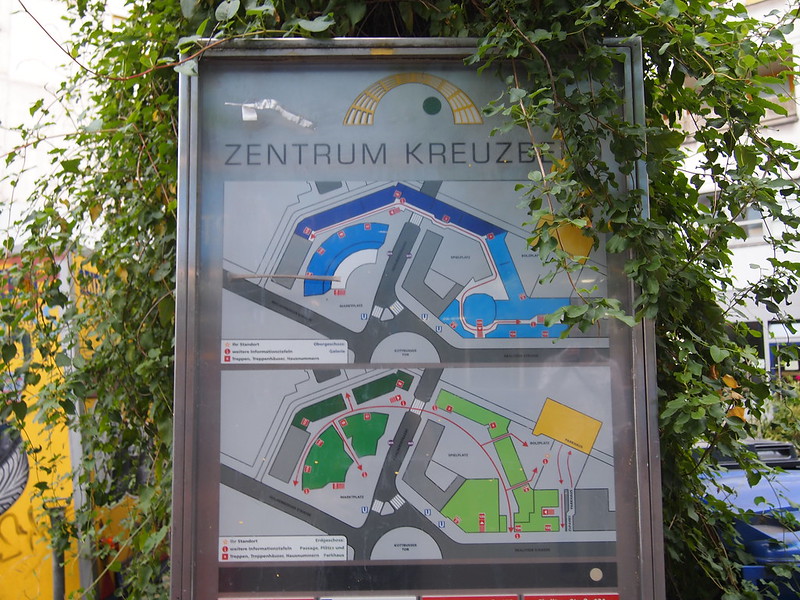
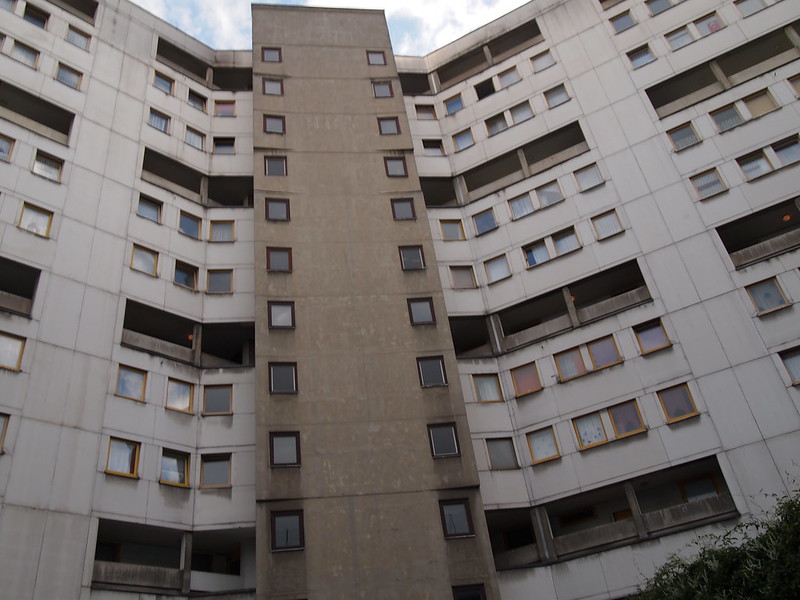
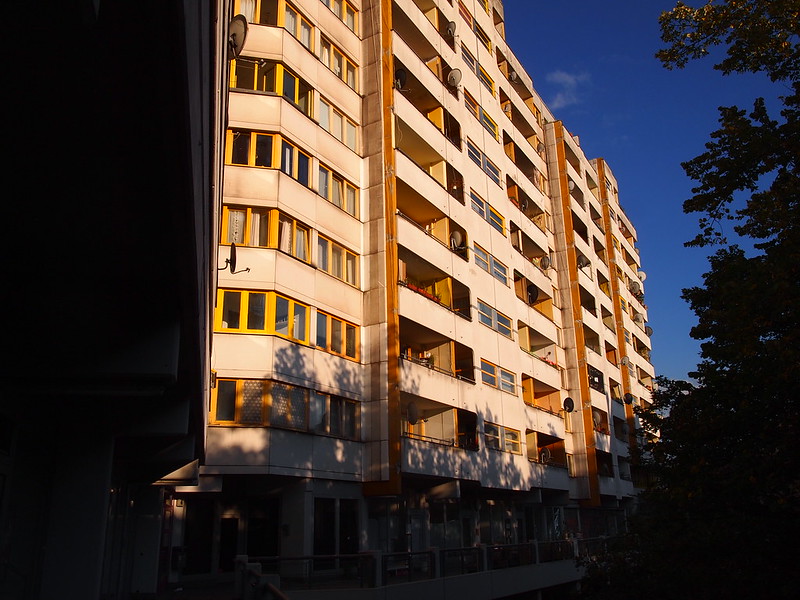
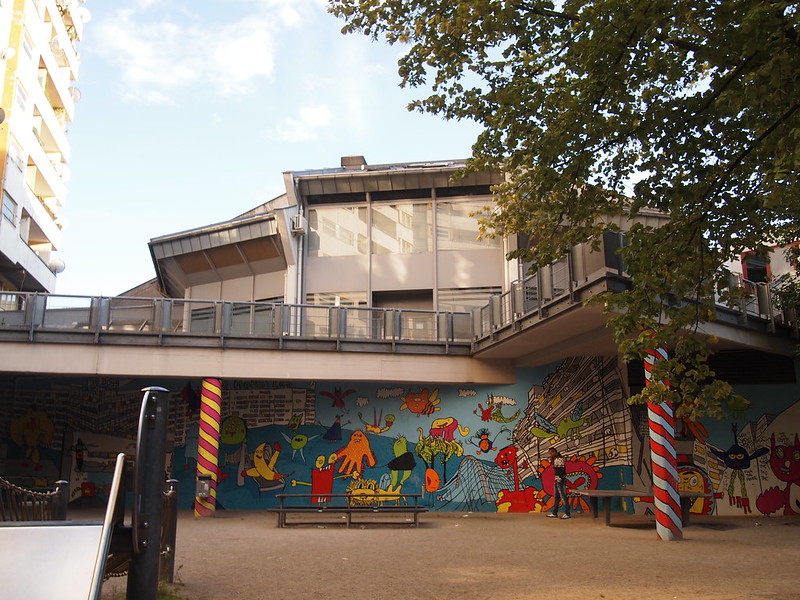
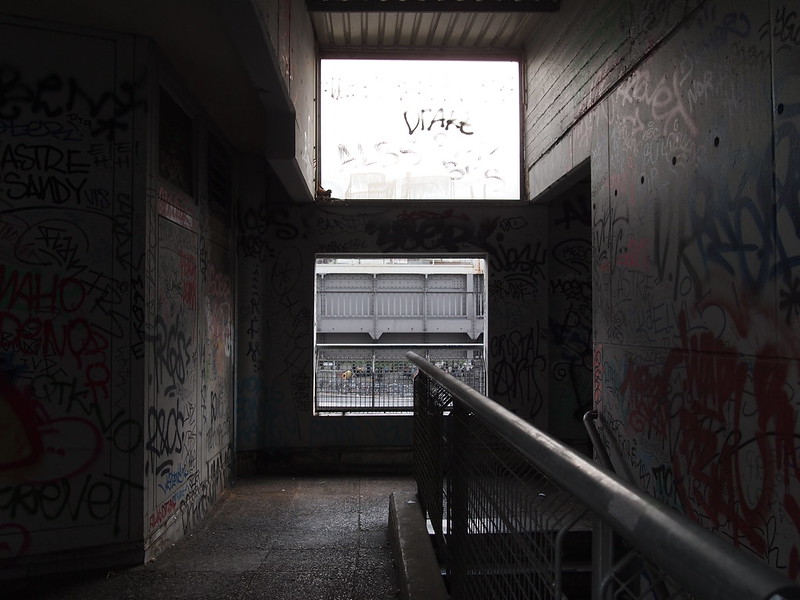
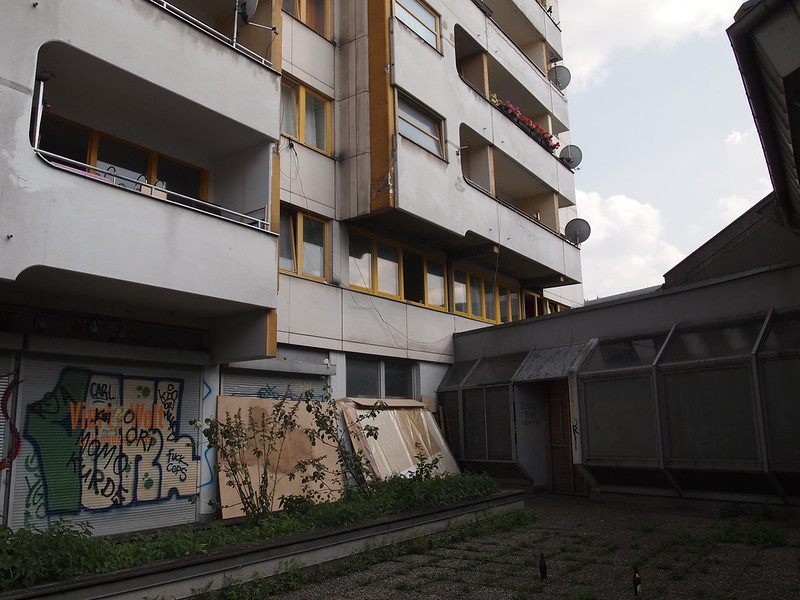
In 1974, some 40 years ago, the Neue Kreuzberger Zentrum (NKZ) was built. A staggering mammoth of a mixed-use tower block, it stands at the centre of the chaotic and noisy Kottbusser Tor traffic junction. Its construction required the complete demolition and rebuilding of the area, and the word “neue” was surely in its name to suggest that it was imagined to be the starting point for a new urban direction in Kreuzberg. Its arch design was meant to compliment the development of the future ring road whilst allowing the building to serve as a wall for the traffic sounds.
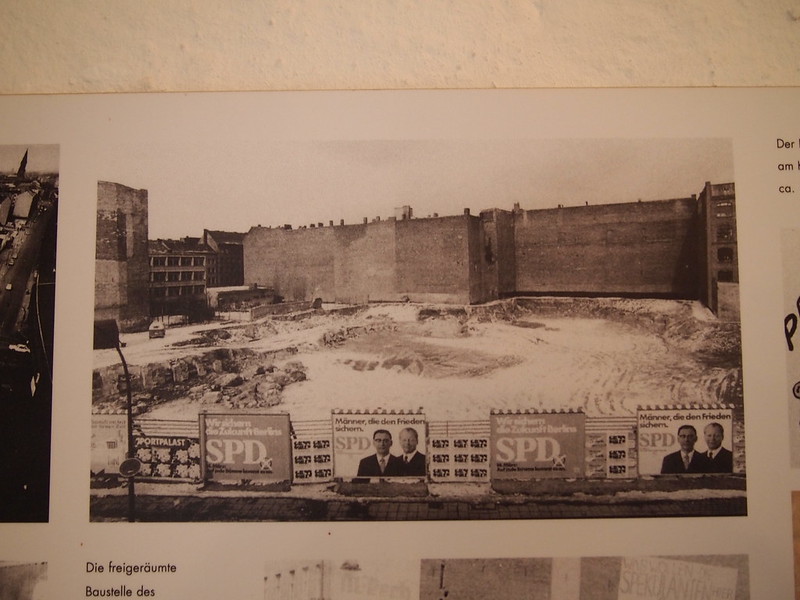
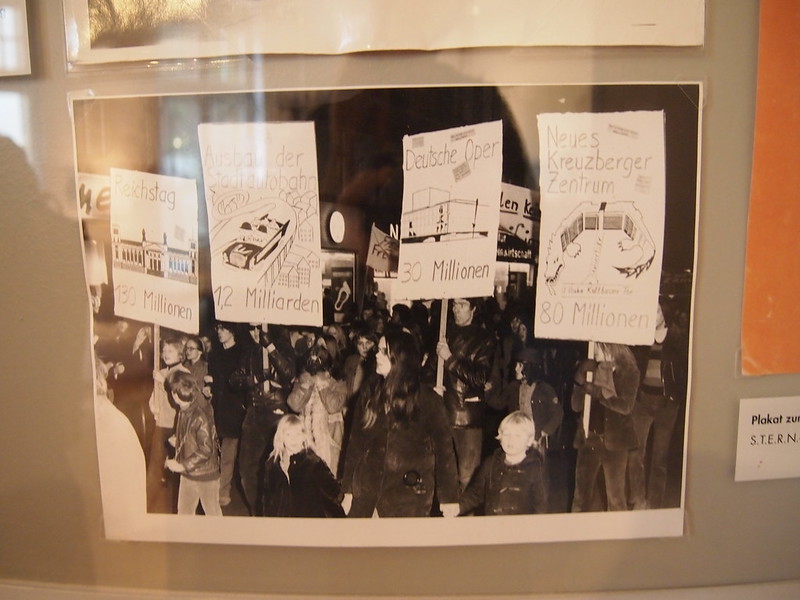
If you go down to the FHXB Museum near the NKZ, they have a permanent exhibit of how the building and area was redeveloped, including a photo of the site upon which the NKZ has been built, in which the outside of the demolished site has huge posters from the Social Democratic Party stating “Wir sichern die Zukunft Berlin” (We ensure/secure the future of Berlin). A dream for the future, to build more social housing in the area which sorely needed it in the post-war era, but blighted by different demands and interests pulling it in all directions and pushing it forward against the will of the people living in the area. The NKZ was criticised for having been built without sufficient public consultation or participation and having used brutal forced evictions to clear the land.
When I was in Berlin for the summer, I frequented a printer on Dresdener Straße in Kottbusser Tor which was directly behind this mammoth of a building. On exiting the dead-end of Dresdener Straße, I saw a stair leading upwards, which took me to an fantastic upper level that crossed over to the other side. I was instantly attracted to it, although it was hard to explain why.
The main issue was that I couldn’t even recall why it looked familiar to me - did I see this on my last trip to Berlin in 2011? Or was it 'familiar' because I had seen a similar building in the Genting Highlands, or Singapore? Was it a falsely displaced nostalgia for this sort of dated architecture; or was it the pleasure of discovering something that seemed like a fantastic urban playground to me, with its numerous stairs and corners and vantage points?
Today the word “neue” has been removed from its name, and it is simply known as the Kreuzberg Zentrum. But in some ways, the NKZ reminded me of Golden Mile in Singapore, one of my favourite buildings in Singapore. Both the Golden Mile and NKZ were planned as buildings which would be at the centre of a glittering, golden era of modern urban development, although in both cases it did not materialise as such in those locations. Golden Mile has been later described as a vertical slum, but it remains as one of my favourites because of the diversity of spaces within it, and how well used it appeared to be. I suppose I was fascinated that the thai people in the Golden Mile Complex would sit on the stairs and use them as picnic areas. To some it might seem like a unorthodox use of the spaces within the building but in my opinion they had done it all right! The food was tasty, the spaces were welcoming, the music went on and on - in my opinion the building was a success!
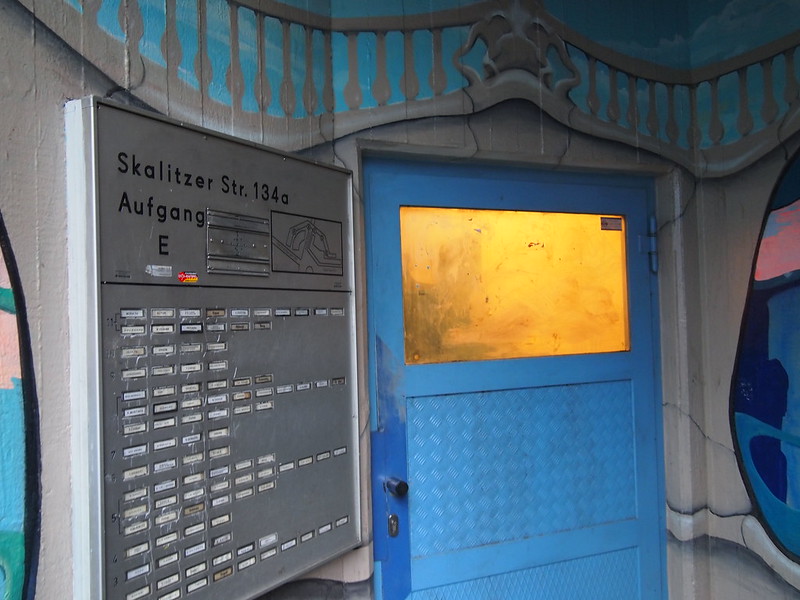
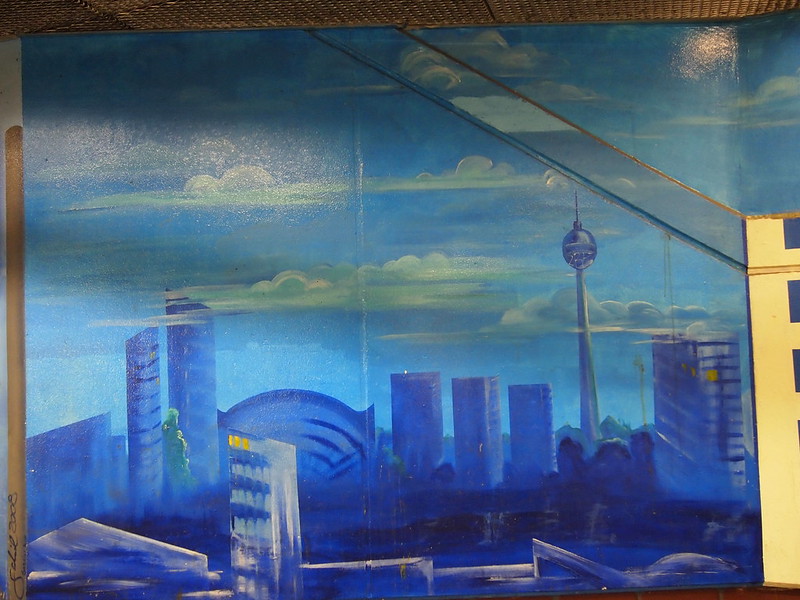
Tucked away in one part of the NKZ is this beautiful covered corridor which has been painted with murals of a futuristic Berlin city. This area in which the murals are located seems less than perfectly maintained and is a well-trafficked public thoroughfare which is littered with rubbish and strongly reeks of urine in one corner. I adore the strange juxtaposition of these odd future visions, placed right smack in a rather grim urban setting.
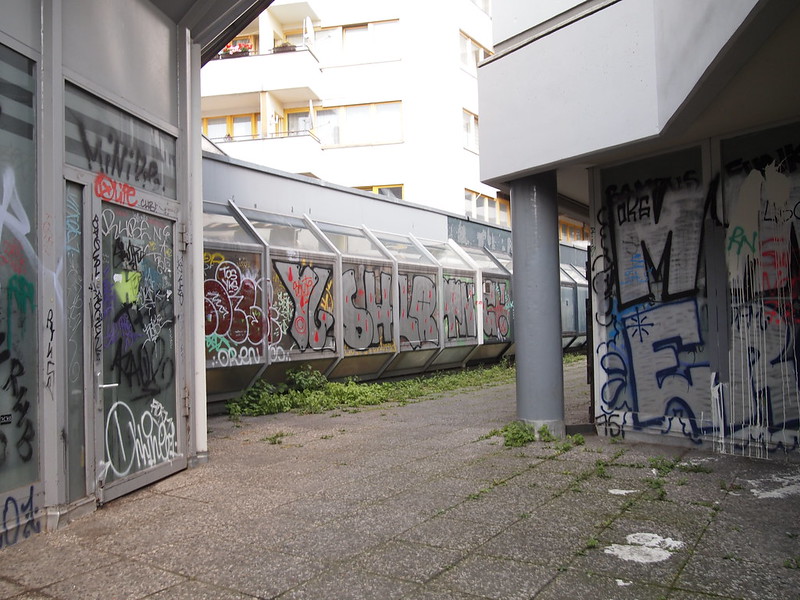
Whilst its not to say that I like any old sort of place which is rundown and poorly maintained, I realised that I do like places for the very same reasons which turn it into such an anti-social space: littered throughout the complex are these tiny pockets of empty space - sometimes disused and uncared for, covered in broken glass and graffiti, but on other occasions you may find a hidden dead-end public corner filled with plants and small comforts, places where one can find privacy for a moment within a very public space. They are spaces to be experienced, but which have no real purpose except perhaps to be a walkway between places; a temporary halfway house. And in a huge building like the NKZ there are so many of them.
One may debate that it is these hidden spaces within the building which engender antisocial behaviours because no one can see or police the activities that go on within it, yet perhaps naively I think they are also alternative spaces for dreaming. Strange isolated spaces from which the outside city is not visible for a moment, just as the city cannot see inside it. It is really just... an empty space, and I am attracted to that.
Time for the Irresponsible Disposal of Confidential Documents!
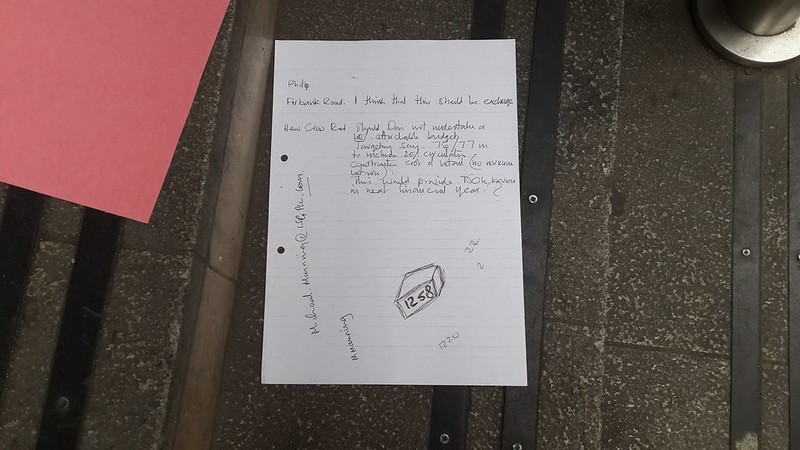
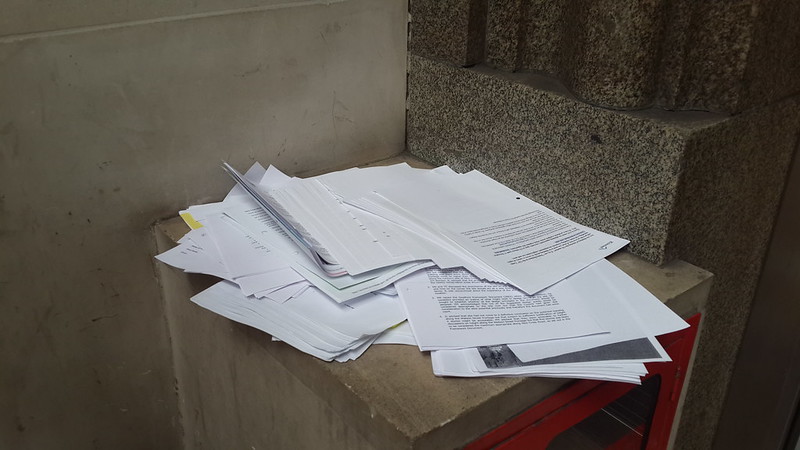
Ah, I do believe it is that time of year for the irresponsible disposal of your sensitive and confidential documents! Step right up, all you two-bit law firms and architectural consultants with reams of unwanted papers and emails that you printed out! In the last week we began to notice lots of these bags of papers in and around town. Perhaps they have always been there. Papers, bursting out of heavy bags which can't go in the normal trash because they are just stacks of solid, heavy paper. We were lured in by the clock drawing on this paper that had naughtily escaped its plastic bag and drifted into Gracechurch Street as we were walking on foot to Bank the other day.
The incorrigible hoarders that we are, we've been collecting them and reading the discarded papers of the city of London. This particular haul involves a documentation of correspondences relating to the design and redevelopment of a property in New Cross, wherein the people corresponding are examining existing (business) tenancy agreements and noting that the worse case scenario is that the current tenants will try to invoke the Landlord and Tenant Act 1954, but which apparently will not longer stand when the developers eventually become the new successor in the title. What happens to all the parties involved? Who knows? I mean, we could google it since we have detailed address and information about the property now, but shall we? The other day on Green Lanes we also had another haul of documents in which legal documents, visa appeals and NHS medical reports had exploded from a bag and strewn across the streets. Again, a puzzling choice to throw out confidential documents on the street. Or do they want to tell us the story? Are they just DYING to share with us these stories, by throwing out these tantalising clues?
Don't worry, people who like to irresponsibly dispose of their documents, your papers won't be flying on the streets, they'll be safe and sound with people like us who will be collecting your sensitive documents as souvenirs, and then uploading them to the internet and blogging about them one by one.
Sunday, 2 November 2014
Ultimaker 2: The Importance of Filament Guide design, and Underextrusion Troubleshooting
This week I bought an Ultimaker 2 so I could start work on a new project in which I intend to do a fair bit of prototyping and printing with different materials. I want to understand how a 3D printer works instead of handing my file over to someone to make the print for me - the same way a printmaker learns the intricacies of the printmaking process. In my mind, I thought it would be like just having a printer which poops out 3D models. But that was wrong. This is more like having a baby which is lovely when the baby is being lovely, but then you find that it does not have the ability to tell you what is wrong with it, and all you can see is that sometimes stuff might be coming out of it in rather unexpected ways. Horrifying ways. Oh and the sounds! The sounds which might be delightfully high-tech if you're in a good mood, or monstrous if you're in an irritable mood.
Now, if someone were to ask me, "Should I get a 3D printer?", my answer would be "Do you like fixing 3D printers? DO YOU??? DO YOU LIKE STRUGGLING WITH ALLEN KEYS AND PILERS FOR HOURS?" Let's just face it - it appears that maintenance and fixing is going to be a big part of having a 3D printer. I feel like a person who has stupidly moved into the top floor of an apartment block without a lift. "Why yes, I don't mind living on the top floor penthouse with no lift access, I don't mind getting a little more exercise every day or having to hauling up my boxes up and down all these painfully endless flights of stairs!"
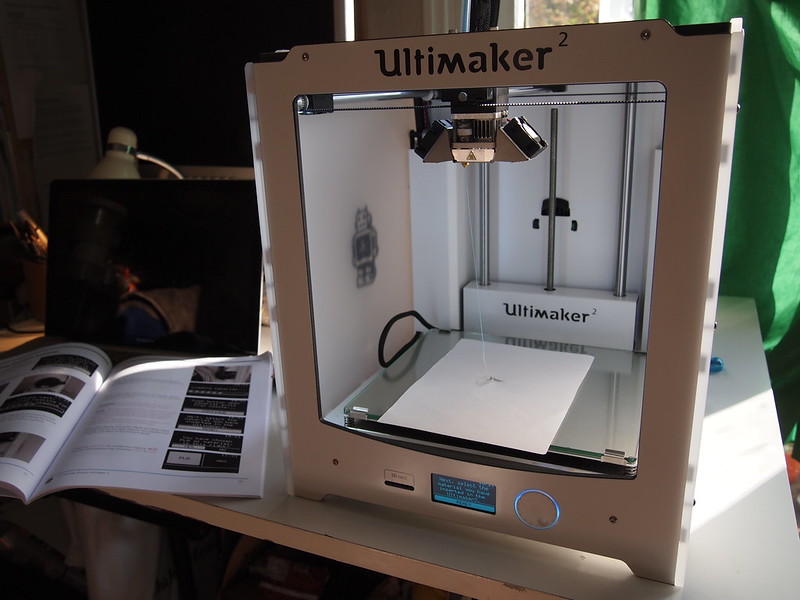
The first prints were all fine. I thought it was quite noisy though but we took it back to the iMakr engineers to check and they said it was normal. Perhaps this is down to my furniture all being quite hollow. I think we can live with the noise, which is like a whirring melon of sorts. When it returned from the engineers, the first print I did after that had some underextrusion, causing one of my prints to snap into half when I was removing it from the build plate.
Again, I'm no engineer, so it has been taking considerable time for me to really understand each part of the printer and fix what seem like minor issues... which then turn into many frustrated hours poking and tinkering with the machine. For example, I thought I had a nozzle problem but found out it was the filament feeder that was the issue and grinding the filament too tightly at the feeder.
Knurled wheel had begun to grind the filament...
After some confusion of whether I should try to adjust the tension or to change the temperature or speed, I determined that it might just be a physical blockage and that I had to remove the bowden tube to manually pull out the jammed filament with pliers. The logic behind not upping the speed is that if you have an existing blockage, sending more material down the pipe at a faster rate doesn't necessarily help the jam. I ended up having to go through the assembly manual and trawling the forums, wishing I had some calipers now to measure if my filament was INDEED 2.85mm as claimed or thicker in some parts and causing the jam, and falling into depression and demoralisation when I couldn't exert enough strength to pull the jammed filament out of the Bowden tube (George had to help me with this).
From left to right: “Yet Another Ultimaker 2 Feeder” by sfriedri on YouImagine (combination of |Robert| and Geeks’s Design), Ian Spring's Ultimaker 2 Feeder, |Robert|'s Ultimaker 2 Feeder with filament guide.
From looking around at different people's modified feeder systems and from playing with the Bowden tube, I've determined that the issue is that the filament could benefit from some straightening before entering the bowden tube. Furthermore, if the spring tension was easier to change without the tiny finicky allen key, this would be an improvement.
After fixing the jam I switched to white PLA and printing has resumed just fine and I made lots of tiny dollhouse cups as a quick test.
One might say that with a 3D printer you would never have to buy as many things again since you could print it in the convenience of your own home. But convenience? Oh yes, just give me a few hours while I print this spoon instead of going outside to a shop to buy one in a heartbeat. It is a slow and hard process of getting to know the machine bit by bit along the way. Well this week I became acquainted with the filament feeder. All I can say is that I was amazed that I managed to fix it all at the end without making anything explode.
LESSONS LEARNT THIS WEEK WITH THE UM2
- Underextrusion - could be either a nozzle jam or filament jam. To confirm if it is a filament jam, check whether the filament can be removed or reversed. If the filament cannot be removed then its a filament jam
- If its a nozzle jam, which might happen if switching between PLA and ABS (which melt at different temperatures), you can clear it using the Atomic method.
- If its a filament jam, remove the jammed filament from the feeder and Bowden tube. Remove Bowden tube by first removing tiny blue horseshoes and pressing down on the white tighteners while pulling bowden tubes out. Do this for both ends. Then remove the misbehaving filament from the tube with a pair of pliers and replace them all back. If warping or deformation of the Bowden tube has occurred (which seems likelier to happen on the feeder end), trim a bit off but with a very flat and straight razor cut across.
Now, if someone were to ask me, "Should I get a 3D printer?", my answer would be "Do you like fixing 3D printers? DO YOU??? DO YOU LIKE STRUGGLING WITH ALLEN KEYS AND PILERS FOR HOURS?" Let's just face it - it appears that maintenance and fixing is going to be a big part of having a 3D printer. I feel like a person who has stupidly moved into the top floor of an apartment block without a lift. "Why yes, I don't mind living on the top floor penthouse with no lift access, I don't mind getting a little more exercise every day or having to hauling up my boxes up and down all these painfully endless flights of stairs!"
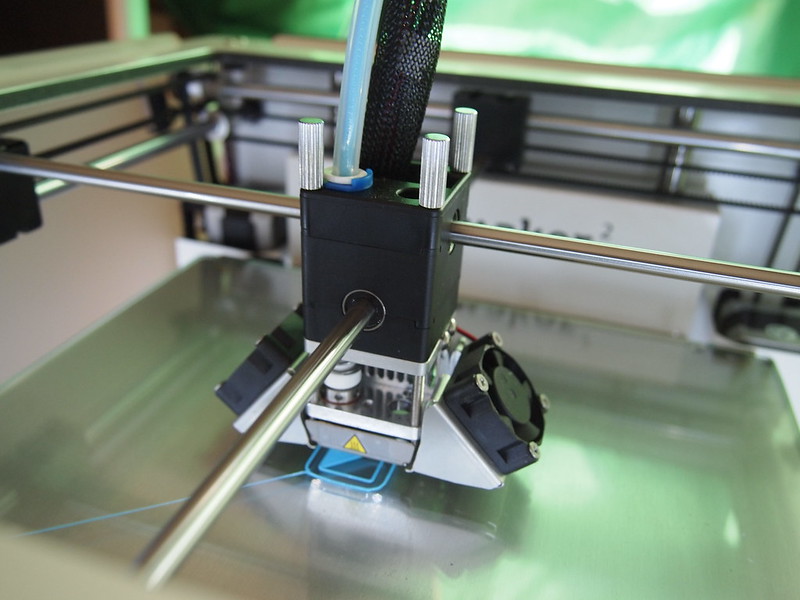
The first prints were all fine. I thought it was quite noisy though but we took it back to the iMakr engineers to check and they said it was normal. Perhaps this is down to my furniture all being quite hollow. I think we can live with the noise, which is like a whirring melon of sorts. When it returned from the engineers, the first print I did after that had some underextrusion, causing one of my prints to snap into half when I was removing it from the build plate.
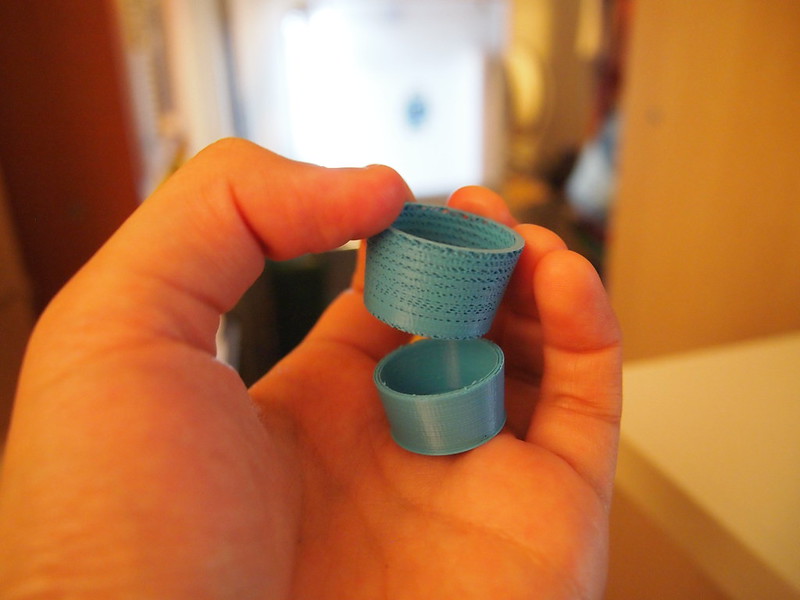
Again, I'm no engineer, so it has been taking considerable time for me to really understand each part of the printer and fix what seem like minor issues... which then turn into many frustrated hours poking and tinkering with the machine. For example, I thought I had a nozzle problem but found out it was the filament feeder that was the issue and grinding the filament too tightly at the feeder.
Knurled wheel had begun to grind the filament...
After some confusion of whether I should try to adjust the tension or to change the temperature or speed, I determined that it might just be a physical blockage and that I had to remove the bowden tube to manually pull out the jammed filament with pliers. The logic behind not upping the speed is that if you have an existing blockage, sending more material down the pipe at a faster rate doesn't necessarily help the jam. I ended up having to go through the assembly manual and trawling the forums, wishing I had some calipers now to measure if my filament was INDEED 2.85mm as claimed or thicker in some parts and causing the jam, and falling into depression and demoralisation when I couldn't exert enough strength to pull the jammed filament out of the Bowden tube (George had to help me with this).
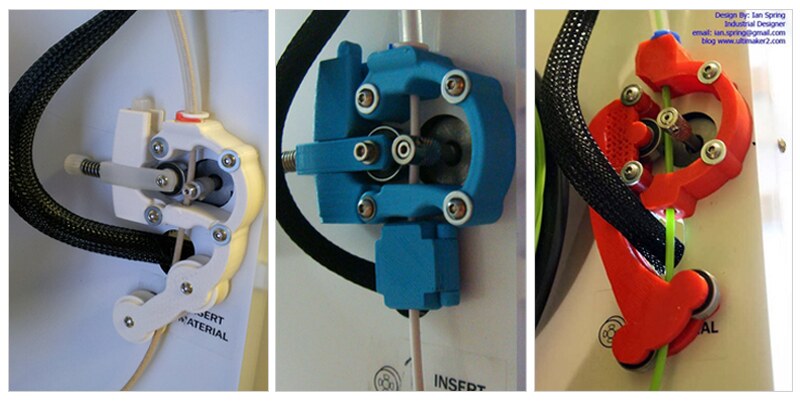
From left to right: “Yet Another Ultimaker 2 Feeder” by sfriedri on YouImagine (combination of |Robert| and Geeks’s Design), Ian Spring's Ultimaker 2 Feeder, |Robert|'s Ultimaker 2 Feeder with filament guide.
From looking around at different people's modified feeder systems and from playing with the Bowden tube, I've determined that the issue is that the filament could benefit from some straightening before entering the bowden tube. Furthermore, if the spring tension was easier to change without the tiny finicky allen key, this would be an improvement.
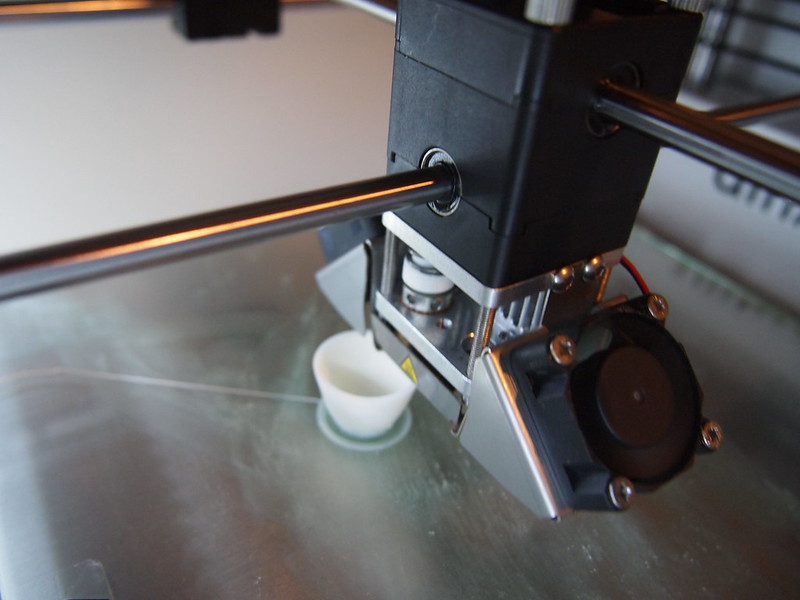
After fixing the jam I switched to white PLA and printing has resumed just fine and I made lots of tiny dollhouse cups as a quick test.
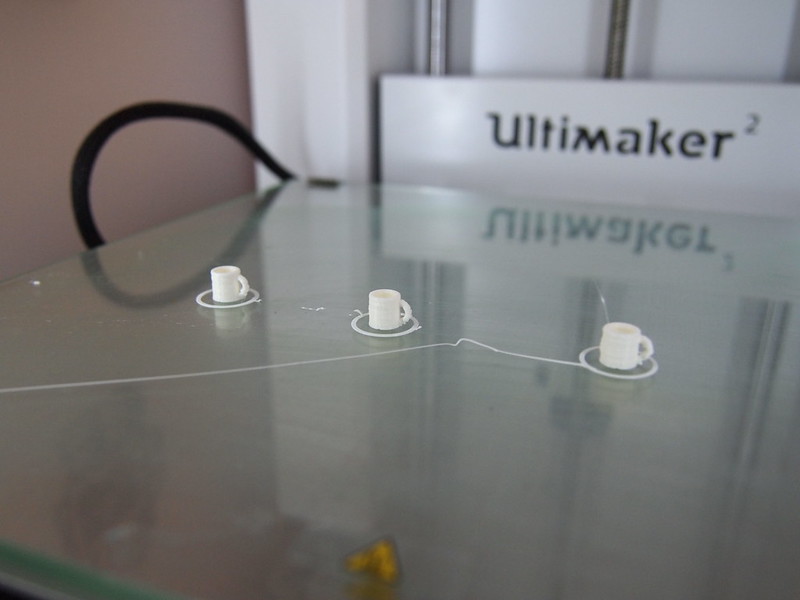
One might say that with a 3D printer you would never have to buy as many things again since you could print it in the convenience of your own home. But convenience? Oh yes, just give me a few hours while I print this spoon instead of going outside to a shop to buy one in a heartbeat. It is a slow and hard process of getting to know the machine bit by bit along the way. Well this week I became acquainted with the filament feeder. All I can say is that I was amazed that I managed to fix it all at the end without making anything explode.
LESSONS LEARNT THIS WEEK WITH THE UM2
UNDEREXTRUSION TROUBLESHOOTING:
- Underextrusion - could be either a nozzle jam or filament jam. To confirm if it is a filament jam, check whether the filament can be removed or reversed. If the filament cannot be removed then its a filament jam- If its a nozzle jam, which might happen if switching between PLA and ABS (which melt at different temperatures), you can clear it using the Atomic method.
- If its a filament jam, remove the jammed filament from the feeder and Bowden tube. Remove Bowden tube by first removing tiny blue horseshoes and pressing down on the white tighteners while pulling bowden tubes out. Do this for both ends. Then remove the misbehaving filament from the tube with a pair of pliers and replace them all back. If warping or deformation of the Bowden tube has occurred (which seems likelier to happen on the feeder end), trim a bit off but with a very flat and straight razor cut across.
Saturday, 1 November 2014
Growing Mushrooms, Moss and Lavender - Part II (1 year later)
About one year ago (See Part I) I attempted to grow some mushrooms, moss, and lavender. Nothing happened to the mushroom spawn or the moss for ages and I completely forgot about the mushroom bog roll under a box for almost a whole year, but the good news is that one year on they are actually still well and alive!
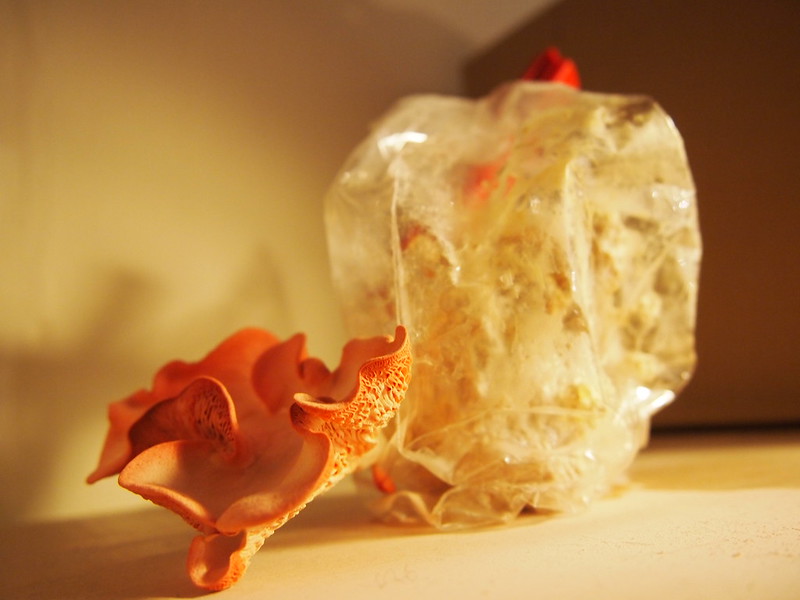
I used a bog roll as the growing media for some oyster mushroom spawn that I had bought online. It was done on the spur of the moment and not in a particularly sterile manner at the time. I hadn't looked under the box for months - this was because absolutely nothing happened for months and I had almost given up on it. Then I went away to Berlin for the summer, and came back 3 months later to SURPRISE OYSTER MUSHROOM. This one that bust out of the bog roll is hard as a shelf. I'm confused about the timeline or life cycle of an oyster mushroom now. I might have another go at this but this time maybe following the, um, growing instructions a bit more closely...
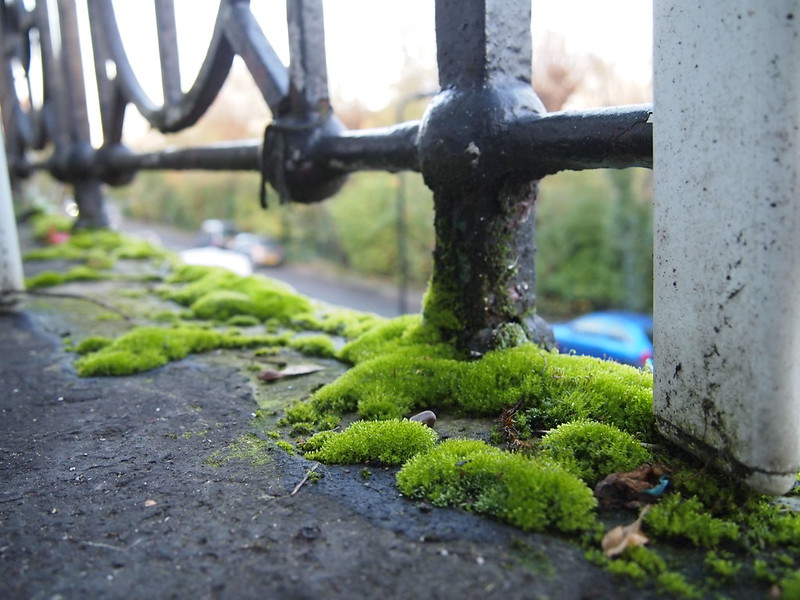
I'm glad to say that the moss population on our balcony has increased significantly over the summer.
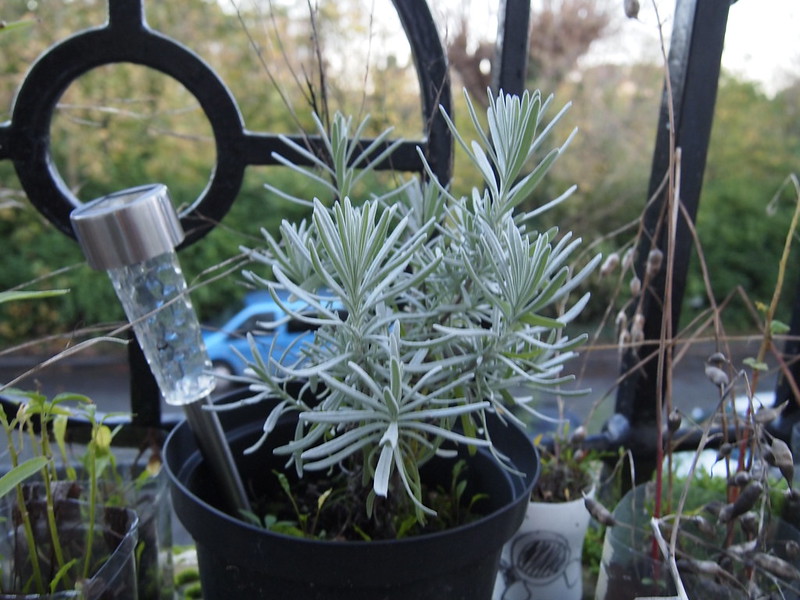
Georges II the Lavender Plant is still alive two years on! The secret has been to NOT GIVE THE PLANT ANY ATTENTION AT ALL. Lavender apparently just needs some rude ignoring and no fussing as overwatering kills lavender plants, which easily drown in too much water. I’m pretty pleased that by carefully ignoring it, it has thrived two years!
See also:
Nov 2013: Growing Mushrooms, Moss and Lavender - Part I
Growing Mushrooms - UNEXPECTED SUCCESS
I used a bog roll as the growing media for some oyster mushroom spawn that I had bought online. It was done on the spur of the moment and not in a particularly sterile manner at the time. I hadn't looked under the box for months - this was because absolutely nothing happened for months and I had almost given up on it. Then I went away to Berlin for the summer, and came back 3 months later to SURPRISE OYSTER MUSHROOM. This one that bust out of the bog roll is hard as a shelf. I'm confused about the timeline or life cycle of an oyster mushroom now. I might have another go at this but this time maybe following the, um, growing instructions a bit more closely...
Growing Moss - SUCCESS
I'm glad to say that the moss population on our balcony has increased significantly over the summer.
Growing Lavender - SUCCESS
Georges II the Lavender Plant is still alive two years on! The secret has been to NOT GIVE THE PLANT ANY ATTENTION AT ALL. Lavender apparently just needs some rude ignoring and no fussing as overwatering kills lavender plants, which easily drown in too much water. I’m pretty pleased that by carefully ignoring it, it has thrived two years!
See also:
Nov 2013: Growing Mushrooms, Moss and Lavender - Part I
Subscribe to:
Posts (Atom)