Saturday, 16 December 2017

A Tour of London's Historical Wetherspoons

Untitled

Wetherspoons! The smell of spilled ale, steak pie, salt and pepper, and red wine stains on the carpets! I've always liked the historical buildings in which Wetherspoon pubs are located, so for Boxing Day LAST YEAR I decided to design a tour of London's historical Wetherspoons! (Unfortunately I have only come around to writing out my guide NOW, and I'm in a different country, but still..)

In theory, a spoons day sounds like it would be an excellent boxing day out, but all of central London seems to shut down on Boxing Day so the pubs in the most central part of town are closed. So we had to make a visit to some of the pubs on the list on another occasion.

Untitled
Empty Central London.

Secondly, London is a pretty big town so any "cross-London" journey is going to involve a significant amount of time and energy spent walking or taking public transport.

Untitled
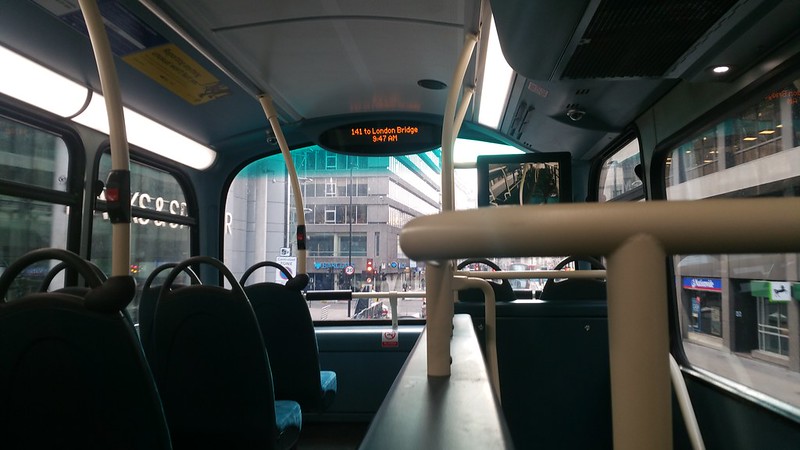
Hours and hours of Buses. Forever.

Finally, what follows is obviously going to be a day entirely centred around the endless consumption of ales and pub food, which starts off well and fine until you get to the fourth Wetherspoons of the day and will suddenly find yourself (and anyone else unfortunate enough to have done the route) having voluntarily sworn off going to any more pubs for possible for the next month.... (Or at least until the next weekend, when the wild pubbing can start all over again!)

Debbie's Historical Wetherspoons Tour

(Central and North London)


My selections were based upon the following simple three criteria:

IS IT HUGE?
IS IT HISTORIC?
IS IT EPIC?

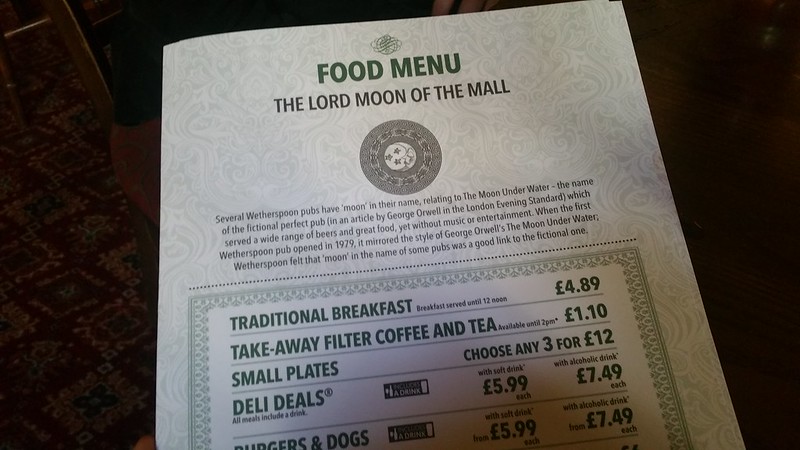
You'll have noticed that several Wetherspoon pubs have got 'moon' in their names. These all relate back to "The Moon Under Water" - the name of a fictional pub in an article by George Orwell, published in the London Evening Standard. This fictional pub was described as the perfect pub, serving a wide range of beers, extremely decent food, and yet curiously without any music or loud entertainment. So indeed the Wetherspoon pubs have been modelled after that idea of the ideal pub - a pub without loud music you have to shout over! Indeed, Tim Martin also felt that 'moon' was a good link for some of the pubs to have to the fictional one. Some required reading is the Orwell's "Moon Under Water".

Untitled

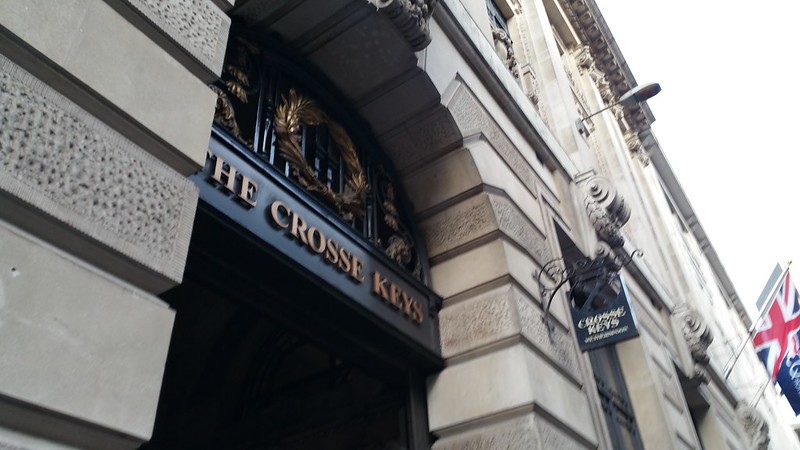
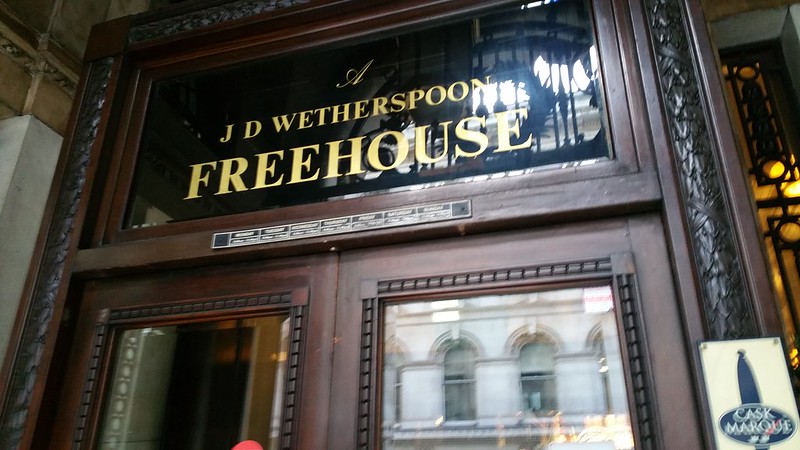
1. The Crosse Keys

9 Gracechurch St, London EC3V 0DR, UK

Untitled

Untitled

IS IT HUGE? - Tall ceilings. Said to have the MOST NUMBER of handpulls in any Spoons pub. 24 in total apparently.
IS IT HISTORIC? - It was first built as the Woolpack Hotel & buffet in 1899 and later
IS IT EPIC? - “Marbled columns, coffered ceilings a Victorian baroque facade and a drinking space large enough to house a whole fleet of Routemasters..."

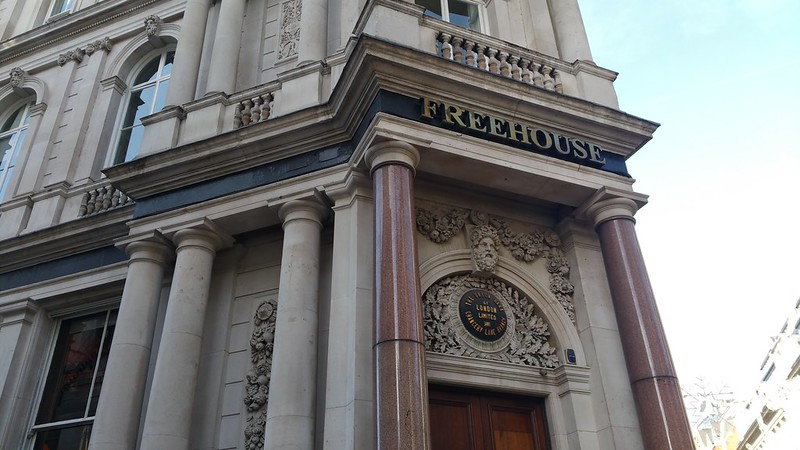
2. Knights Templar

95 Chancery Ln, London WC2A 1DT, UK

Untitled

IS IT HUGE? - A very high ceilinged bar.
IS IT HISTORIC? - The Knights Templar owned land on which Chancery Lane was built, along with this former Union Bank of London. Grade II Listed building. Its front railings are also listed! And it was in that Da Vinci Movie or something...
IS IT EPIC? - It has retained many decorative features such as the original scroll of the "union bank of London".

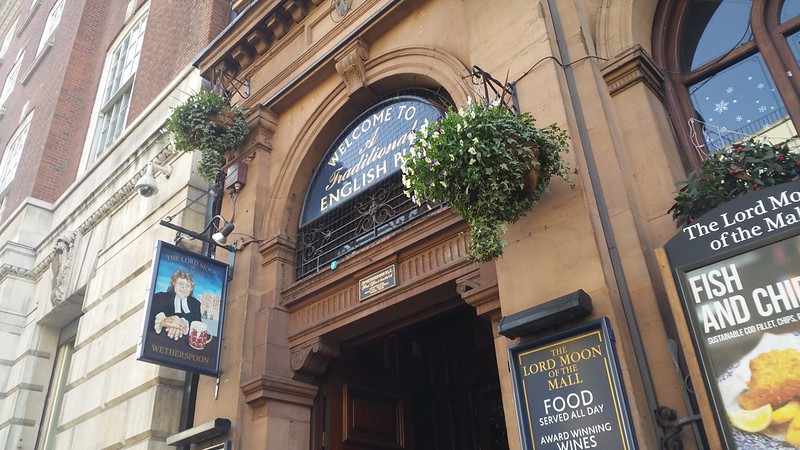
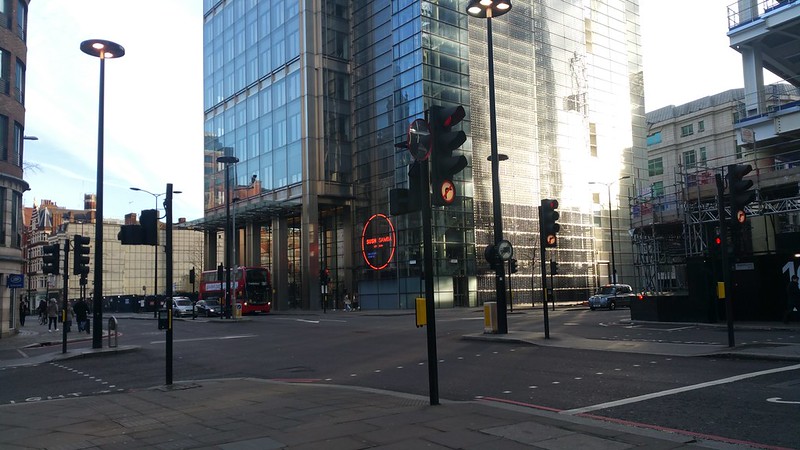
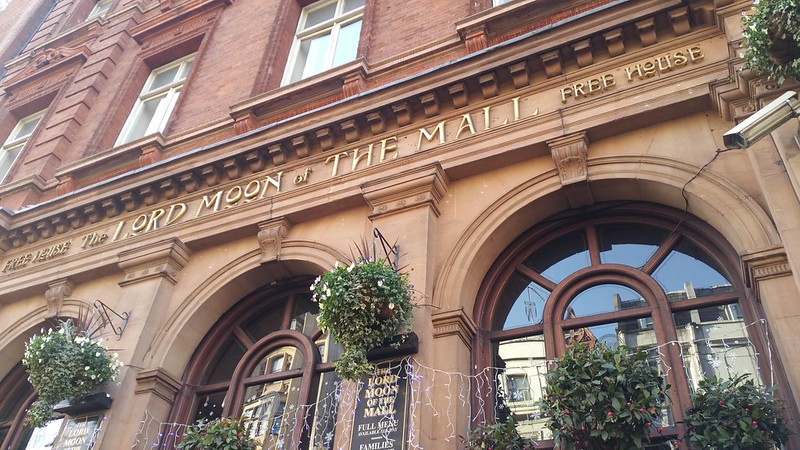
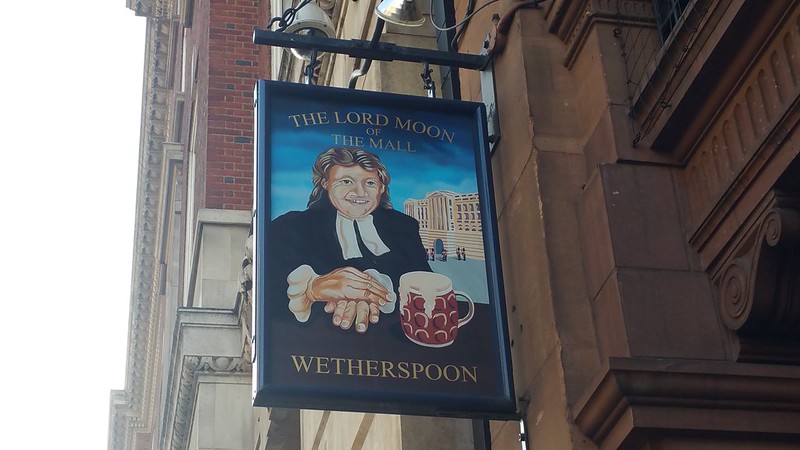
3. Lord Moon of the Mall

16-18 Whitehall, Westminster, London SW1A 2DY, UK

Untitled

Untitled

IS IT HUGE? - Huge and tall ceilinged
IS IT HISTORIC? - Former Cocks Biddulph Bank. Latterly Martins Bank. Then Barclays, closed 1992.
IS IT EPIC? - This is Spoons home turf – perhaps could be seen as its the Central London home. There’s a massive painting of Tim Martin in here. Also the pub sign has his face on it. Apparently this is often lauded in tour books for being “too grand”. People comment that its like “withdrawing a beer” instead of investing in a pint.

This place has rather more the vibe of a tourist trap than the earlier two (Knights Templar and Crosse Keys). Teeming with gaudy signs in multiple languages warning of pickpockets and thefts, its hard to

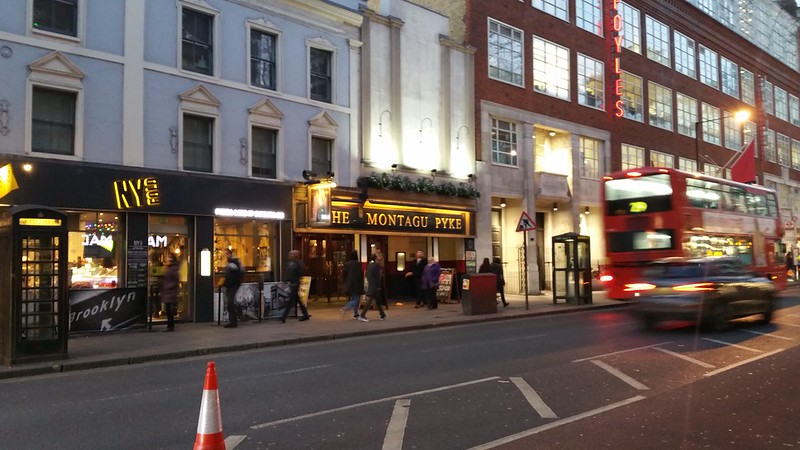
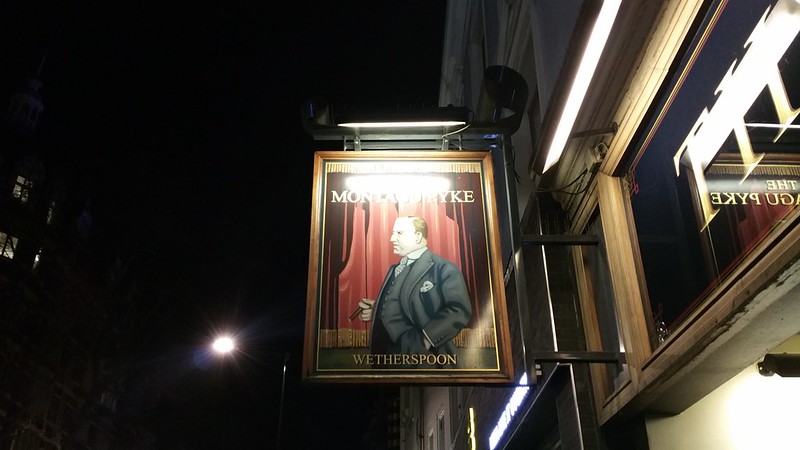
4. Montagu Pyke


Untitled

Untitled

Untitled

Untitled

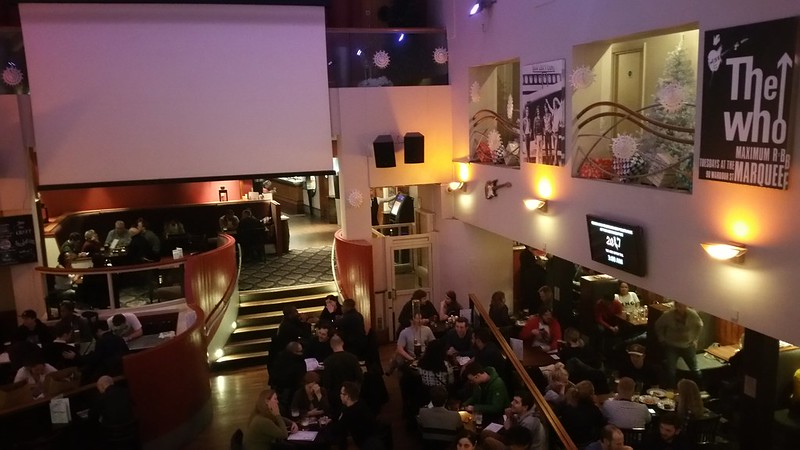
IS IT HUGE? - Huge old cinema
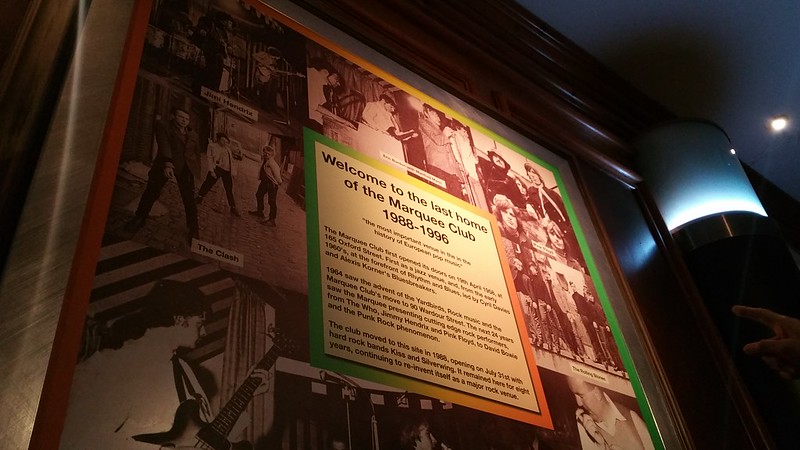
IS IT HISTORIC? - 1911 cinema and former Marquee Club venue
IS IT EPIC? - It feels squeezed in the middle of high street shops. From its description it was very promising, as most pubs do not have the benefit of a large interior area like this, however its current modern interior update doesn't seem to do the historic venue justice.

5. The Coronet


Untitled

Untitled

Untitled

Untitled

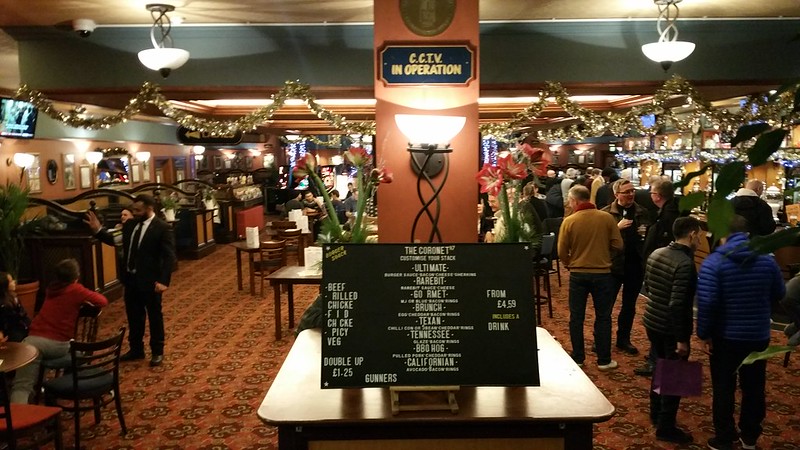
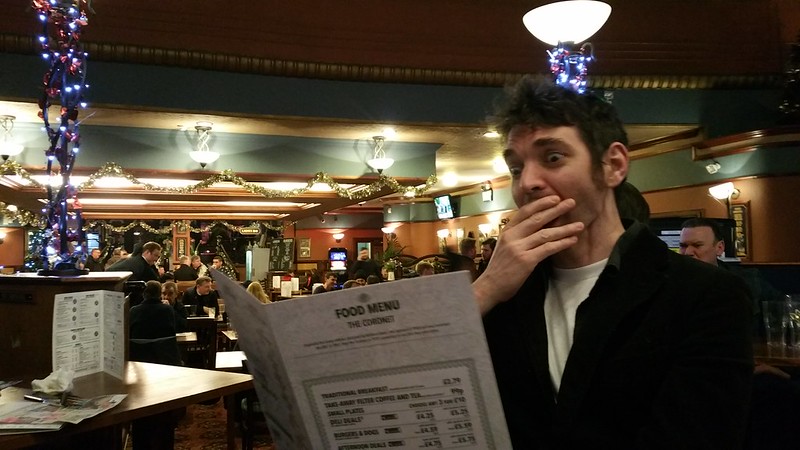
"WHAT? ITS THE SAME MENU AGAIN?"

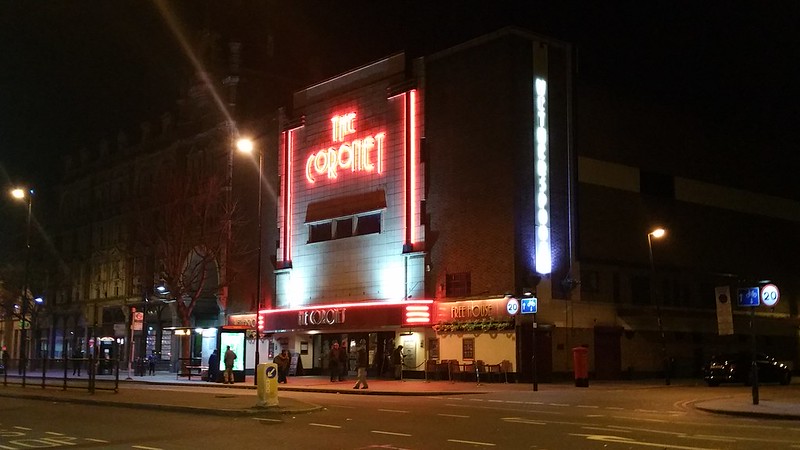
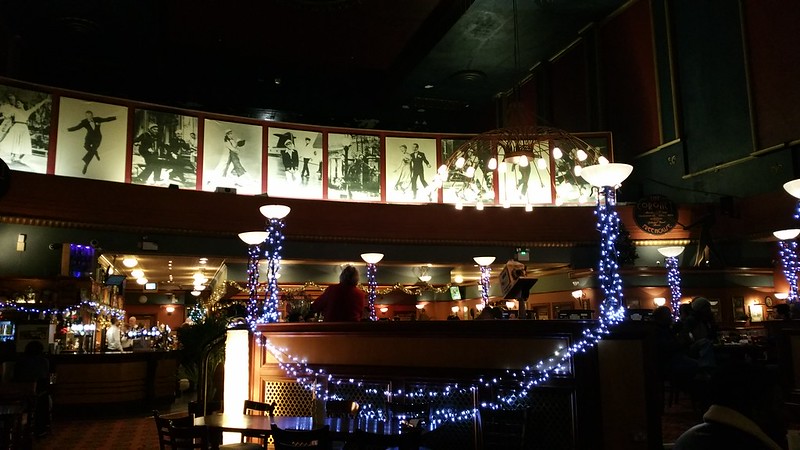
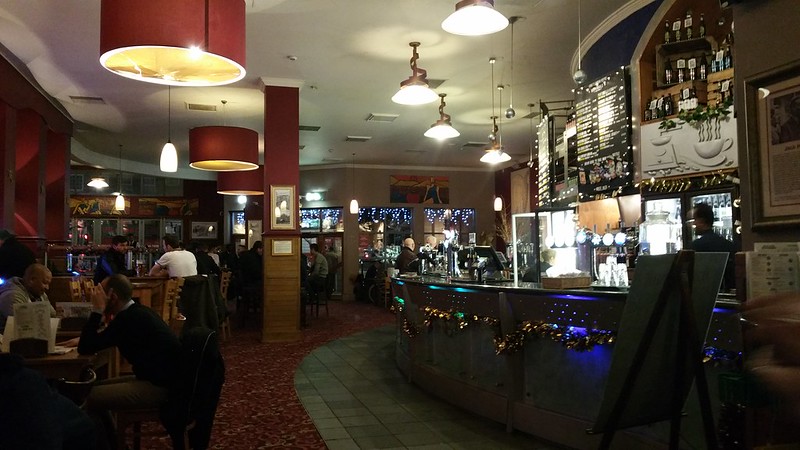
IS IT HUGE? - Huge old cinema
IS IT HISTORIC? - Former Savoy Cinema. Was renamed ABC in 1962, then Coronet in 1979; last screened a film in 1983.
IS IT EPIC? - Appears on many highlights lists of spoon pubs in London for its grandeur and interiors

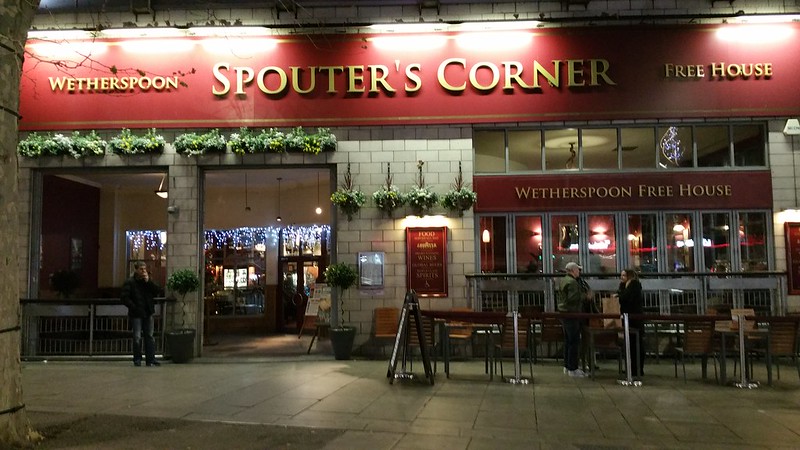
6. Spouter's Corner


Untitled

Untitled

Untitled

Untitled

IS IT HUGE? - No
IS IT HISTORIC? - Part of the Hollywood Green leisure complex, that corner of the High Road was called Spouter's Corner in the past for its popularity for free speech, or "spouting" in a similar style to Speaker's Corner at Hyde Park. Open air meetings were held until the 1950s and it was also an assembly point for hiring workers.
IS IT EPIC? - Honestly, I only added this one as a palette cleanser and because it was pretty close to home.


#LATERGRAM
I hope it doesn't confuse people that I've decided to backdate my posts even though I'm writing this in Dec 2017 - but it does make more sense since I've had such a huge number of posts to push out and I like to think of this as a #latergram

Sunday, 17 September 2017

Singaporean Landscapes: Cut-and-paste greenery

With the opening of After The Fall at National Museum of Singapore in a few days time, I thought I should post up a series of entries about the design process of the holograms that I've been working on.

When I began thinking of my desired aesthetics for an imagined "Singaporean landscape", I can't think of anything more apt than clean textures and hard cut lines in the 3D models; that impression of some master designer's wildly clicking Ctrl-V all over the landscape. Bizarrely hard contrasts between forms - such as this example of the generic industrial property constructed within a hair's width of the highly decorative chinese temple:


View from the Bedok Park Connector: Taoist Federation Building meets Industrial Carpark on Bedok North Ave 4
(Photo: Debbie Ding)

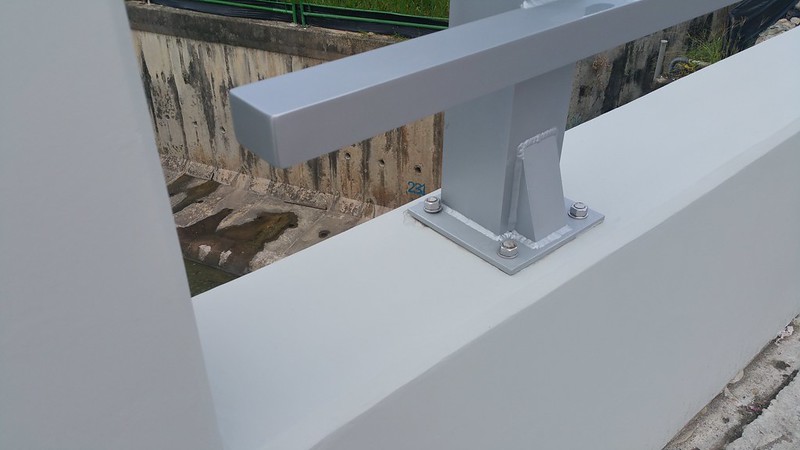
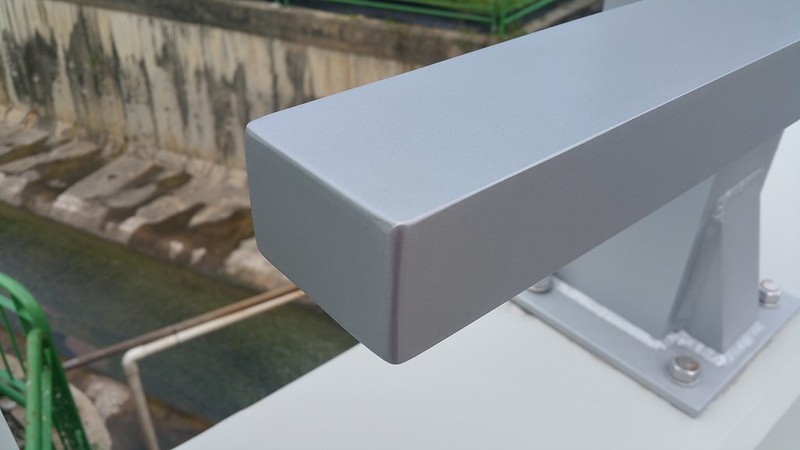
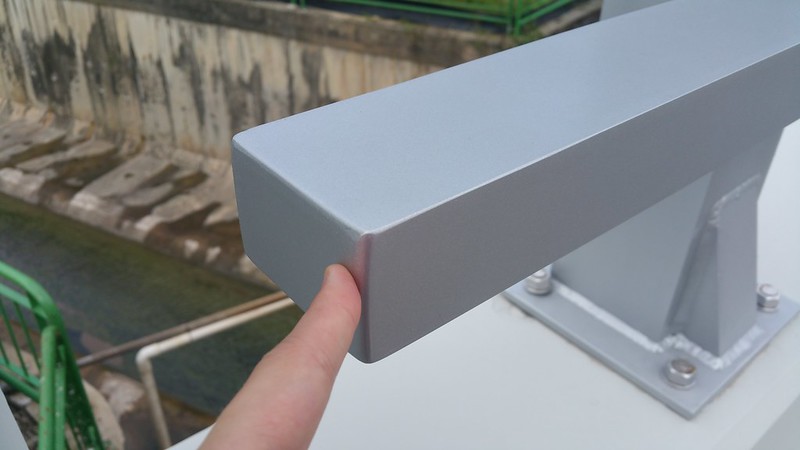
Or another example is this pristine specimen of a concrete and metal crash barrier that I encountered the other day whilst out walking around Bedok - so blindingly white and perfectly new that it may as well have been a 3D render:

20170827_101146

20170827_101150

20170827_101153

ITS REAL


For efficiency, the top tip would be to cut away any faces/vertices that do not ever appear within the camera view so no processing power will be wasted on that information that you will never get to see within the final render. So for a very tall tree, you can simply cut off the tree's crown as long as you won't see it and you won't need the shadow of the leaves to impact on the overall scene.


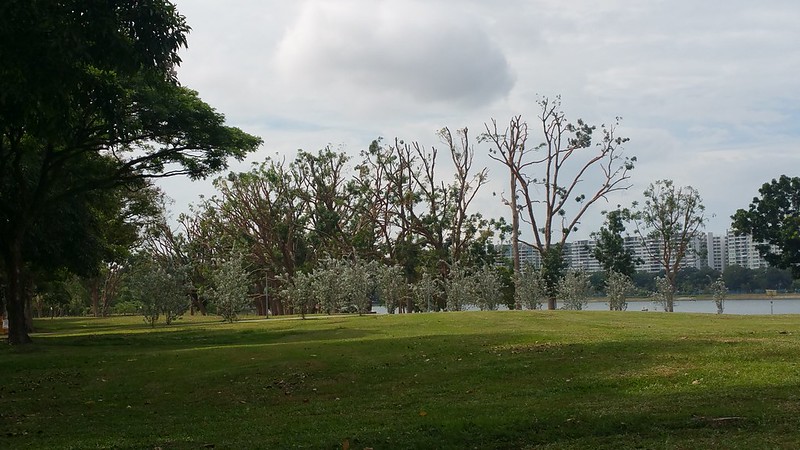
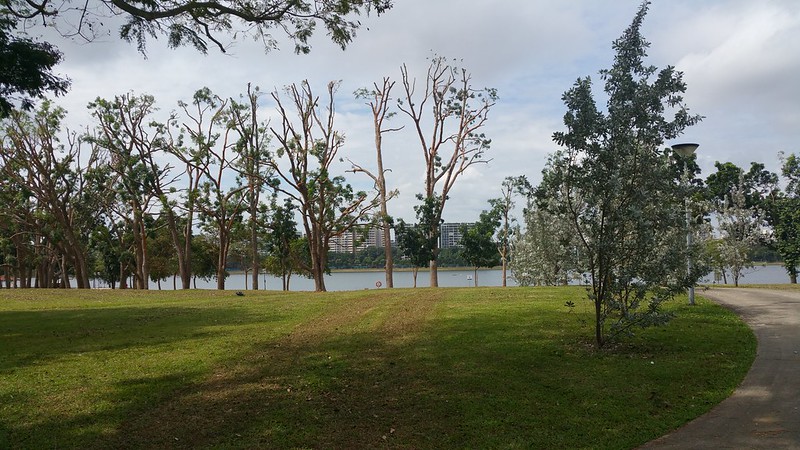
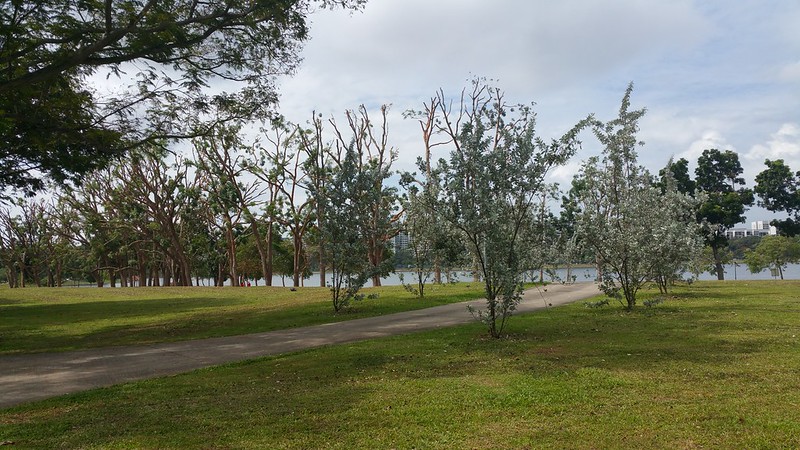
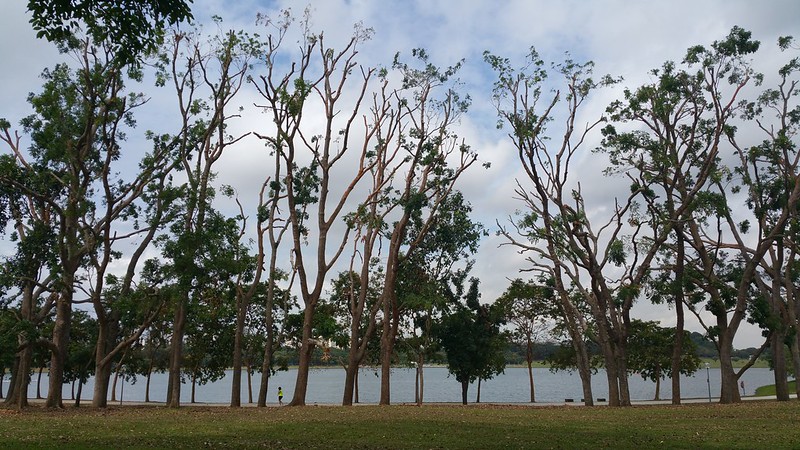
If you did it right, you'll be able to dramatically reduce overall file size and render time. But the visual outcome is in the file you'll also see a lot of hard cuts in the virtual greenery... And whilst I was working in the isolation of my flat in London a few months ago when this project first began I was actually worried that I might have overdid things with my.. er... overzealous cutting-and-pasting. But I need not have worried! For upon returning to Singapore, I was gratified to see countless examples of this highly efficient cut-and-paste greenery at work:

20170827_104433

Recently the trees around Bedok Reservoir seem to have been subjected to a round of very fastidious tree pruning which look like a model picture of the cut-and-paste public greenery that was in my head. A cutting exercise facilitated no doubt by what they describe as more cutting-edge tree monitoring tech...

20170827_104545

20170827_104532

20170827_104730

Sunday, 3 September 2017

Goodbye Mac, Hello Windows: Windows alternatives to Spotlight, Quick-look and other Mac interface staples.


This year my 5 year old Macbook Pro had finally reached the point where its old processor seemed completely unable to handle the 3D work I needed to do for a project, so it was time to make the big migration to a new desktop replacement... and a new OS!... Because after an entire adult life of using Mac - I've switched to Windows!!!

I've been really disappointed by the blandly uninspiring offerings for the 2016/2017 Macbook Pro. In my opinion, Apple has failed to produce a reasonable 15" that can serve as a decent desktop replacement. What they've made instead is really just a bigger Macbook Air. There have only been minor improvements to the processor, RAM is still capped at 16GB, the touch bar seems to have inflated the overall machine cost, and in order to reduce the thickness and weight of the machine, the USB ports and SD Card reader have been taken out, despite the fact that a majority of digital camera users still currently use SD cards and that whole argument about moving towards a future in which we'll all be transferring huge (RAW or otherwise) files wirelessly is simply not yet feasible for most situations that I find myself in!

After adding in the cost of other usual screen/RAM upgrades and extended international warranty that one would need to get for a long-term desktop replacement, the average Macbook Pro buyer in 2017 would have to pay close to or in excess of 4000SGD for a 15" desktop replacement that lacks some of the most basic features you would expect of any decent portable desktop replacement. I mean, you're telling me that after spending so much on a new machine, I'll still have to buy a whole bunch of frustratingly expensive peripherals and dongles to replace the complete lack of ports and card readers that come with every single other PC laptop on the market????

BYE MAC... (Image via GIPHY)


With so many compelling reasons to jump ship to PC, I spent some weeks formulating a new Windows PC criteria list. (Much of this was compiled with the help of George aka PC FAN BOY). In case it might be useful to other Mac users thinking of switching, this is what my list looked like:

DBBD's Specs list for a 15" Windows PC Desktop Replacement (written in May 2017):

Processor: 7th gen Kabylake [The newest at that point of time]
RAM Upgradability: 32GB
Graphics Card: At least GTX 1060/1070/1080 ["VR Ready"]
Screen resolution: 4K
Screen bezel: As small as possible [aesthetic preference]
SD Card Reader: Required
Fan: Adjustable speeds / Should have option for silent mode
Weight: Below 2.5kg (my Mid-2012 Macbook Pro 15" was 2.56kg not counting the charger and this was back-breaking)
Thickness: Below 3cm
Design: Shouldn't look overly aggro or like a monstrous tank [Ruling out Alienware and MSI...]
USB: The more USB 3.0 the merrier
Thunderbolt port: Required
HDMI Port: Required
Warranty: Two Years International [A Basic requirement!]

[There's the term VR Ready which means the machine is capable of a decent performance with VR headsets such as Oculus and Hive. For this, I've used the benchmark of recommended system requirements, not minimum specifications, although these specifications are always changing]

[One might also sagely ask: since I am already switching, WHY NOT LINUX? and the answer is simply that I DONT HAVE THE TIME to spend weeks setting up Linux, deciphering my way around Linux and posting endless help messages on Linux forums which is probably what will happen if I try to switch to Linux.]

What I ended up getting based on my spec list:


Gigabyte Aero P65W
Processor: 7th gen Kabylake Intel® Core™ i7-7700HQ
RAM: UPGRADED TO 32GB
Graphics Card: GTX 1060
Screen resolution: 4K
Screen bezel: 5mm
SD Card Reader: YES
Fan: Adjustable / Silent Mode
Weight: 2.1KG + 0.5KG Charger
Thickness: 1.9CM
Design: SLEEK
USB: USB 3.0 x 3
Thunderbolt port: YES
HDMI Port: YES
Warranty: Two Years International

A compact, light 15" desktop replacement gaming laptop with one of the smallest bezel I've ever seen on a Windows laptop. The screen and colour looks excellent to me, and I'm so pleased to have a laptop with variable fan settings for once, and the keyboard can be set to conduct a light show performance in a dizzying array of LED colours (it can also be easily turned off when you get annoyed with the all-blinking keyboard feature). But because the screen bezel is so tiny the webcam for this is located below so by default you'll always be pictured chin-first (FATFACE) when the unusually low webcam turns on. But this doesn't bother me too much though because in every other way this laptop basically meets all the specifications that I need for my work.


CONS: GET READY FOR UNUSUAL WEBCAM ANGLES....
PROS: GET READY FOR UNUSUAL WEBCAM ANGLES!!!!

Price in Mid 2017: 2899 SGD (3049 SGD with RAM upgrade)


Transitioning from Mac to Windows: Alternatives to Spotlight, Quick-look and other Mac interface staples on Windows


Besides the usual issues of getting used to a new keyboard for speed touch-typing, the transition from Mac to Windows has been pretty smooth. There are a couple of features which Windows doesn't seem to have a default solution to, however for every single problem that presents itself, there are probably a half-dozen free ways to accomplish the same task...

1. Local Search / Quick File Launcher Replacement


Mac users will probably find that Windows 10's default File Explorer is unacceptably slow and unable to find any files as efficiently as Mac's Finder/Spotlight can. Could this be an indexing problem? Is the File Explorer slow because it is pointlessly looking for network folders which it can't find? I honestly don't know what causes Windows 10's File Explorer to be so slow. Fortunately, the solution is simply to use a free indexing tool called Everything which indexes contents and works as a much faster local file search tool. From within Everything, you can indeed find everything on your computer instantly. Used together with Wox, which is a launcher very similar to Mac's Spotlight, this basically does the job.

Wox's default hot-key is Alt-space and you can theme Wox with different colours/fonts and its easy to add or write additional plugins to extend the function of the quick launcher. With different prefixes you can quickly search different things, for example "g anything" will google search for "anything", "wiki anything" will search wikipedia for "anything", and #000 will show the hex colour #000 (Black).

2. Quick-Look Replacement - Seer


I googled to find out when the Quick-Look was first introduced and it says that it was first rolled out in 2007. That means I may have had 10 years of impulsively hitting the space-bar when I want to see a larger preview of an image, and let me tell you its hard to stop a habit like that. The same way you might launch yourself into a browser today and find yourself inexplicably typing in the first few letters Y O U T U B E for absolutely no reason at all. Ah, muscle memory.

It was a major disappointment to find that hitting the space-bar did absolutely nothing on Windows at first - I tried to ask George to tell me how to enable any kind of Quick-look feature on windows only to find out that the concept of Quick-look basically does not exist in Windows. For a moment there, this almost made me doubt whether switching to Windows 10 was a worthwhile investment of my time to get familiar with Windows. There you have Windows 10's slow and completely unintuitive and cluttered File explorer interface and I could gripe about it all day. But one has to be objective about things and the good thing is that so very often there will be a free tool that does exactly what I want the Windows PC to do - a different file launcher, a different previewer - you just need to find it or make it yourself.

A quick fix to this entire Quick-Look problem is simply to install Seer, which provides the much needed Quick-Look feature that allows you to preview images in File Explorer quickly by hitting the space-bar.

3. Skitch Replacement - Monosnap


For years, I've probably used Skitch on a daily basis to annotate images for work purposes before sending them in email, but sadly Skitch was ruined by Evernote (Evernote bought up Skitch in 2011, almost seemingly just so they could force the discontinuation of the development of this excellent project. Because of this terrible behaviour on Evernote's part, I refuse to use Evernote. Evernote, suffer the wrath of the 10 million disgruntled Skitch users!).

Fortunately there is no lack of alternatives that have come into the market since, especially for the Windows platform. There are many Skitch-alternatives and after trying a few options I settled on using Monosnapfor all my quick screenshot and annotation needs. Monosnapis very similar to Skitch - you can draw arrows, lines and then quickly drag and drop the file into an email or file folder. Another super important feature is that you can also blur out parts of images quickly!

I set all *.png files to open in Monosnap by default, so that by default all screenshot PNG files would open in Monosnap, ready to be instantly annotated. Super handy. Other similar alternatives include Greenshot and Lightshot. I just happen to like Monosnap's interface the most out of them all.

4. Web Browser - Microsoft Edge


Recently, after having created a monster of a webpage involving about 53 animated gifs each about 1-6MB huge, I realised that Chrome was suffering and lagging. Although I wasn't intending to upload that page in that form, I decided to check how the same page performed in every single browser on my computer and came across Microsoft Edge which I had never used or even seen before. Not at all to be confused with Internet Explorer, Microsoft Edge is the new Windows 10 browser and e-book reader. I was really surprised to find that my horrifying web creation did not lag at all in Edge!

Microsoft Edge was first released in 2015 and obviously for a new browser it lacks the same kind of extensiblity that Chrome and Firefox have with the multitude of plugins available. Nevertheless, when I look online and see the general complaints of Edge's earlier incarnations not having a browsing history (it now does) and not having a fullscreen mode (it now does), it seems like it has only been improving since it was introduced.

Apparently for things like Google's Octane and a lot of other javascript engine benchmark tests, Edge actually outperforms Chrome. And clearly it performs much better on my computer for graphics and page loading times as compared to Chrome, Firefox and IE. Just so you know...

Thursday, 31 August 2017

A Warehouse Sale in Singapore: the mass production of freedom tshirts

Recently the parents took me to see one of the huge Robinsons warehouse sales in Singapore out at Expo, where I encountered vast mountains of GIORDANO shirts like never before. For the uninitiated, in Singapore Giordano has long-established itself as the main purveyors of generic low-cost casual wear - with an outlet in practically every other HDB centre. Even I probably have had a few Giordano basics in my childhood wardrobe, because Giordano is so ubiquitous that people sometimes even think they must be a Singaporean company (they're actually from HK). I don't know who designs these shirts, but if you just want the cheapest possible basic cotton shirt and have no care for fashion or aesthetics or things with meaningful messages on them, then this is the place for you. You know, a $5 tshirt that basically says "I absolutely do not care whether the words on my shirt makes any sense at all in any context whatsoever because I do not care about the useless practice of wearing shirts to express my individuality and personality".

[This is also not to be mistaken for Things which are so bad until they're good again. No, this is not exciting, trendy, or radical clothing. No, these are just generic words printed onto a generic shirt and then sold in staggeringly vast quantities in Singapore]

Now the strange thing about all these Giordano shirts was that... THEY WERE ALL FREEDOM THEMED! Yes, a mountain of FREEDOM shirts in Singapore.

Here are a few of them:

20170902_103934

OKAY... WE ARE FREE TO CHOOSE...
BUT WHY ARE ALL THOSE PEOPLE RUNNING?
WHAT ARE THEY RUNNING FROM???

20170902_103923

OK... I'LL TRY TO KEEP CALM...
BUT..... IS THERE REASON NOT TO BE CALM?
IS IT RELATED TO THE "STAYING FREE" PART???

20170902_103914

I DON't KNOW GIORDANO, WHY DON'T YOU TELL ME?
OR AM I SUPPOSED TO ASK THESE FISHIES?
DO THE FISHIES KNOW FREEDOM?
WHAT IS FREEDOM???

Maybe they had a meeting and then they thought about how Singapore and Singaporeans are always concerned about freedom. Maybe they were chortling to themselves as they designed it, "Oh these Singaporeans! They are so going to love our insightful and subtle commentary on the state of freedom and free speech in Singapore in our new line of freedom shirts!". Or who knows, maybe the designing of the shirts was done by a hapless designer being forced by the dollar to churn out more and more nonsensical mass produced tshirt designs which the designer knows will never be thought of or valued as a credible creative product and as the poor designer sheds a tear for the demise of his or her creative integrity he or she types into Illustrator: WHAT DOES FREEDOM MEAN?

I wish I had taken more pictures of all of the designs but the Dingfather pulled me away and told me to stop mocking the freedom shirts by laughing so loudly.

Saturday, 19 August 2017

Blender Cycles: 12 Ways to Reduce Render Time

Recently my challenge was to produce 2000 x 3 frames for the production of three holograms. At 50 minutes per frame, 6000 frames would have taken a frightful 208.333333 days to render out on one already relatively speedy laptop. On the slowest mechanised computating potato in the household (5+ year old Macbook Pro), it would have taken several hours. But the real issue was not the complexity of the scene, but the way in which I had initially constructed the scene, and the necessary render settings.

After several weeks of editing (and frantically googling "HOW TO REDUCE RENDER TIME"), here is a compilation of ways that I used to reduce my render time (CPU) for a single frame from a horrible 50 minutes to 1-2 minutes. Its not an exhaustive list, but I thought it would be useful to WRITE IT ALL DOWN NOW in case the Future Debbie completely forgets everything after the hard slog of trial and error of the last few weeks..

1. Duplicate Linked Object Instances the right way


This may seem pretty obvious but I think it needs to be on the top of every list. The right shortcut to duplicate an instance of an object is ALT-D not SHIFT-D. SHIFT-D produces a completely new object with no reference back to the data of the original object. A linked object shares the same object data, so any edits you make to the first object will make all the other linked objects change as well. When you're in a hurry it is easy to accidentally type Shift-D instead of Alt-D, but this has the potential to make a serious impact on render time.

2. Link Object Data


Let's say you completely can't recall if you used Shift-D or Alt-D to duplicate your objects. If you go to Mesh you'll be able to see how many linked objects are currently using the same data. If your mesh is unique and unlinked, first select what is going to be the master, then all the other objects you want to have using its data, and press Ctrl-L whilst the mouse is over the 3D view. You'll get the "Make Links" dropdown menu and you should select Object Data to link the objects. Other links for materials, groups, etc can also be made using this shortcut.


Note that if for some reason you do accidentally select different objects which aren't at all similar, note that all the latter objects will be changed to have the object data of the master object anyway...


In general, I personally found it useful to assign my materials really crazy colours in the viewport so that I could see at a glance which objects were the same and which were not.

3. Clamp Direct and Indirect


Usually you end up turning up the samples for a scene because there are too many 'fireflies' and noise, but clamping values can quickly remove these stray white dots which appear on the render. Clamping sets the very lightest (brightest) samples to a maximum value so it removes those stray white fireflies, but in the process, it will reduce the bright "pop" or light sheen that you might have wanted to achieve with certain glossy materials.

If you set Clamp too low, it will also cause the ENTIRE scene to be too dark/dimly lit, especially if you are using HDR for Environmental Lighting, so don't set the Clamp too low. The general advice is to start from a high number like about 10 and then work your way down to see what works for your scene. I was able to set Clamp Direct to about 4 and Clamp Indirect to about 6 and still achieve acceptable results. As for the overall "dimming" effect the Clamp will have on the scene, you can simply increase scene brightness through the compositor with a Color Balance node, or you can simply do it in post.

4. Subdivision surface
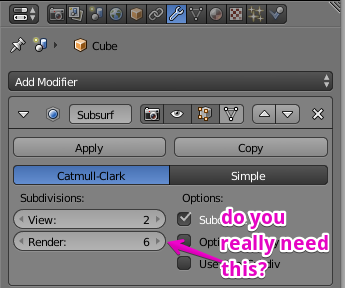


Subdivision surface is a modifier commonly used to create a smooth surface mesh from a blocky linear polygon mesh. It is done by splitting up the faces of the mesh into even smaller faces in a way that gives it a smooth appearance.

It is worth checking if you have stupidly set a subdivision surface of VERY MANY iterations for something incredibly trivial, tiny but also incidentally heavily duplicated in the scene...

5. Decimate


Did you subdivide your terrain into unwisely tiny bits and then handsculpt it with a 5px clay brush?? If there is complex modelling or you've applied Subdivision Surface to a mesh and are now regretting it, you can undo your CPU-killing subdiv-happy ways by decimating the meshes that you don't need smoothing on! Add the Decimate modifier to reduce number of faces.

6. Simplify


Let's say you're just rendering a preview for yourself and its not the final render. You can quickly set the global max Subdivision Surface and Child Particle number here under Scene > Simplify. Just remember to uncheck the Simplify box when you're producing the final render.

7. Delete unnecessary terrain


Set up Blender so that you can see several angles of your scene at the same time, along with the timeline if you need to scrub through it quickly. Go into Edit mode (Wireframe) and highlight the excess terrain that never appears in Camera view for the entire timeline using either B (to draw a box) or C (to paint it with a circular brush). Make sure you're viewing in the Wireframe mode though, because if you're viewing in Solid you'll only be able to select the vertices that you can see, rather than all the vertices in that area regardless of whether you can see them or not.

The most handy shortcuts in 3D view are the 0 and 7 button:
0 is Camera View
7 is Top view
5 to toggle between Perspective view and Orthographic view


The resultant landscape will look a bit weird like this but you'll save time not rendering all the bits. But do keep the bits which you'll need for the light bouncing off to produce a realistic scene.

8. CPU/GPU Compute and Tile Size
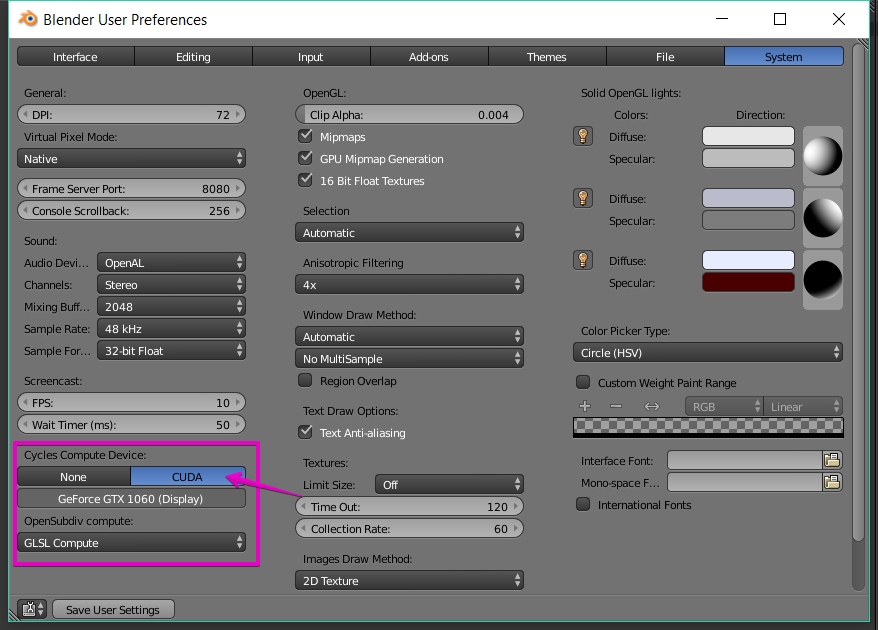


If you have a Nvidia graphics card, you'll still need to enable it in Blender's User Preferences in order to use GPU, which can drastically cut down your render time. When GPU works, its like magic. GPU can be dramatically faster than CPU but is also limited by the total amount of VRAM on the card - so once it hits that limit the rendering process will simply fail (memory error). Also I had to dramatically rein in my expectations - I have always insisted on using desktop replacement laptops rather than a desktop for portability (especially for my kind of work) - but one has to consider that laptop GPUs generally aren't as powerful as the ones in desktop GPUs in terms of VRAM, No. of CUDA cores, and overall speed.


It is generally said that the tile size should either be a perfect squares or factors (ie: divisible fraction) of the final resolution (having smaller bits of tiles left over is wasteful) but I think a lot more testing would be required to determine for the type of scene and type of CPU/GPU. Generally, if you reduce tile size too small, it incurs more overheads of switching between tiles. You should experiment with the numbers and see what works for you...

What worked for my scenes (Intel Core i7-7700HQ @ 2.80GHz / Nvidia GeForce GTX 1060 6 GB GDDR5):
For CPU an ideal Tile size seems to be around 16x16 or 32x32
For GPU an ideal Tile size seems to be 312x312

9. Number of AA Samples / Progressive Refine


The number of AA (Anti Aliasing) samples will increase render time exponentially, and this was largely why my first renders were taking 50 MINUTES PER FRAME even on the best laptop in the entire household! How many samples are enough samples? How do you find out how many samples are good enough for you, visually?

Under Performance, there's an option for Progressive Refine which will progressively show you the overall image at each sampling level. It can be slower to have to complete the entire image together but you can also stop it when you think the image is good enough. Its useful to eyeball it until you find out what number of samples you are happy with, then just use that number and uncheck progressive refine so it will be faster.

10. Resolution, Output File Location, and Output Quality
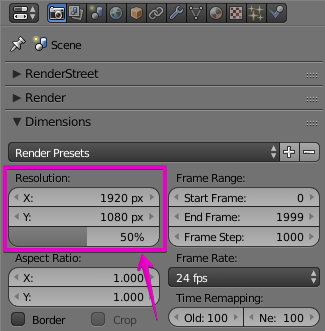


When you "double" the size of the image, you're actually making it four times as large and your image will take 4 times the CPU/GPU to compute! When making a preview and not the final render, you can set resolution to 50%. But don't forget to uncheck it when you are doing the final render!!! (ARGH!!!)
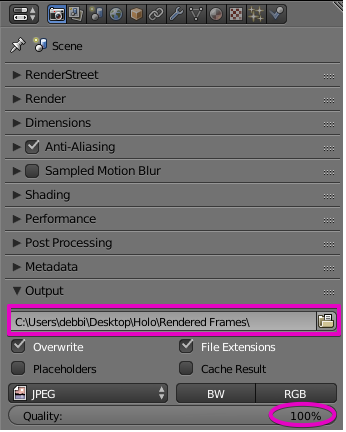


Make sure that you have set the correct Output file location. If you are opening the blend file for the first time on a new computer, MAKE SURE YOU HAVE RESET THIS. Blender does this thing where it doesn't tell you the output folder/drive doesn't exist - it will happily render but only tell you at the end of the process that it had no place to save the file.

Below that there's also the compression/quality setting for it. For a preview you can set it lower but remember to set it back to 100% for the final render.

11. Selective Render / Animated Render Border


Whilst in Camera view (Shortcut Num-0) within 3D view, if you use the shortcut CTRL-B, you can demarcate the "Selective Render" border (which appears as a red dotted line) in camera view. To release this Selective Render Border, its CTRL-ALT-B.

Ray Mairlot's extremely useful Animated Render Border allows you to selective render an object moving through a scene, or to even create an animated border that can be keyframed.

When using this add-on, the final output is a frame that will still be the size of the entire render resolution, but only the selective render area will have an image and the rest will be alpha transparent.

12. Use a Render Farm


Ok so after I shaved scores of minutes off the render time to 2 minutes per full resolution frame, I realised that 2 minutes x 6000 = 8.33333333 days - and that was 8.33333333 days that I certainly did not have! There are limits to what a great laptop with a good graphics card can do. When the computer is rendering - you can't really use anything else that taxes the graphic card or processor when its rendering, so it basically disables the computer for the duration of the render.

So.. there was no other way around this - I had to use and pay for a render farm. I tried out Render Street, TurboRender and Foxrenderfarm as they were the farms which came up when you search for Blender Render Farms.

The basic process for all of them is:
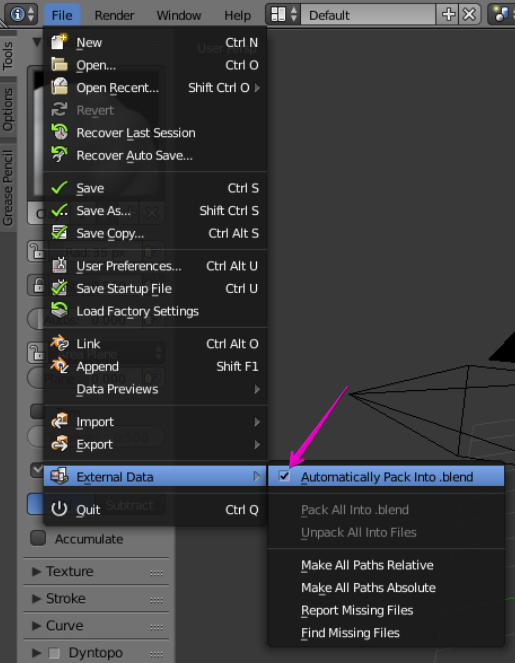


- Pack external data into blend file (tick the option to automatically pack)
- Upload a zipped copy of the blend file
- Choose your render settings
- Pay the render farm some money (for slower render) or LOTS OF MONEY (for faster render)
- Monitor render progress and render quality through web interface
- Magically download completed rendered files in record time

[Do however note that the Animated Render Border add-on mentioned above in this list will not work with the render farms, but you can write to most of these render farms regarding desired plugins and they will let you know if the add-ons and plugins can or cannot be installed]

A more comprehensive review of render farms coming up in the next post...