Thursday 26 December 2019

How to get ready for the 2063 annular solar eclipse


This morning at about 10am, George alerted me to the fact that the annular solar eclipse of our lifetime was going to be upon us presently, at 1.22pm-1.24pm SGT (Singapore Time). The next one is in 2063 and I would either be 79 years old or dead by then (cue the crying from baby Beano when she finds out that Mummies and Daddies don't live forever), so I decided that I would quickly set up a safe viewing board for Beano (and the adults).


Here's a diagram of my hacky setup...

A pinhole camera is doable but the output would be very dim and hard for a baby to see. Probably hard for adults to see too. So I decided to get some binoculars and build a simple projector with actual lenses. Benefits of living 5min from Mustafa is that I can waltz up to it at 11am and say to the man at the counter: "hello which is the best sub-$100 binoculars that you recommend???" And then go back with my awesome new binoculars and make a hacky job with some cardboard and tape, and get to a nearby hdb carpark rooftop by 1pm...

My top tip for people trying to build this in 2063 is to dispense with the tripod entirely and just hold it in your hands and lap as follows because ITS HARD TO FOCUS ON THE SUN IF YOU DON'T ACTUALLY LOOK AT IT.

I missed getting the ring moment on camera but I think got a pretty good view (and extremely safe view) of the eclipse anyway. I also pointed my preview camera at it and later when I looked I saw some refraction from the eclipse in my picture.


I don't think baby was very impressed by it (possibly because she does not yet know what is SUN or MOON or SHADOW, etc) but now I have a great pair of binoculars with which to spend hours looking at the strange things people do on the streets of Jalan Besar / Little India when they think they are not being looked at...

Friday 20 December 2019

Playing around with Jupyter Notebook, Sketch RNN & Neural Style Transfer


This week as part of my work I went to a 2-day crash course in Tensorflow for NLP, which is admittedly ridiculous because (a) 2-days? what can one accomplish in 2 days? would we not be better off slowly studying ML via a mooc on our phones? or the Google Machine Learning Crash Course? and the official Tensorflow tutorials? (b) I am struggling with both the practical side (I have absolutely no maths foundation) and theorectical side (I don't even understand regression models, but, I mean, do I need to understand regression models anyway?)

Which then begs the question: DO I REALLY NEED TO PEEK INSIDE THE BLACK BOX IN MY LINE OF WORK?

Or, WHAT IS MY LINE OF WORK ANYWAY? And how much technical understanding do I really need to have?

Now I obviously don't feel like I'm in any position to design the innards of the black box myself, but I'd like to be the person who gathers up all the inputs, preprocesses it, and stuffs it through the black box myself, so as to obtain an interesting and meaningful output (basically I'm more interested in the problem framing). But existential crises aside, this post is to gather up all my thoughts, outputs (ironically unrelated to the course I was at, but this is a personal blog anyway), and relevant links for the time being (pfftshaw, with the rate at which things are going they'll probably be outdated by 2020...)

Jupyter Notebook


Jupyter Notebook is the wiki I wish I always had! Usually when working in Python you're always in the shell or editor and I make my wiki notes in a linear fashion to recount the story of what I was doing (in case I want to revisit my work at a later point). For the purposes of learning I find it most useful to think of it as a linear narrative.

Jupyter is the new shell where you can do precisely that - write a linear narrative of what you think you were doing - alongside the cells of your code that you run. Its generally quite easy to set up Jupyter notebook via Anaconda which will install both Python and Jupyter Notebook and then you can paste the link from terminal into your browser.


I could have embedded my notebooks instead of screenshotting it but I ain't gonna share my notebooks cos these are just silly "HELLO WORLD" type tings...

Let's say you don't want to run it on local environment. That's fine too because you can use the cloud version - Google Colab. You can work on the cloud, upload files and load files in from Google Drive. You can work on it at home with one computer and then go into the office and work on it with another computer and a different OS. You can write in Markdown and format equations using LaTeX.

As an interactive notebook there are so many opportunities for storytelling and documentation with Jupyter Notebook. And if you like things to be pretty, you can style both the notebook itself or style the outputs with css.

Sketch RNN


I followed the Sketch RNN tutorial on Google Colab to produce the following Bus turning into a Cat...


Love the Quick Draw project because it is so much like the story I often tell about how I used to quiz people about what they thought a scallop looked like because I realised many Singaporeans think that it is a cake instead of a shellfish with a "scalloped edge shell".

I love the shonky-ness of the drawings and I kinda wanna make my own data set to add to it, and perhaps the shonky-ness is something I can amplify with my extremely shonky usb drawing robot which could use the vector data to make some ultra shonky drawings in the flesh.

Now that I have accidentally wrote the word shonky so many times I feel I should define what I mean: "shonky" means that the output is of dubious quality, and for me the term also has a certain comedic impact, like an Eraserhead baby moment which ends in nervous laughter. (Another word I like to use interchangeably with "shonky" is the Malay word "koyak" which I also imagine to have comedic impact)


Eg: When Tree Trunks explodes unexpectedly...

Neural Style Transfer


I followed the Neural Style Transfer using tensorflow and keras tutorial on Google Colab to produce the following:

Beano x Hokusai
Neural Style Transfer with Eager Execution - Colab3

Beano x Van Gogh's Starry Night
Neural Style Transfer with Eager Execution - Colab4

Beano x Kandinsky
Neural Style Transfer with Eager Execution - Colab5

Beano x Ghost in the Shell
Copy of Neural Style Transfer with Eager Execution gots

Beano x Haring
Copy of Neural Style Transfer with Eager Execution_haring

Beano x Tiger
Copy of Neural Style Transfer with Eager Execution_tiger

Beano x Klee
Copy of Neural Style Transfer with Eager Execution

How does this work? In the paper it describes how you can try to find out what is the style of an image by including feature correlations of multiple layers in order to obtain a multi-scale representation of the original input image, thus capturing its texture information but not the global arrangement. The higher levels capture the high-level content in terms of objects and their arrangement in the input image but do not constrain the exact pixel values of the reconstruction.


Image Source: "A Neural Algorithm of Artistic Style" by Leon A. Gatys, Alexander S. Ecker, Matthias Bethge

Saturday 7 December 2019

The Library of Pulau Saigon in "2219: Futures Imagined": Animated GIF Workflow


The Library of Pulau Saigon, Now at 2219: Futures Imagined (ArtScience Museum)

Over the years I've often told a story about an apocryphal encounter I had with a certain glass case full of items from Pulau Saigon at the ArtScience Museum, back in 2011...

Back then as a designer, I had been working on some interactive educational games for the education team at ArtScience Museum, and I had an opportunity to also show my own interactive artwork about the Singapore River - in a large cavernous space at the end of the huge Titanic show - a section about Singapore during the time of the Titanic. I was very much delighted to be able to show a work about the Singapore River next to some actual artefacts dug up from the Singapore River (loaned by Prof John Miksic). At the time I knew very little of the history of the islet - except the fact that, well.. not very much was known about it, and that it was plainly visible in some portions of my interactive (which had been based on old maps of the Singapore River).

I don't really know what I should have expected, but the items were much tinier than I had imagined them when Angeline first told me about them. I recall feeling somewhat underwhelmed by its scale; they were entirely dwarfed by the space. I remember being somewhat confused by the label; and even though they were not my things, I began to feel worried that people would not understand them, or want to understand them. Audiences today have so much media fighting for their attention - they want to be entertained by easily consumable chunks of entertainment; right before this there was the spectacle of the TITANIC! TITANIC! READ ALL ABOUT IT! Could we really get audience to spend time and energy contemplating and thinking about this poky little vitrine full of tiny, rough, broken, complex things which might take more time to understand?

Anyway, I thought about how I used to obsessively photograph everything even back then. So why had I never searched in my own archives for photos of this purported vitrine that I saw in 2011? So I went back into my photo archives and... successfully dug up these photos!

IMG_1439

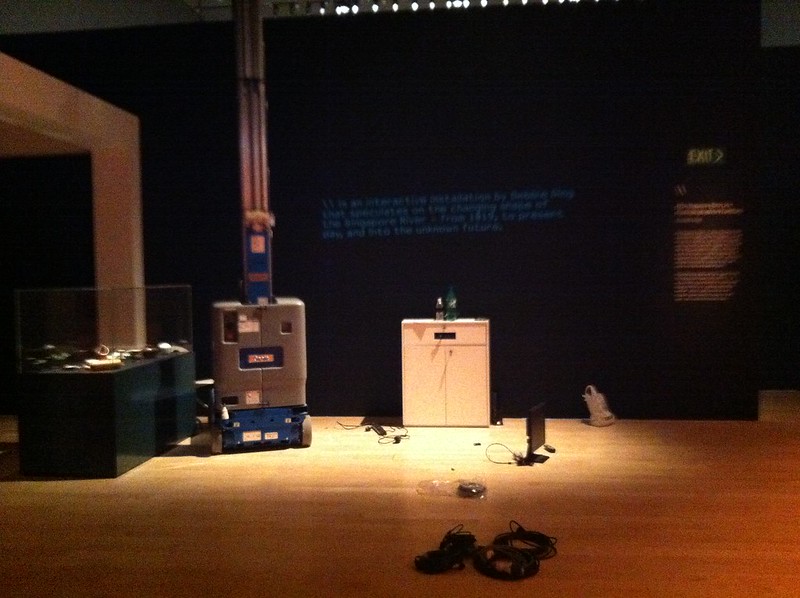
BACK IN 2011: NOTE THE GLASS CASE ON THE LEFT OF THIS IMAGE!!!


IMG_1444

BACK IN 2011: Pulau Saigon Artefacts at the ArtScience Museum


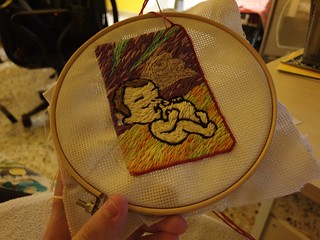
Part of my desire to make "The Library of Pulau Saigon" stemmed from that encounter with that problematic vitrine. So it feels quite fitting that a copy of this work is finally making an appearance at ArtScience Museum - in the new "2219: Futures Imagined" exhibition.

In terms of how the work is made, I've always been surprised how far hand waving gets you. The truth of the matter is that models are made from sampling Google Images and me finding individual (and sometimes different) methods to reproduce those objects in 3d by writing Openscad scripts to generate models. Some were straightforward like just producing svg outlines of objects and transforming them into 3D but others involved more... er.... creative coding. As an artist I might like to say that its the machine helping me along in the creative craftsmanship of the object, but actually I'm in the back hitting the computer with a big stick shouting "COMPILE, DAMMIT, JUST COMPILE MY CRAPPY CODE!"

This time around I decided I also wanted to generate lots of gifs showing the process in order to supplement the existing physical work which I got onemakergroup to help me reprint. Why didn't I do this earlier? It seems people are always drawn to the screenshots of my openscad files for this, although frankly speaking if you are a techie person then you will quickly see that a LOT of intervention has gone into the making of the objects (whilst I'm cheeky enough to say that its an unforgetting machine that is making it, to a great extent the hand and the subjectivity of Debbie the artist is obviously written over all the objects)...


THE GIF FACTORY


Since I did my project in 2015, Openscad has since gotten many more features including an "animate" feature - except that what it does is to render out frame by frame and you still have to compile everything together by yourself, so in the interests of time this wasn't the method I wanted to use. (But if you did want to use Openscad to generate frames that you could compile into an animation, you can look at the default example within Openscad. You just have to create a value $t and then to start the animation, select View > Animate and enter some values into "FPS" and "Steps", like this below)


Step 1: Automatically open and resize application window to specific size and position

First I figured out how to write an Applescript to resize windows so I can screen-capture them quickly. The following Applescript uses assistive access to resize and reposition the window of any app - including 'unscriptable' apps - but you'll need to allow Script Editor to control your computer in System Preferences. You can change the numbers to fit the size you require. In my case I wanted to screencap it at 1024 x 768 but for some reason my screenshot app Monosnap does not start the capture at 0,0 so I adjusted it to fit (pixel by pixel). I also only wanted the app's content so I added 2px to height and width.

Applescript to resize app window and set position:
set resizeApp to "OpenSCAD"
set appHeight to 770
set appWidth to 1026

tell application "Finder"
 set screenResolution to bounds of window of desktop
end tell

tell application resizeApp
 activate
 reopen
end tell

tell application "System Events"
 tell process resizeApp
  set the size of front window to {appWidth, appHeight}
  set the position of front window to {5, 0}
 end tell
end tell

Step 2: Screen video


I just used Monosnap (Free, Mac/Win) for this.

Step 3: Convert mp4 to animated gif


To convert the mp4 files into animated gifs, I used Gif Brewery 3 (Free, Mac). What is it about the palindrome loop (boomerang) that works so well?

Anyway I'm glad to have worked out a faster workflow for creating gifs quickly and maybe next time every other image I upload to my blog or website ought to be an animated gif!!!

Wednesday 18 September 2019

DBBD's 50 Things to do on Maternity Leave

20190920_163715

Lists! Lists! At the start of this I wanted to think of the maternity leave as a kind of "artist residency in motherhood". Indeed it has sharpened the focus of time, eking out minutes between feeds to finish a task. I decided to not pressurise myself to do something too intensive, and instead to try out new crafty mediums that I've not used before. So... here was my list of things I wanted to do on my maternity leave (and what I actually did in the end...)


1. Finish renovations, unpack boxes, and move into new house
We finished up everything and moved in the first week of June. See House Reno posts here:
Part 1 - Flat Viewings, Online Research, HDB Resale Flat Purchase Process, & HIP Options
Part 2 - Budgeting, Appointing Renovation Contractor, House Design Layout, Painting Scheme, Laminate and Tiling Selection
Part 3 - Hacking Works, Aircon Installation, Flooring, Electricals, Lighting, Carpentry, Hinges, Doors, Windows, and Blinds


2. Research the baby gear
A reconnaissance mission to two large brick and mortar baby stores in Kaki Bukit - BABY KINGDOM and BABY HYPERSTORE - were made, as well as other trips to Mothercare. Mothercare is quite expensive and only great when there's a sale on (eg. GSS). Baby Kingdom has one floor of cots and walkers and strollers, and another floor of small consumables and clothing. As for Baby Hyperstore, it has many floors of strollers if you want to look at them all. After that I still did a lot of internet researching to figure out what I had to buy in order to be all ready for baby. I didnt buy anything from the brick and mortar stores - just their online incarnations instead! But it does put a face to all these baby shoppes...

20190522_133810

20190522_133935

20190613_112748


3. Buy the baby gear
After doing a price comparison, I made a massive spreadsheet and then bought it one by one from various e-retailers such as Pupsik Studio (who has a very excellent next day delivery if you make a purchase over $60), Mothercare online, Lazada, and Qoo10.


4. Sort out finances
In progress. Also, I switched to a cashback credit card that was more suited for internet purchases. My FirST CrEdIt CaRd in my life??? At the grand old age of 35...


DBS Livefresh: the credit card product seemingly targeted at university students and millenials doing all their purchasing online.
Wah! Also Got complimentary entry to Phuture & Zouk before 12am.... but zzzzz I already fell asleep


5. Assemble bassinet
I figured there was no point buying a forevercrib made out of wood or something solid because babyhood is so fleetingly short. So I chose a playpen which also doubles as a playpen when baby is older (just drop the base down!). We've got a Lucky Baby travel bassinet with a changing table and even a little mobile which I thought was pretty shitty but then BEANO LOVES THE SHIT OUT OF IT! Her favourite animal on the mobile is the stripey horse which I think is meant to be some kind of discount zebra, she talks to it all the time. (But what does the stripey horse say?)

There are lots of Fisher Price playpens, Chicco Playards, and Graco Pack and plays on the market which cost lots more (S$200-500!) but the Lucky Baby range which is designed in Singapore is cheaper (about 180sgd) and does the job. I was telling George that now I can recognise discarded bassinets on the side of the road when previously I didn't know what manner of a bizarre contraption had been abandoned. OUR BASSINET IS ACTUALLY SOME SORT OF WEIRD FOLDABLE UMBRELLA. Also, babies do generate so much waste in a way. How can we reuse this item beyond Beano's babyhood? I still don't know...


20190612_201116


6. Learn how to use stretchy wrap
After looking around online, I bought a Keababies sling wrap from Amazon because it seemed a far sight cheaper than the other popular ones (before shipping and taxes, Ergobaby is about 30usd, Boba and Weesprout is about 40usd, Moby is about 45 usd, K'tan is about 50usd, etc) - the Keababies wrap cost about 24usd for the wrap + 8usd for the shipping/taxes coming to about 45usd/60sgd total.

When it comes and you take it out for a prewash, you might be horrified that it is basically all just one long 4m long strip of cloth. "HOW COULD THIS STRIP OF CLOTH COST SO MUCH!" you might be railing, and well the answer is that it is in the weave and elasticity of the cloth, which most other cloths just do not have. It takes quite a bit of practice to learn how to tie the wrap but the stretchy wrap I have works perfectly for having a bit of give but also a lot of support for baby. I liked it so much that I got a second piece!

Tips for the stretchy wrap: don't bunch it up at the back or overtighten it on yourself or else it is hard to sit down. Wrap it up with the fabric as straight as possible! And it kinda works with friction and will magically stay up with baby anyway without you having to tie it to the point of suffocating yourself.


20190904_133207 20190803_202206 20190807_093208 (1)


7. Learn how to use structured carrier
We have a pre-loved Ergobaby carrier that was handed down from my colleagues Mei Leng and Soren and this proved to be even easier to put on than the stretchy wrap... although less snug - with the stretchy wrap you really feel like one with your baby, whilst with the Ergobaby carrer you feel like you've put on a tactical babywearing vest and now you are going out for a mission....

(speaking of tactical, I became addicted to looking up "tactical gear" on internet shopping sites. There is just so much of it. Yes, tactical as a keyword is a thing. TACTICAL!!!! What does it even mean. And who is buying these "tactical" MOLLE (Modular Lightweight Load-carrying Equipment) bullet rounds wallets online anyway? DO NATO ARMED FORCES GO ON LAZADA/QOO10/TAOBAO TO BUY EXTRA MOLLE EQUIPMENT? WHO IS THEIR TARGET AUDIENCE?? HUHH??)

20190809_155204 20190824_185157


8. Learn how to use breastpump
I plan on returning to full-time work by December so that means that I will need to set up a pumping routine and Beano would be fed my expressed breastmilk during the daytime when I am at work. From Week 3 onwards I started pumping and trying to steal a bit of milk from present-day Beano to feed future Beano and personally speaking I don't think I'd be considered an oversupply mom despite starting early. It was hard at first because the amount I pumped was a measly 5ml at the start but now it has gone up to 50-190ml per session (even whilst exclusively breastfeeding).

20190724_135815

The powerpumping really works (20 min pumping, 10 min rest, 10 minute pumping, 10 min rest, 10 minute pumping) but I've found that it consumes so much time that it becomes stressful and I lose out on sleep as a result. So I only do it when I really need to.

Currently I have 2 breastpumps - one is the Cimilre F1 Double Electric Breast Pump (S$159 from Pupsik Studios) and the other is the Real Bubee (S$25.50 from Lazada). It seems that a lot of people go for the Spectra or the Medela pumps which go for an eye-watering 300-400 SGD, but having used the Cimilre I don't think you need to get a more expensive one to get results though. Obviously it needs to be a proper pump, but after that it is also diet, relaxation, and scheduling that determines the milk output.


Cimilre F1 - hospital grade, portable, very light, lighted timer, 2 distinct modes

The Cimilre is a lightweight portable hospital grade pump which seems to be very similar to the Spectra ones and has all the features - closed system, a timer, medela compatible parts. I use it together with the Simple Wishes Signature Hands Free Pumping Bra (S$44.90 from Pupsik Studios). The Cimilre's pumping action is quite solid and can be quite strong so for me I rather use about power 4 instead of the default 5 which can feel like it is about to crush your poor nipples.


Real Bubee - USB powered, portable, no timer, basically only one mode

The Real Bubee is an even more lightweight pump that must be charged by USB when in use (it can plug into your computer or a power bank) and its sucking action is a bit more frenetic. Despite costing a fraction of what the Cimilre and the other branded pumps cost, I think it does a great job and I'm hoping to use the lightweight Bubee at work... We'll see how that goes!....


Naturebond - Milkcatcher. A cheaper alternative to the Haakaa.

Another essential is the Haakaa (S$29.90 on Pupsik) or one of the cheaper versions of it such as Naturebond (S$11.90 on Qoo10). I have 2 Naturebond ones. This is a milk catcher which saves drops of milk from your other boob during the letdown.

NEXT UP: I'm also going to try out the korean handsfree Imani pump... waiting for that to come. It might be extravagant to have so many of these pumps about - but I feel that anything that will help me in the breastfeeding journey when I go back to work is worth it for Beano!

It also became necessary to set up a kind of pumping station where the bottles, pump parts, and other valves could live (and dry off when not in use) so here is what it looks like:


20190822_122839 20190816_142534

Hegen bottles (for the slow teat), Philip Avent Storage Bottles (cheap and plentiful and has adaptor to use straight with breastpump flanges), and Tommee Tippee steam sterilizer with two bread bins (Redmart) that have been repurposed as bottle storage.

20190905_201243

Mother's Milk: Last but not least, a galactagogue tea which helps in milk production!


9. Learn how to use car seat
We got the Cybex Aton 5 Infant Car Seat (S$239), to be used with the carseat attachment (S$49) to add on to the GB Pockit+ (S$269) - all from Mothercare during the Great Singapore Sale. Yes, these cost quite a bit and these were some of the largest purchases we made for baby. We used it for carrying baby home, especially because I had been told that you wouldn't be allowed to take a Grab without one, but the setup is almost too heavy for me and my bad wrists to handle. Weirdly, I learnt 2 months later that the requirement of car seat for baby does not extend to standard taxis... ¯\_(ツ)_/¯

IMG_20190703_160032 20190731_133817


10. Learn how to use stroller
We have a GB Pockit+ Plus which was $269 from Mothercare. We don't really use this much after all, as I prefer using the carriers and keeping baby close. Perhaps we will get more use out of this when Beano gets too heavy to carry. We only did one major outing to Newton Food Centre with it...


20190925_200730 20190925_210612


11. Figure out how to breastfeed baby and still do some other stuff simultaneously
Now this one seems too easy at this point (10 weeks in) but in the first few days it was quite hard. All I can say is that you have to accept that baby will want to nurse basically ALL DAY LONG and if you haven't got a system for letting baby feed on you whilst your hands are free then you will feel trapped. For the first few weeks I struggled with the breastfeeding but over time we made a few adaptations that made life better.

A good nursing pillow such as the MY BREST FRIEND is essential, and if you are planning on sitting on the sofa or some other armchair, get a rolling laptop table!!!


Then when you are familiarised with the setup, you can do anything from eat food and even do blockprinting.


IMG_20190906_194243


12. Figure out a Cloth Diaper Routine
Speaking to others, I know some felt that doing cloth diapers would be a lot of work and adding complexity to the first few months of motherhood, but I was very pleased that my mother was very supportive of cloth diapers as she had done the old fashioned cloth diapers when I was a baby and she was very keen on helping me with the modern pocket diapers I planned to get.

Beano has worn cloth diapers pretty much since she returned from the hospital. I started with a set of 24 Moo Moo Kow diapers which came with 2 inserts each (S$390 for 24 / S$16.25 per diaper). The inserts are placed inside the pocket diaper (not outside because they are so absorbent that they might dehydrate baby's bottom too much). We wash them every other day and we use a diaper sprayer (the "bidet" in the HDB toilet) to spray off the large gunk and then the rest goes into the machine. We use the "babycare" setting on the washing machine but often turn it down to 40 degrees as the washing instructions on MMK diapers is for it to be colder not hotter. Sunning the diapers and inserts also help remove any yellow staining on the diapers. She began with one insert but by about 2 months 20 days she had upgraded to two inserts, and I'm also using more charcoal inserts (as they seem more resistant to staining) and hemp inserts (which are more absorbent at nights).

20190918_104834

The average disposable diaper costs about S$0.25 - S$0.30 per unit. If baby uses about 6-7 a day, that's approximately S$50-60 a month, plus the environmental cost of disposables. On the other hand, good cloth diapers do cost quite a lot, and the market is flooded with a lot of cheap china made ones that are very thin and basically have no form and weak gussets. So I decided the only way was to buy something with a proper name to it. In Singapore, the popular brands seem to be Moo Moo Kow, Charlie Banana, Bambino Mio, and Bumwear and these are all usually about $30 or more. The only way I got the MMK diapers at a lower price was to buy them in bulk of 24. Willow & Sage is about $16. Happy Flute appears to have shut down. I think the price point that I can accept is $16ish, so this reflects what I've purchased.

[Tip: It also seems that if you are not too picky about colours and prints and will accept solid colours regardless of 'gendered colours' then this is the most cost efficient way to get your pocket diapers! Although on hindsight the many shades of blue diapers may be why everyone keeps congratulating me on my baby boy... EVEN THE GYNAE WHO DELIVERED THE BABY ADDRESSED HER AS A HIM AT THE FIRST CHECKUP]

Over time I realised that I'd like to wash it every 2 days rather than every other day, so I tried some more cheaper diaper covers to bring my total stash to 45. I tried a Willow & Sage charcoal bamboo with double gussets and 1 charcoal insert for S$16.90 (from the willow & sage store on lazada) which I think is very value for money but not as soft on baby's bum as Moo Moo Kow. Then I also tried alvababy (via alvababy.com), simfamily (via lazada), and elinfant (via lazada). Alvababy came with inserts which seem decent enough, and the Elinfant ones are charcoal but the charcoal is kinda a weird shade of warn brown. These seem pretty similar and seem to do the job but I don't think they will hold up to repeated washing as the MMK ones will, so we'll be washing it only once a week at 40 deg C and more often at 30 deg C, lest all of the elastic disintegrates on these new china cheapies.


20190907_183314


13. Binge watch Netflix
Since my maternity leave started, I have watched the following non-exhaustive list of series in their entirety, frequently in one sitting: Steven Universe, Tuca & Bertie, Orange is the New Black, Working Moms, The Letdown, Derry Girls, Marcella, Dead to me, Hyperhardboiled Gourmet Report, Happy Jail, Pinky Malinky, Naked Director, Diagnosis, Tiny House Nation, Grand Designs, The Great Interior Design Challenge, Cabins in the wild, etc........

20190918_170946


14. Write out Birth Story
Forced myself to write out Beano's Birth Story within 2 weeks of her birth.


15. Take photos of baby
Private google photos album set up for the grandparents!


16. Make baby handprints and footprints
There are kits online for cheap such as this one on Lazada (S$4.82) which consist of a thin inky film that you can push baby's hand or foot through and press onto a paper without ever getting baby's hand dirty.

20190816_140710

17. Take baby to the park on a walk
Did you know that Fort Canning has escalators now??? Well we went on the escalators to the top... which wasn't that far anyway, so I must confess it was easier to go to the park than expected....

20190807_095153 20190824_194616

Fort Canning by day, fort canning by NIGHT

18. Find and use a nursing room in the nearest mall
City Square Mall has the nursing room on the 2nd floor next to Decathalon. One day Beano wailed when I was out and about and I made a beeline for this room which I had scoped out on a previous visit. On arrival I realised the door was locked with a message outside saying I had to call in to request for it to be opened. There was an intercom button to press but Beano was just wailing and I couldn't hear what the person was saying. Nevertheless I guess the person on the other side of the line totally understood (or must be fielding a ton of people with crying babies trying to get in) and the door to the nursing room popped open magically. After she had calmed down from her feed, I was able to arrange myself and Beano so I could continue to breastfeed her WHILST WALKING.

20190803_102042 Screenshot 2019-09-18 at 2.57.53 PM


19. Make an effort to get dressed properly
Getting dressed properly? I snort. It turned out that what I needed was to have a nursing top that would give Beano quick access to the boob without all that excess fabric flapping about. This meant that.... all of my clothing didn't work. This was when a bunch of tops that a colleague had passed to me suddenly made sense. Previously I was confused about the flappy holes in them but now these made a lot more sense. I also tried buying a few cheap nursing tops from lazada and I tried both a horizontal slit and vertical slit. I found that I really liked the horizontal slits whereas the vertical slits did not seem to account for the fact that women's boobs are all spaced differently. I decided to buy about 5 of these tops which were about 9-10SGD each and that's all I've been wearing during my maternity leave! Ah... I like a good uniform....


20. Get out of the house everyday
Was too difficult to get out in the first month. Then my wrist flexion improved enough for me to handle things on my own and I got better with the carriers! Now leaving the house is no problem!

20190909_175940


21. Organise a baby full moon
DID IT AT 6 WEEKS. CLOSE ENOUGH.

20190810_165308 20190810_134050 20190810_150119 20190810_151629


22. Go to a baby and mommy activity
I HAVEN'T DONE THIS YET. I DON'T HAVE ANY MOMMY GROUPS TO FRATERNISE WITH!!!


23. Breastfeed in public
Done it during our first outings to hospital and polyclinic and to ICA because I didn't know to feed baby in advance before leaving. And now I've done it so many times its not stressful anymore, and the other day I even breastfed the baby in a TAXI. The only funny thing was that Beano was so noisy (not a perfect latch) so it was like SLURP SLURP SLURP SLURP. I wasn't embarrassed about public breastfeeding or accidental boobslips, to be honest I was only a little chagrined that my baby was just so loud when eating.

20190913_095851


24. Eat with baby in public
Done many many times now because obviously I wanna eat out like a normal human too. Just put a burp cloth over her head and eat, whilst trying not to spill HOT SOUP on your baby.

MVIMG_20190801_123604


25. Change diaper in public
Done it several times now (even with my cloth diaper setup). EVEN AT A HAWKER CENTRE. Here's a pic of a big poo. Look at that! I fed that baby entirely with my boob! And now she made a massive poo. I'm proud.

20190906_144048


26. Visit Dingparents with baby
Beano got to meet my childhood toy, squirrel with rashes on his face. They got along splendidly.

IMG-20190906-WA0012 20190913_101506


27. Mail Southparents a card
I made little blockprinting stamps and used them for the envelope. AND I MADE THEM WHILST BREASTFEEDING. I did make an accidental gouge into my table though...

Photo - Google Photos 2019-09-16 10-35-56


28. Write a baby blog

It's been 5 weeks 1 day since I landed on Earth. Since my arrival, my mission has been mainly to feed for survival, and I am very very hungry indeed. I am fortunate to have acquired two humans who seem bound in servitude to me, although I confess that I don't really know who they are.

Today, I awakened on my own in my darkened chamber just after midnight and decided that I fancied a midnight snack....


https://diaryofahungryalien.blogspot.com


29. Make a baby scrapbook
I bought one of those self-adhesive albums from Lazada and a totally generic set of scrapbooking papers and BOOM! A day's work (whilst breastfeeding!!!) and I had done a dozen pages.

20190908_112640 20190907_183031 20190907_182943 20190907_182956


30. Learn how to oil paint

20190615_101754
20190615_105242
20190616_210322
20190616_215906


31. Learn how to block print with linoleum

20190903_182212 20190903_230337 20190906_183258 20190904_211718


32. Make a resin casted ornament
Waiting for my resin kit to arrive in the post from China via slowpost...


33. Make cards for people
Did it using blockprinting!

20190904_212357


34. Read or listen to a book every week
I got Audible, Blinkist and Headspace to listen to, but I don't really seem to listen to any of them consistently. BAH HUMBUG. I did get a cheap pair of bluetooth earphones for $16.90 which were LIFECHANGING. Goodbye cables! (but not goodbye to the very essential cable connecting the two - I'm pretty sure if it did not have any cable connecting the two that I would instantly lose one of the earphones!


35. Knit/crochet a baby hat sock
I crocheted one baby sock. Stay tuned for the SECOND SOCK lol.

20190912_202150 20190915_114255 20190915_124337 20190916_103849


36. Do some embroidery and make an iron-on patch
Still in progress...

20190926_175643 20190929_191949

37. Update my website with 2019 works
I finally did it!


38. Make at least one new work
I'm working on a new piece which is the result of a conversation with a neuroscientist, tracing the path of fishes which have been alarmed by schreckstoff or "scary stuff". Been experimenting with some very bendy EL wire and PMMA optical fiber... I'm using American spelling because all the shops which sell it spell it as FIBER and sometimes these sites aren't so smart so if you type FIBRE they won't come up in the search...

20190916_111830 20190925_090944 20190925_162125 20190926_110715


39. Update Family Website
Still in progress but started by scanning old photos each time I visit the Dinghaus.

20190913_163139

Debbie as a baby!


40. Get a jamu massage
10 relaxing days with Mdm Zita from Traditional & Holistic Post-Natal Centre who helped soothe my aches and forced me to carve out some me-time in a day of non-stop breastfeeding.

20190831_132427 20190831_154507 20190831_154517


41. Eat lots of deliveroo
I got Deliveroo Plus and I did use it a hella lot. There wasn't an easy way to export the data but I found out that since 2 June 2019 (Start of maternity leave) to 29 Sept 2019 (last day of maternity leave) I've done a scandalous grand total of...

94 deliveroos!!!


20190709_124108


42. Drink a beer
My first beer in more than 9 months was a bottle of Little Creatures. I waited over 2 hours after that before I pumped milk and fed Beano again. I thoroughly enjoyed it!!! But unfortunately I also could not help worrying it would hurt my milk supply so I don't think I'll be doing it again any time soon until my breastfeeding stabilises!


43. Make awesome compilation video of Beano's first few months

Beanovision: https://youtu.be/IHFo-UamfvE
There's a 50 min version of the Beano "FROM BIRTH TO 3 MONTHS" video but I won't bore you all with it unless YOU WISH TO SEE IT.


44. Bring Baby to a swimming lesson
I found out that most places are for 4-6 month old babies. Beano is still too small to go for swim class. Check back in a few months!

20190622_200457

Jalan Besar Swimming Pool - one day we'll go there!


45. Label Beano's things for daycare
I ordered labels from Brightstarkids so I could label all of Beano's stuff once she starts going to infantcare at 6 months. I looked at a few other places but I wasn't big on them so I went with the slightly more expensive Brightstarkids.

20190912_180752


46. Figure out how to use less disposables and more reusables
Since I got cloth diapers for Beano, it figures that I should do the same for myself. So I got organic cotton handkerchiefs, reusable cotton pads for cleaning face, and reusable pads.

20190907_182731 20190916_111402 20190918_144451


47. Pack diaper bag and make checklist for returning to work
Diaper bag and Packit for cold transfer of milk!! The Packit is a bag you put into the freezer in its entirety and it stays cold for the whole day if you minimise the number of times you open it.

20190906_100603 20190905_202702


48. Freezer Stash
I have stored 10 full feeds (10x150ml) at this point, which was quite hard to do and mainly done through waking up in the middle of night to pump for hours. It was hard. Now i have dropped the middle of the night pumping and my sleep deprivation has reduced tenfold!!!! I've also got a small fridge which I verified was able to keep a temp that is 20 deg C lower than ambient - to keep the milk cool in the office as I pump it...

20190829_121210 20190918_073318


49. Write epic blog post(s) about my 50 things to do on maternity leave
THIS.


50. Enjoy my time with baby
I'm still getting to know Beano!

20190907_100335